Rebuilding the front suspension, the old parts refused to cooperate. On the upper control arm, the bushings didn't sieze to the bolt, but of all things, the front caster washer did! Thought I could chop off the end of the control arm and slide it off, but there's barely enough room under there to slide the bolt out, not even close if the arm is still attached.
The lower was REAL fun, both bolts siezed to the bushings. Cut them strategically to get close enough with the cut-off wheel on the grinder, the sawzall was worthless against the hardened bolts.
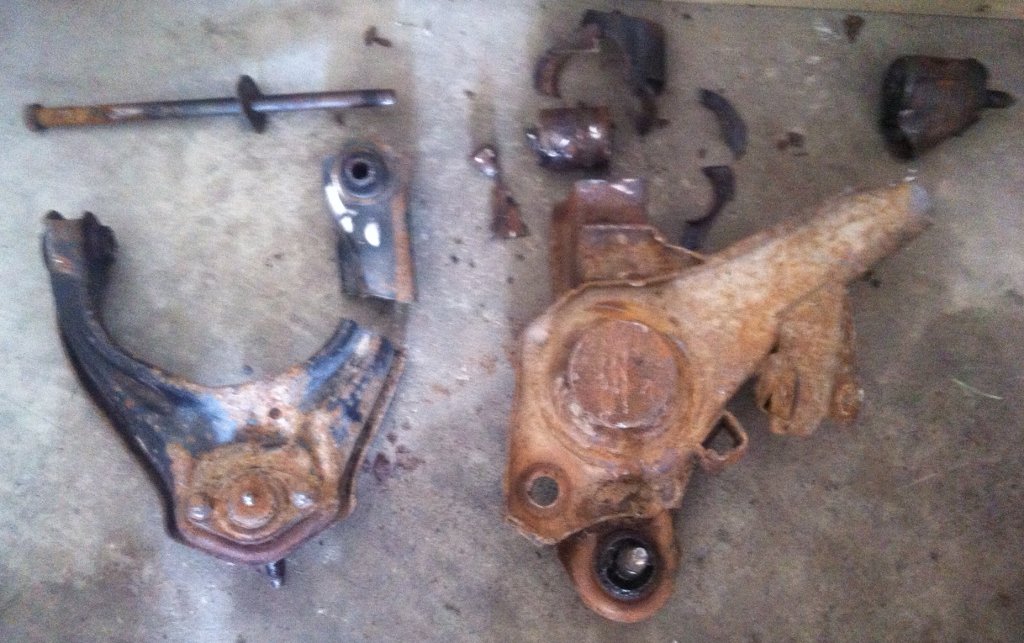
One side down, now just need to clean it up and POR15 it. New control arms are already assembled with new ball joints and poly bushings. These don't looks like they would have been salvageable anyway.
To my utter shock, both of these ball joints had been replaced at some point in the past. The lower was still nice and tight. Replacing it and the uppers with Rodney's.
I just replaced every suspension component on my 84, the only part not changed was the steering rack. It would have been impossible to remove all the bolts without damage without PB Blaster and a good air hammer.
IP: Logged
09:20 AM
E.Furgal Member
Posts: 11708 From: LAND OF CONFUSION Registered: Mar 2012
Just invest in an oxy-acetylene torch and you'll never have a problem removing any bolt or nut.
------------------ " THE BLACK PARALYZER" -87GT 3800SC Series III engine, custom ZZP /Frozen Boost Intercooler setup, 3.4" Pulley, Powerlog manifold, Northstar TB, LS1 MAF, 3" Flotech Afterburner Exhaust, Autolite 104's, MSD wires, Custom CAI, 4T65eHD w. custom axles, HP Tuners VCM Suite. "THE COLUSSUS" 87GT - ALL OUT 3.4L Turbocharged engine, Garrett Hybrid Turbo, MSD ign., modified TH125H " ON THE LOOSE WITHOUT THE JUICE "
[This message has been edited by Dennis LaGrua (edited 09-03-2012).]
Got the other side removed tonight, the same way, except the upper control arm came out intact. Lower was uncooperative again.
Then decided to try to remove the brackets that hold the crossmember to the frame. I think this is the first time I've seen bolt heads actually missing large portions from just rusting away. Got them all out with heating them with a MAPP torch, except for one, had to weld a nut to the head of the bolt so I could get something to wrench on. Took a couple nuts, the first one I had the heat set too high, and blew the nut in half. I remember seeing once someone made new ones, but I'm having trouble finding the thread...
Yes I work slow, still waiting for some rubber steering rack mounting bushings I HOPE will work, because the old ones are rock hard an a bit loose, and NOBODY has a listing for 84-87 Fiero steering rack bushings. I took the crossmember out, took a wire wheel to it, and painted it in POR15. All the bolts have antiseize on them. Prothane polyurethane control arm bushings, poly sway bar mounting bushings and end links, and Rodney Dickman's upper and lower ball joints. Rodney's ball joint seperator made getting them off EASY. Here's the rebuilt suspension on the passenger side:
I also took apart the rack, repainted it with some silver caliper paint I had, replaced the bushing with Rodney's, and replaced all the old grease.
Taking the rack apart wasn't as hard as it looks, once I figured out how to adjust the preload with the bad instructions from the service manual. Also used Rodney's tool for that. The inner and out tie rod ends are also Rodney's, replaced those a few years ago.
[This message has been edited by RWDPLZ (edited 09-26-2012).]
IP: Logged
11:32 PM
nitroheadz28 Member
Posts: 4774 From: Brooklyn, NY Registered: Mar 2010
Nice work! I remember doing all that on my car, I actually really enjoyed it despite hitting a few bumps (it was my first time ever doing any suspension work).
I definitely appreciate how simple the suspensions are to work with on these cars, dealing with rusty bolts really sucked though.


 )
)


