Hey all, So I've been debating on begining a build thread for over a year.. and just finally got arround to it.
I initally was picking up a 3400 and building it to put it into a cavalier and have it as a sleeper although when I researched some more and realized that it would fit into a fiero,... I was sold on the idea.
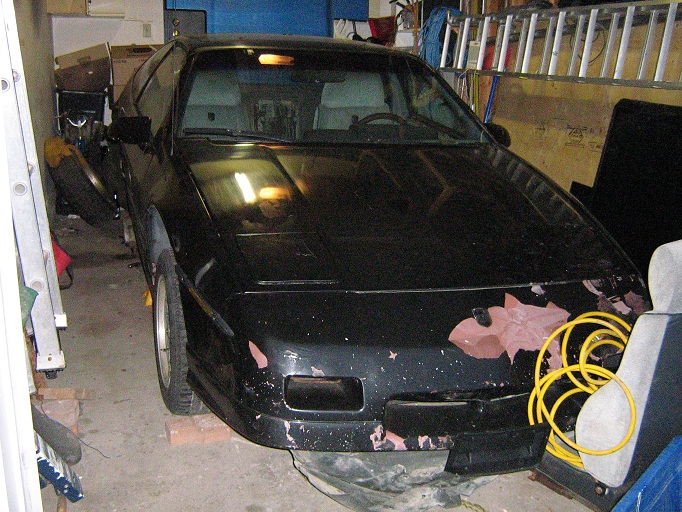
About a year ago I picked up a 1986 GT that had been sitting in someone's field for what looked like quite a while. the car had no engine although it had a 4spd tranny and I got everything else i needed off a totalled fiero that the seller had as well.
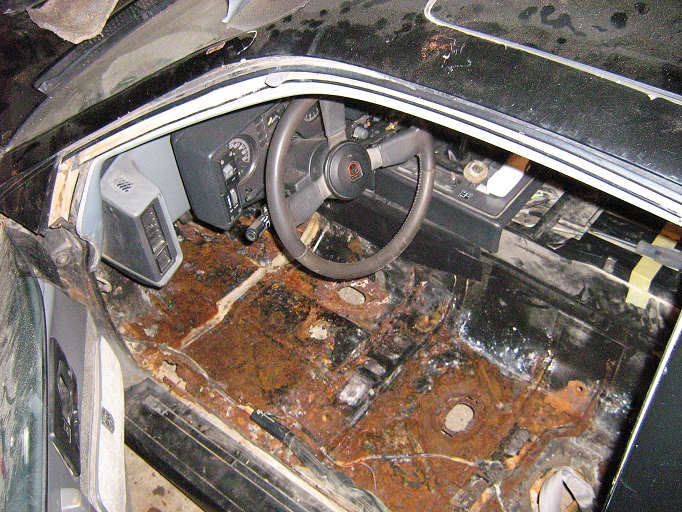
Ofcourse there was rust and a crap load of sand in the car?! The person I baught the car off of had to take ihis paperwork to court to prove that he baught it cause it had been stolen 10 years ago(he never signed the papers over) so i figured there must be some epic story to all the sand in the car but I just never got the story.
I am a welder by trade so the rusted frame and holes in the trunk were no problem to patch.
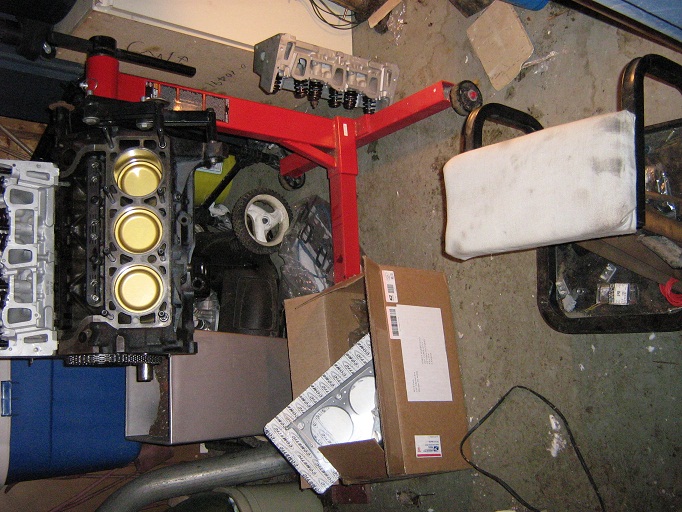
Last year I had picked up a 3400 sfi out of a 1998 Venture van. I also purchased all the goodies and built it myself over the winter. Unfortunatly I didnt take any pictures of the goodies but they were;
Comp cams roller cam intake (216/.3170) exhaust (224/.3170) TCE lifter spring upgrade Diamond Pistons 8.5 compression and .020 bore ARP Head stud kit All bearings and gaskets Custom length push rods Timing Chain Lifters Cosmetic Head Gasket Stage 3 clutch
Unfortunatly I had no where else but a little shed to build the engine in during the winter. As cold as I was, I still found it quite amusing and it really made me work faster cause all I could think of was going inside.
As cold as I was, I managed to get it done. For futur reference when your taking apart an engine take pictures so that its easier to put together. Or do as I did and got to a junk yard to double check things that you are not 100% on.
Once i had the engine built and the holes in the frame and body fixed, I was able to bring the car and engine to my workplace in order to use a forklift to put it in.
My friend and I braught some food to make grill cheese because I swear I thought we had a stove at work ..... but we made do without it.
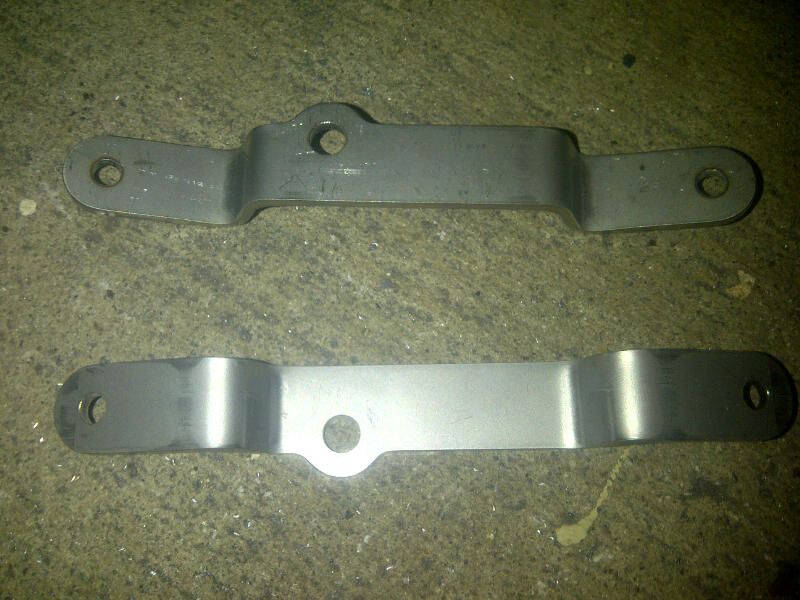
For the lower engine mount i had to do some grinding on the oil pan. Eventhough I noticed some upper mounts that will work while I was at the junk yard, I had ended up making one myself either way.
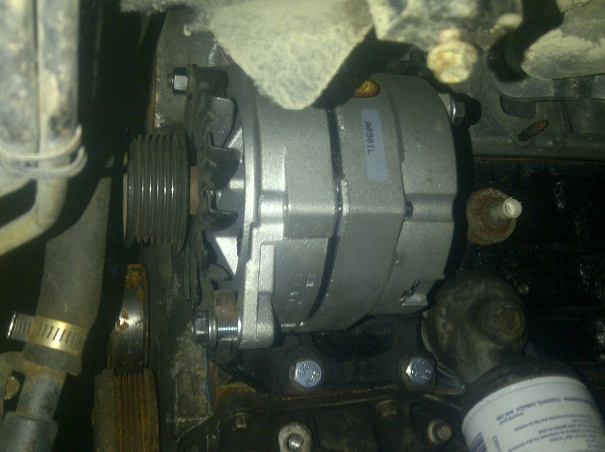
One thing that I'm having troubles finding is what car I can grab an alternator bracket from so that I can locate it in the lower back of the engine. I have a feeling I will be making one myself. Unless ofcourse anyone knows where one can be found.
Now the engine is finally in so I am working on building the exhaust and trying my best to figure out the wiring. I will be using a 7730 ecm although I absolutly hate wiring and am having a very hard time with it so if anyone wants to chime in I would appreciate any notes.
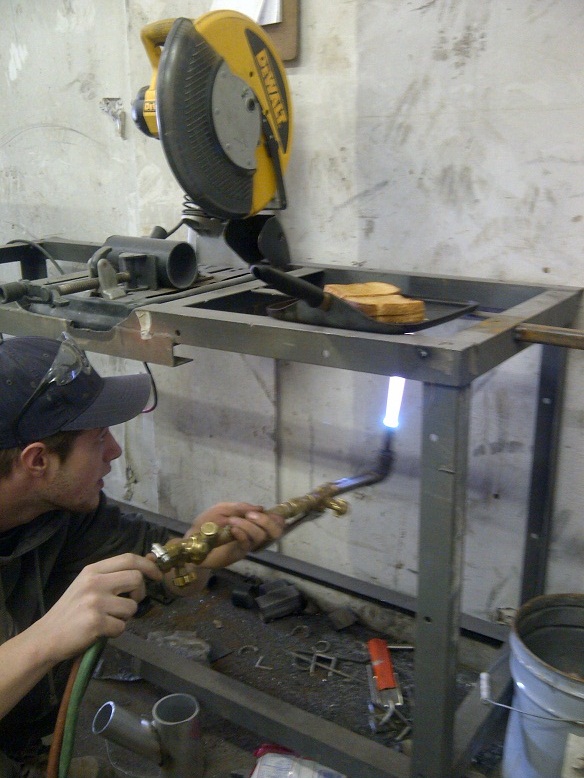
I was having troubles trying to make the exhaust all the same length and ended up giving up. Due to the limited space in the fiero I figured that what I made may not be the best although I'm sure it will flow much better than the stock logs.
So this is what I've got so far... I'll add more as I go. I would also like to thank everyone for putting time into making their build threads because this website has helped ALOT along the way.
IP: Logged
05:25 PM
PFF
System Bot
donnie072003 Member
Posts: 1956 From: LaSalle, IL. Registered: Feb 2010
Looks good. I admire the motivation to work in the cold. I was having a heck of a time trying to get out and work on my stuff this winter and its rarely even freezing over here. I hope you continue to post a build thread, and I am sure there are many lurkers that don't post that would follow as well.
Ryan also hosts the pin out instructions on his website.
It is pretty strait forward. I just used a paperclip to pop the connectors free and relocate it to the correct pin on the 7730. I re-wired the injector harness while the engine was out. The rest of the harness I re-wired after the engine was back in to ensure accuracy. Just cut and re-solder a length of wire. I also checked the ohms for each pin with a digital multimeter and a helper after the harness was completed.
Good luck -Blake
IP: Logged
07:37 PM
Luke Member
Posts: 467 From: Toronto, Ontario, Canada Registered: Nov 2005
Nice to see another 3400 in Ontario, whereabouts are you?
For alternator mounting on my swap we used an 87 front cover, water pump, alt mount, alt and a custom dogbone, other than not having a tensioner it works great.
Wiring my buddy x-thumpr-x did do I cant answer a ton of questions on it. He can be found on our local forum gtfieros.com all the time
Nice work so far. The link bellow is to a _draft_ of what I'm putting together for the low mount alternator stuff. I'd love to give credit to whoever it was that first discovered this bracket but I don't remember where I saw it. If it was you let me know and I'll give you credit. It's also a draft because I don't remember what I got that alternator off of and I wanted to get the proper belt info in there too. One day. HTH. Good luck.
The bracket you want is from early 3100 cars, it is the AC bracket, not an alternator bracket. It neeads a small amount of modification to work as an alternator bracket. The member that pioneered it was TigerII
Sweet deal thanks guys. I'll definitly be hitting the junk yards this weekend and let you guys know how it goes. Hopefully it'll save me from making one.
IP: Logged
07:07 PM
Luke Member
Posts: 467 From: Toronto, Ontario, Canada Registered: Nov 2005
So I managed to make it out to the junkyard today. Picked up up a couple things for the fiero along with a few things for friends cars.
My list consisted of the following;
-driver side coolant line (mine has a massive dent in it) -Oil cooler off a old school volvo -Clutch slave (while I was lifting the fiero to drop the engine in I snapped the line) -Idler pulley for the serpentine belt. was off of a 88 GMC 1500(the wheel was from the tensioner because they are ribbed on that engine) -a/c bracket from a older 3100(going to use for the lower alternator set up)
All and all I walked out at the end of the day only paying 21.59$.
[This message has been edited by dutch13 (edited 05-07-2011).]
So today was more discouraging than anything. Started to work on the car and realized that the starter from the 3400 didnt want to bolt up to the engine. It seemed like it was catching on something. I think it was the flywheel. What starter has everyone been using? The fiero 6cyl one?
To top it off while I was replacing my clutch line i figured out that the slave from the 4cyl fiero will not work and the slave I have is rusted and stuck. More frustrating than anything but it only got worse from there. I dont know how I missed this hole.... Oh and ofcourse my exhaust wont clear the alternator bracket... more modifications to come i guess.
IP: Logged
09:22 PM
KaijuSenso Member
Posts: 911 From: Westland, MI Registered: Jan 2007
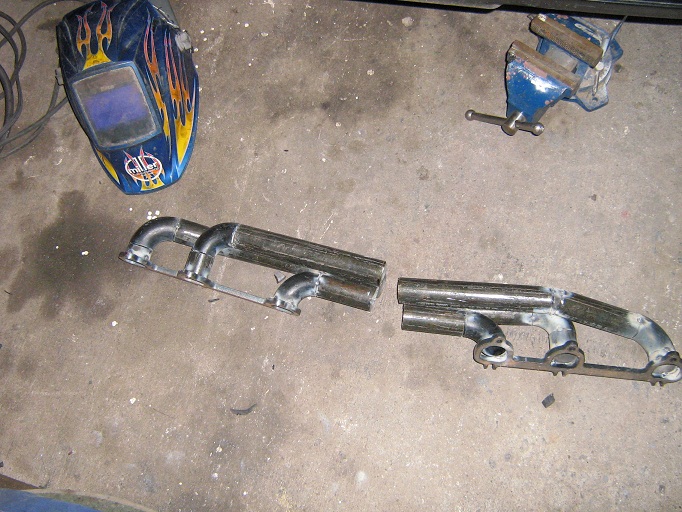
So this weekend I managed to squeeze time to weld up one of the exhaust manifolds. I also went to another junkyard that had 2 fieros although they were basically stripped so all I walked away with were a couple interior and exterior trim pieces that I needed.
I also spent some time looking arround the house and found the right starter so I got that bolted up. Unfortunatly the two fieros at the junkyard were not v6 so I didnt manage to grab a alternator or a slave. In this picture you can also see the cut off a/c bracket that will hold the alternator.
[This message has been edited by dutch13 (edited 05-16-2011).]
Since I saw that hole in my floor the other day it got me figuring that there would be probably be more where that came from and I decided to tear up the carpet and do some repairs. I dont know how it skipped my mind but the window was opened a crack when I baught the car and apparently it had been sitting for years so I should have looked deeper into the floor earlier but better late than never.
There were some holes on the side and one large soft spot in the back. I only had a limited amount of time but I begun the repairs tonight.
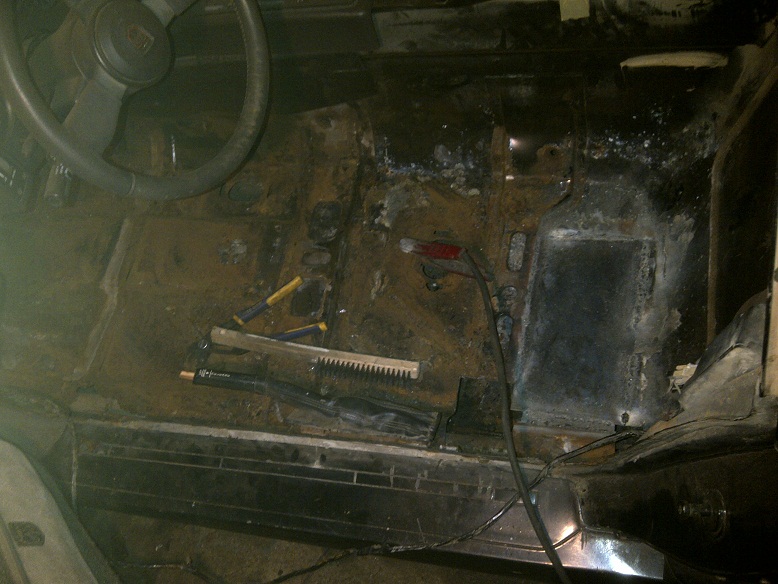
So i finished up the floor last weekend. I had decided to rhino liner the interior and underneath so that I will hopefully never have to to do again lol.
I'm going to start working on the wiring and hooking up all the hoses. Can anyone tell me where the heater hoses hook up?
If it's not too late I'd take that Beretta starter back and get one for the 3500 up engines, from what I recall it weighs less than half the old style at ~17 lbs and is smaller and stronger.
The starter was actually one I had sitting around. I'll keep an eye out for the lighter one for sure though.
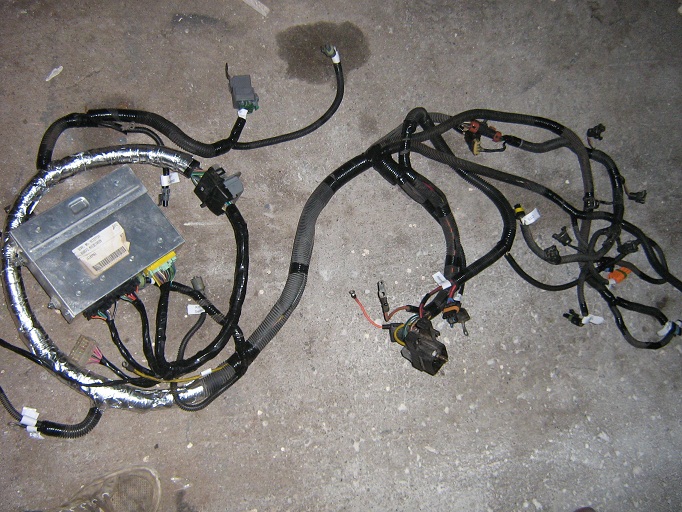
So I have been starting on the wiring and its been quite tedious because the car never came with a harness in it( got one from a junkyard). Its definitly taking for ever to match up everything so i was wondering if anyone had any notes on their swap... which connectors go where or cut and change connectors. I'm sure I'll make it through it fine altough any help will make it go faster.
IP: Logged
07:25 PM
86 toy Member
Posts: 674 From: Mifflinville,PA Registered: Jan 2011
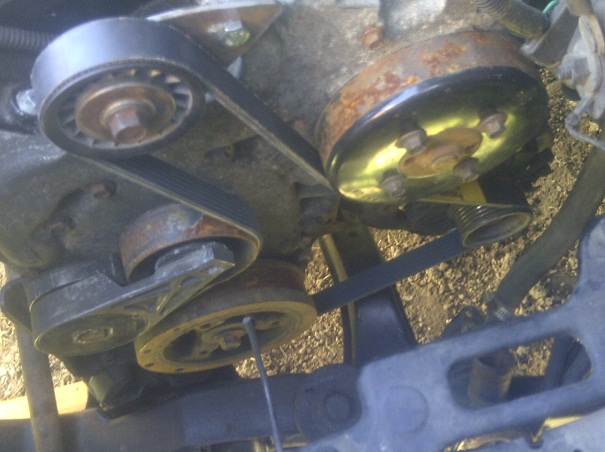
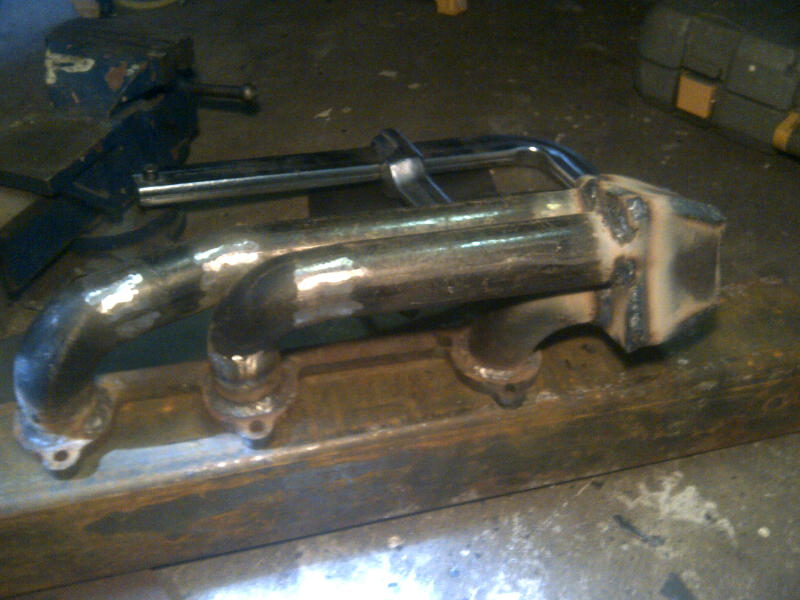
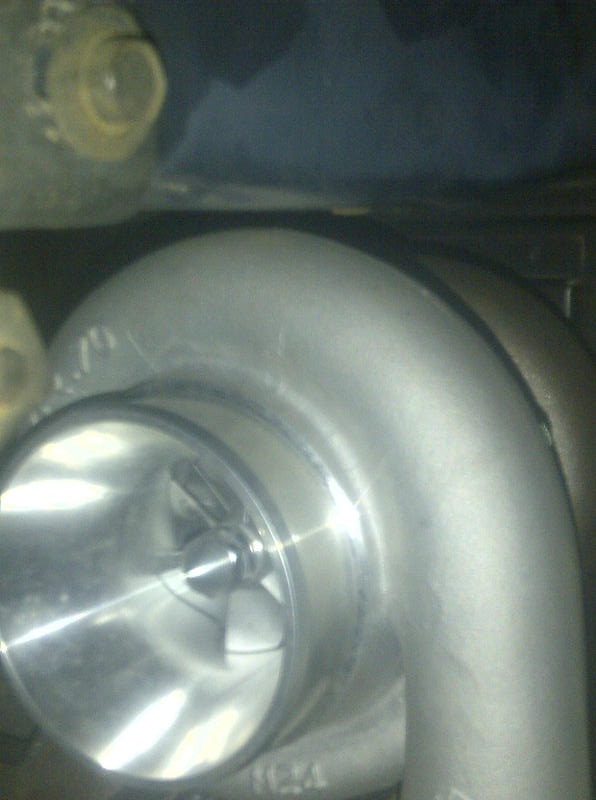
So it's been a while since i've had a chance to work on the car. Today I had a few minuites so I put together the alternator mount. Now that it is in I was able to check if my rear manifold would fit and it turns out that it has lots of space. I also bugun welding the manifold together but i'll post pics when I go buy a turbo and finish the crossover etc.
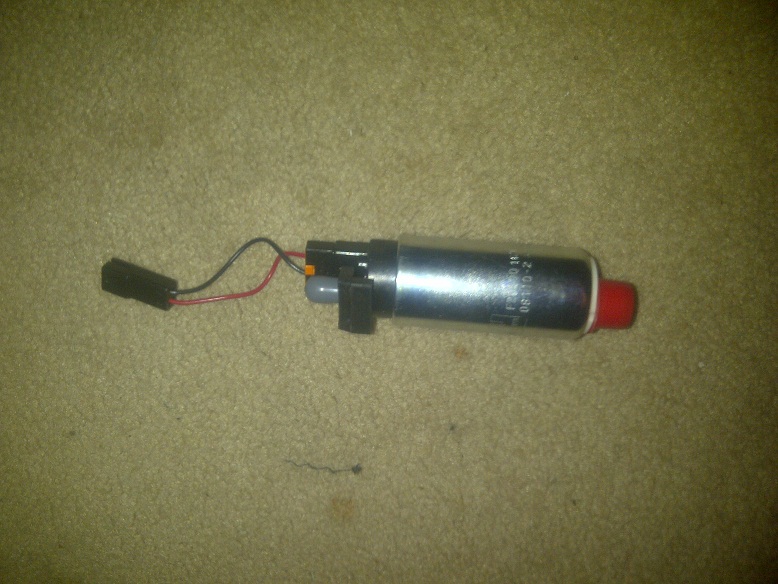
Thanks, Its comming along slowly but surely. I got a hi-flow fuel pump in the other day and ordered the 60lbs injectors. Monday I will be placing my order for the turbo. The wiring harness is currently being made by phonedawgz. I also finished up the belt routing.
Things will definitly start to get a little more interesting when the turbo comes in and the first start takes place :P:P Getting impatient!
IP: Logged
05:51 PM
fieroguru Member
Posts: 12577 From: Champaign, IL Registered: Aug 2003
The water pump doesn't need much wrap, but I would suggest moving that upper idler to the right in the picture to increase the wrap on the water pump. If the bolt hole currently occupied by the zinc bolt is large enough for the idler bolt, then I would move it to that hole. Or you could just slide it an inch or two closer using the plate steel that is currently being used.
I'll definitly look into moving it once I've fired it up and can see if there is any slipping. Thanks for the advice.
Well the parts are coming in.
So far I have recived the turbo, wastegate and the wiring harness.
I'll start with the wiring harness. About a month back I posted an add seeing if anyone would be willing to make one for me and got a responce from Timm (phonedawgz). I shipped my harnesses and with very quick responces and clearly alot of experience, he guided me through what connectors I would need and where.
The harness was also reloomed and every connector was labled. I would reccomend his services to anyone that is looking to do a swap that he is capable of wiring!
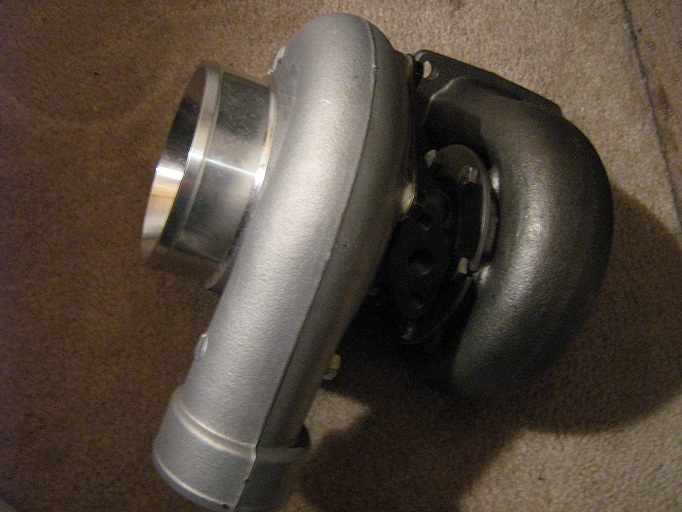
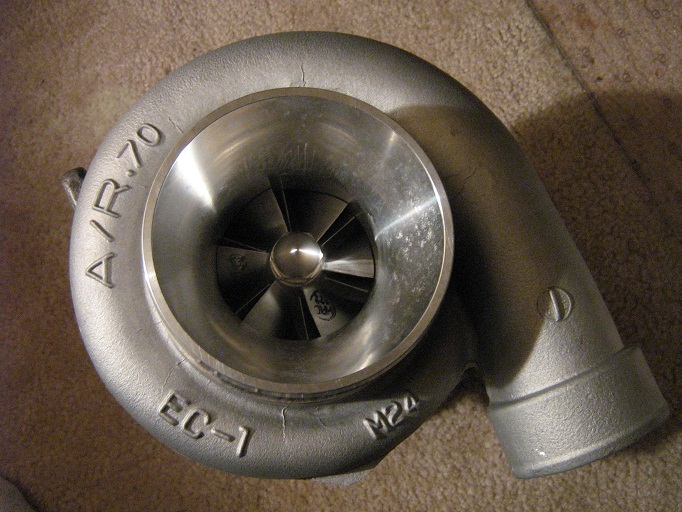
I called alot of companies for my turbo and waste gate and after at least a dozen companies, TurbosDirect was the only person that I had spoken to who actually spoke very confidently about the product and was very knowledged on boosting random applications. If your looking for a turbo these are definitly the guys to call. They are out of Arizona although the shipping to Ottawa was only 55$ and since they have such a wide variety of turbos in stock they managed to ship it next day.
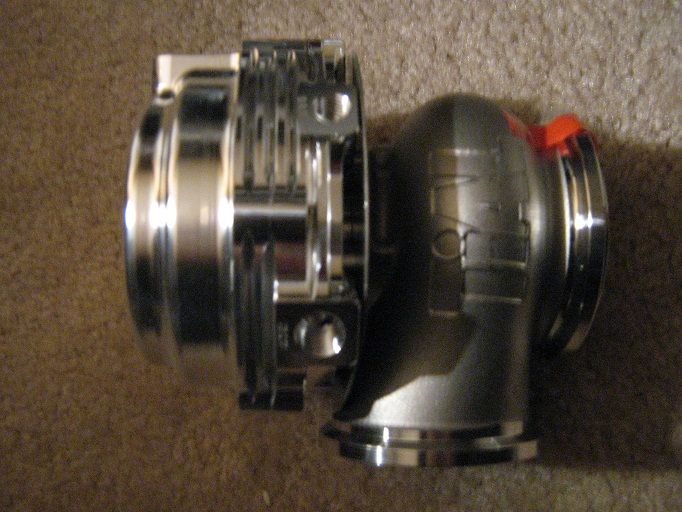
I got a Garrett T61 turbo and Tial waste gate set at 7-9psi for breaking in the engine. I will increase it later to 20 psi and see how it runs.
Now the fun really begins.
[This message has been edited by dutch13 (edited 07-27-2011).]
Looks like you've planned it well. Turbodirect's website looks an awful lot like that of Limit Engineering's also located in AZ run by John Craig who built the turbo for Dennis LaGrua's turbo 3.4L. I've purchased several rebuild kits from him and had good results, he also offered some good advice.
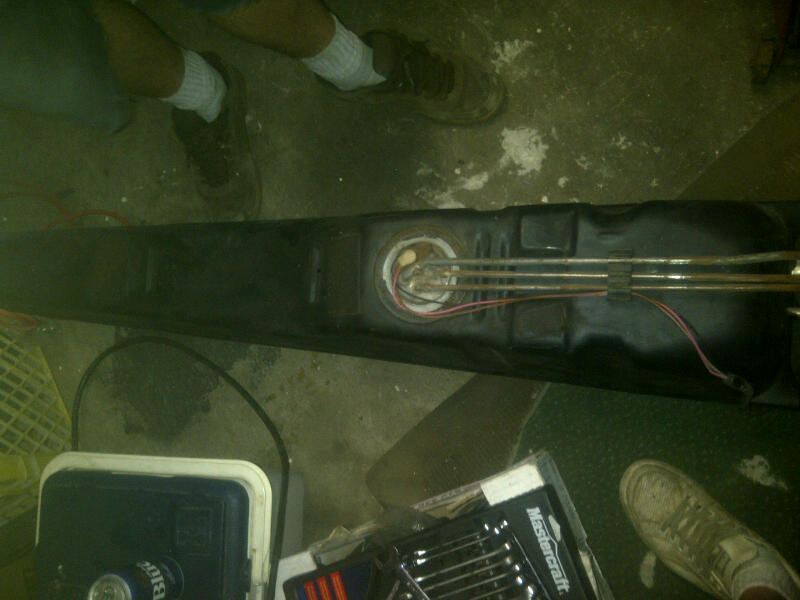
Last weekend I cleaned up the gas tank, installed the new pump and reinstalled the tank. I also installed the new harness. Looking good so far.
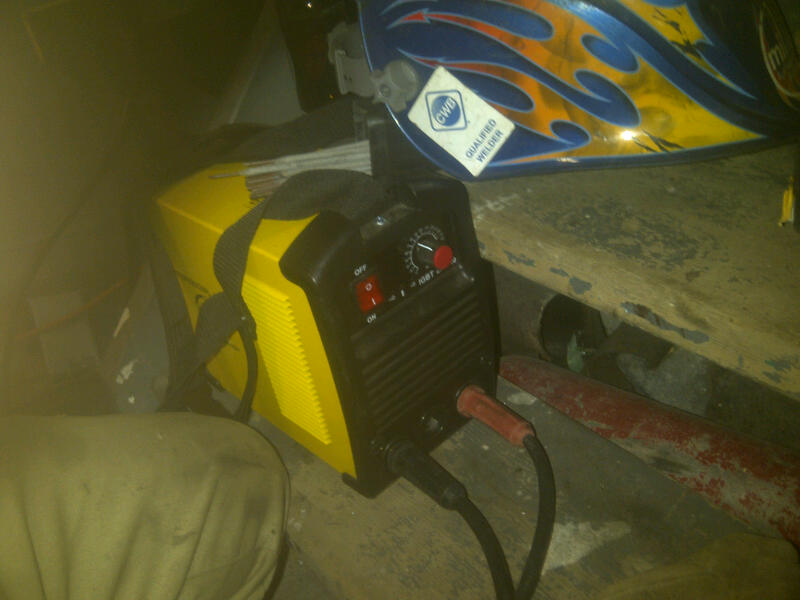
I began welding the temporairy manifolds together. I was looking into picking up some stainless tube and bends for a new manifold later. I'm waiting on a new tig welder before hand though. In the meanwhile I managed to put it all together with my stick welder.
200amps DC.
It got really smokey in my garage so I rigged up an old exhaust fan that I had lying arround.
So far I have everything fabbed up until the turbo. I still need to install the waste gate and work my way down to the muffler. I also have to get the intake side worked on as well. The turbo has 1/2" clearance on the intake side and 1" clearance on the exhaust side from the decklid.
I'll get more pics and updates coming as I go along with the project. Hopefully I'll actually be able to start it soon :P!
Originally posted by dutch13: The turbo has 1/2" clearance on the intake side and 1" clearance on the exhaust side from the decklid.
Unless you intend to remove the trunk section you're cutting it pretty close for turbine exhaust outlet clearance. You may get at least 1" of reward movement of the turbo at that height toward the trunk under load and from the picture it doesn't appear you'll have much clearance for a good radiused downpipe, not to mention the heat that you'll have to control in that area.
yeah unfortunatly im cutting out about a 4" square of the trunk and then boxing it back in as small as I can arround a nice bend for the downpipe to reduce the loss of space. I am lucky that its about 3" under the trunk seal so it wont affect it..... heat shields here we go!
So the injectors came in even though I thought they never would.
They are 60lb injectors from Milzy Motor Sports. They also came with fuel rail brackets for the height difference.
So far it looks like the following is what I have left to do;
-Fuel lines (If anyone reading wants to chime in with advice feel free) -Coolant lines (If anyone reading wants to chime in with advice feel free) -Vacume lines (If anyone reading wants to chime in with advice feel free) -Oil, coolant and vacume lines for turbo and wastegate -Exhaust from turbo -Intake side -Body... paint!... -Suspension -Brakes
Thats about all I came come up with off the top of my head. I'm on vacation this weekend but hopefully by next weekend I will have the fuel lines, vacume lines and coolant lines all hooked up so I can fired up the beast without the turbo on it.
IP: Logged
08:50 PM
PFF
System Bot
Aug 17th, 2011
neophile_17 Member
Posts: 58 From: Southington, CT Registered: Aug 2007
For the heater coolant lines I cut off the original 3400 hard line that goes all the way around the engine to a 6" section and ran an extension to the trunk like the Fiero originally had it. I used the cut off piece for extensions and bends to line everything up. There's a post somewhere around here with the right passenger side coolant hose from I believe a cavalier. My driver side hose came from an Astro van Goodyear part # 62168. It fits pretty well but I may shorten it a little. I added a coolant filler between the drivers side hose and the engine.
Both the vacuum and fuel lines I did with hard brake line, 3/8 for the vacuum and fuel high side and 5/16 for fuel return. I used short sections of FI hose double clamped to splice in the Fuel lines. If you don't have one buy a tubing bender before you try this. Just got one and I don't know what I did without it. I ran the fuel lines all the way around to the back side of the engine so I could keep the original 3400 flex lines but there's probably a cleaner way.
sounds like thats what i'll do for the fuel lines until I can upgrade to stainless. The problem I have is I dont actually know what vacume lines hook up to what. Along with which heater hose connects to which... or does it matter.
I'll do more reasearch.
IP: Logged
09:18 PM
hookdonspeed Member
Posts: 7980 From: baltimore, md Registered: May 2008
sounds like thats what i'll do for the fuel lines until I can upgrade to stainless. The problem I have is I dont actually know what vacume lines hook up to what. Along with which heater hose connects to which... or does it matter.
I'll do more reasearch.
i can help ya out on this one... the coolant "tree" near the waterpump has 2 lines coming off it, the bypass line that goes to under the manifold, and a long metal pipe that goes does the valve cover and wraps around the engine.... CUT that long line about 6-7 inches from the coolant tree, thats the heatercore feed line...
then for the retun line, on the back end on the thermostat housing is a small tube coming out, run a line from that to under where the stock dogbone mount is, there should be a tube under that (seeing as you have an 86, later years are different)
as for your fuel lines... send me a PM, i can make you plastic -to-metal lines so you can run steel on the firewall up2 closer where the fuel rail is, then the new style plastic from that to the fuel rail with quick connects like stock
basicly you could run yours like i did ( https://www.fiero.nl/forum/Forum2/HTML/118019.html ) but instead of the returnless style rail and regulator mounted on the firewall, you can run your lines next to eachother, then from the firewall to the plastic line, over to the 3400 fuel rail and "quick connect" to the rail like factory... heres a small piece i made to goto the 3500 rail for mine.
compression fitting on the 1 end, quick connect other.
Thanks for the help. I'll get those hooked up this weekend. As well I'm going to just use brake line to get the engine running but once i have everything in place I'll give you a shout for those lines.
Out of curiosity does anyone know what the two rad hoses actually come off of? Vehicle make/engine/year?
I was also wondering. Does -4AN stainless lines for the oil feed line and -10AN for the drain sound about right.
Has anyone found the right oil filter sandwich that fits?
Thanks
[This message has been edited by dutch13 (edited 08-22-2011).]
IP: Logged
08:50 PM
hookdonspeed Member
Posts: 7980 From: baltimore, md Registered: May 2008
oil filter...sammich....what? i think for the turbo lines you can remove the plug above the oil filter and use that for feed(where the 2.8l's oil pressure sensor connects to), then tap the pan for the return? hard ot see in this pic, but its just a pipe plug in that hole...
btw, i seen you still have the housing adapter on your block, you can remove that, and unscrew the center screw(that the filter screws onto) from the housing with an allen key, and screw it into the block, with the adapter on the engine, makes changing the filter harder, doesnt give you much room...
[This message has been edited by hookdonspeed (edited 08-22-2011).]
That would definitly make life easier. I'll open it up and take a peek. And yeah I had picked up the adapter to make the filter vertical because I thought it would be easier until I realized how close it ends up beign to the cradle.
Thx
Another thing that I was wondering;
Will the 3400 idle with a 7730 ecm that isnt tuned? Is there any reason that I shouldnt fire it up right away?
Also, eventhough I have upgraded injectors, the fuel pressure regulator will still only allow the regular amount of fuel out until a tune as well correct?
[This message has been edited by dutch13 (edited 08-22-2011).]
IP: Logged
09:53 PM
hookdonspeed Member
Posts: 7980 From: baltimore, md Registered: May 2008
That would definitly make life easier. I'll open it up and take a peek. And yeah I had picked up the adapter to make the filter vertical because I thought it would be easier until I realized how close it ends up beign to the cradle.
Thx
Another thing that I was wondering;
Will the 3400 idle with a 7730 ecm that isnt tuned? Is there any reason that I shouldnt fire it up right away?
Also, eventhough I have upgraded injectors, the fuel pressure regulator will still only allow the regular amount of fuel out until a tune as well correct?
ecu, well, im doing obd2, the 7730 is usable, as for your fireup question, idk, depends what tune you have on the chip...
as for the regulator/injectors, your injectors are rated at lbs per min @ xx psi, so if your stock (making up #'s) are 28lbs @ 55psi, and your new is 34lbs @ 55psi, then they will flow more then the factory no matter what the regulator does, regulator just adjust the fuel pressure, not the injector flowrates, you can modify the injector pulse width int he ecu tuning, but that comes later after data loging... id talk to whoever will be burning your chips for you to see if they can get you a decent base tune.
IP: Logged
10:30 PM
Aug 23rd, 2011
neophile_17 Member
Posts: 58 From: Southington, CT Registered: Aug 2007
Unfortunatly the old oil pressure hole is blocked by my alternator bracket. I'm going to have to take a second look and see if i can run a 90 off of it without interference. In the meanwhile if anyone knows a part number for the oil filter adapters online that go in between the oil filter and have 2 pressure lines that can run off them it would be fantastic to know . Or another way that would work.. Does anyone know if the 3800 filter is the same diameter and thread size?
Well moving along. I begun to bend the hard brake lines for the fuel. I'll get pictures this weekend. I also did some more fitting for the turbo and waste gate and begun the downpipe.
I also ordered a base tune from sinister performance so that I can have something to work off of.
Does anyone have any suggestions on where I should be running my coolant lines for my wastegate. What I mean to say is which hoses should I be splicing them into?
Thanks for the help so far all.
[This message has been edited by dutch13 (edited 08-25-2011).]


 compression fitting on the 1 end, quick connect other.

