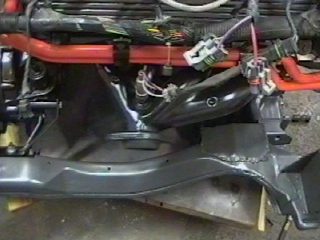
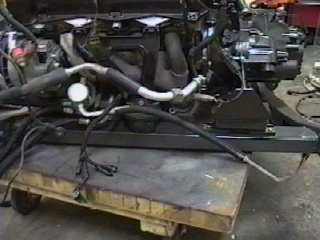
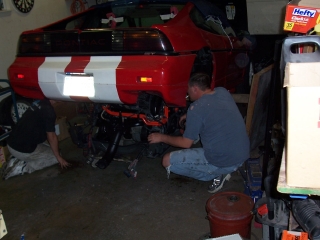
Well guys and a girl to start I had a full day, (not at work, got rained out) shipped out some parts. Got my computer fixed (had a switch go bad) and did some work on the Northstar swap. I now have the motor mounted to the cradle. We installed the trans tonight and we desided it was going to be alot easier to do that with the water pump off, here is a shot without the water pump and cruise servo from a side view. Here is a closer view of the stock Cadillac mount, mounted to the new front cross member Here is a shot of the trans mount that I showed before, its been painted and mounted for the last time, well until next winter (I HOPE!!!!) A look of the coil mount posted earlier completed and mounted
Edit:to remove a name
[This message has been edited by GSXRBOBBY (edited 09-22-2005).]
IP: Logged
02:49 AM
GSXRBOBBY Member
Posts: 3122 From: Southern Indiana USA Registered: Aug 2003
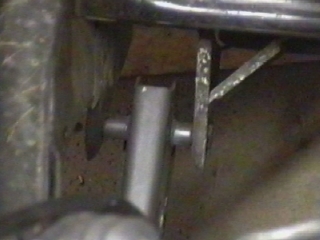
Front view of the new made trans mount on the new front cross member Here is a side view of the new trans mount I did alot of work on this trans mount, I had to find a nice middle way of how it was mounted, not to high but high enough to give the other mounts that extra support. That was alot harder then I was thinking it was going to be. Here is a shot of the new trans mount all lined up and mounted
IP: Logged
02:52 AM
GSXRBOBBY Member
Posts: 3122 From: Southern Indiana USA Registered: Aug 2003
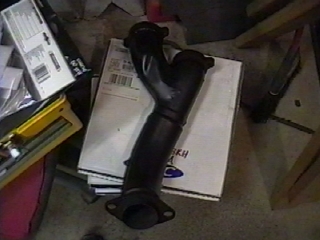
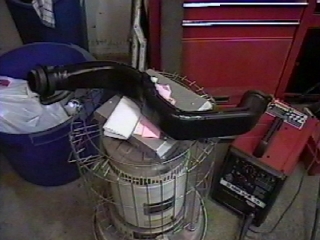
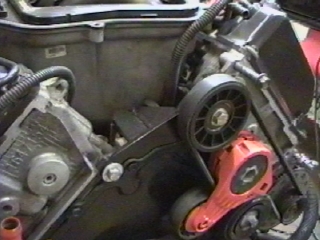
That trans mount looks thin in the picture above but its mad out of 1/4" steel plate. Anyway... When standing in the rear of the car this is going to be one of the only parts of the exhaust most people are going to be able to see, so it was coated with a black 1200 degree paint I coated the exhaust parts from the caddy with 1200 degree black paint, if it doesn't last well it will look better then what it did but I think it will. Again the exhaust tube that goes under the motor coated Here is the belt set up I am running without power steering
IP: Logged
02:54 AM
GSXRBOBBY Member
Posts: 3122 From: Southern Indiana USA Registered: Aug 2003
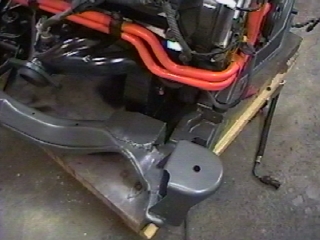
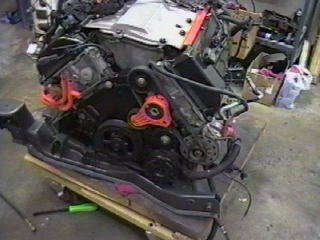
The reason why a few of the parts on the engine are paited small block Chevy orange is I am going to be painting the car orange and hope to add some outer color into the engine bay without over doing it. Here is a view of the motor mounted to the new front cross member I desided I did not want to paint the valve cover a metallic black and not do the same with the trans so it was done tonight, also it is now installed with a Spec stage 3K clutch and aluminum flywheel between to motor and the trans., again I hope until next winter when I am going to rebuild the motor. After alot of work I now have the motor mounted to the 88 cradle, wow I am I happy, can't wait to see it in the car. My last view as I leave the garage and come in for the night, I am now 2-8th's of the way done with this car
Yes I am now about 2 of a 8th's away from having the car complete. 1) Bought the motor, trans, 88 Fiero GT, had computer chip reprogrammed, and bought alot of the extra parts soon needed. 2) Now ave the motor and trans mounted to the 88 cradle 3) Motor running and all the bugs worked out 4) Susp. and brakes upgraded 5) Interior complete (Mr. Mike seats installed "already bought", new stereo system, new gauges, and new carpet and headliner 6) Body prep work done, and chassis repainted 7) Body mods installed and preped for paint, "Norms nose and side scoops from Fieroware" 8)Paint the 88 Fiero STS pearl orange and drive it
Hey Bobby I am happy for you on the progress you have made and after all the fraustration and set back you will appreciate it more when you turn the key and it starts for the first time
IP: Logged
03:53 AM
May 13th, 2005
GSXRBOBBY Member
Posts: 3122 From: Southern Indiana USA Registered: Aug 2003
Well the Northstars top plate has already pitted and clouded over since I polished it the first time so I removed it and sanded it all down again. Tomorrow I am going to polish it and reinstall the water pump. I think the chrome or polished look on the top plate and the termostat housing together will look good on the motor. I just don't want to over do it so it looks like is to much, is I do think there can be to much chrome on a motor. If you don't agree try to clean a motor with alot on it...haha
I ran into my first problem, well kind of. I went to bolt up the rest of the exhaust to each maniflod and found the the cross over that goes under is going to hit the "L" shaped bracket I made for the trans hole that doesn't line up just right. So a friend of mine and I thought about it for a little while and desided that I wuld rather not use it VS pushing it the cross over to make room.
I ran into my first problem, well kind of. I went to bolt up the rest of the exhaust to each maniflod and found the the cross over that goes under is going to hit the "L" shaped bracket I made for the trans hole that doesn't line up just right. So a friend of mine and I thought about it for a little while and desided that I wuld rather not use it VS pushing it the cross over to make room.
this may not affect you but on mine the crossunder pipe also hit my passenger side inner cv joint. it was close though and a slightly smaller diameter cv joint would work.
IP: Logged
06:41 PM
GSXRBOBBY Member
Posts: 3122 From: Southern Indiana USA Registered: Aug 2003
I have been doing some thinking and I may just run a true dual exhaust off the manifolds so there is no fit questions or problems. Also that way I could use the "L" shaped bracket. I don't know, I'll think about it for a few days.
I don't know how others have addressed the clearance issues either, but I plan to come right off the stock front header, but fabricate a new rear header utilizing the stock flange as a starting point. True duals with a crossover being the goal.
IP: Logged
11:24 PM
May 24th, 2005
GSXRBOBBY Member
Posts: 3122 From: Southern Indiana USA Registered: Aug 2003
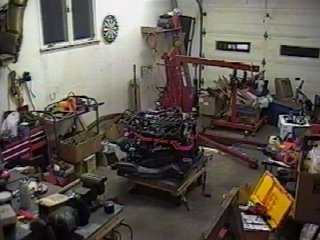
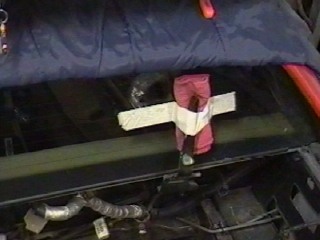
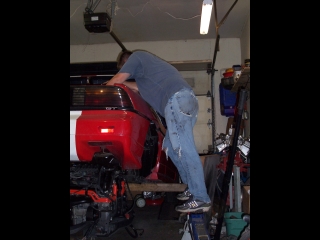
Well Sunday night I did my first test fit, had a few issues. 1) the dip stick hit the bracket that holds the heat sheild 2) the fuel lines were in the way 3) and the strut tower needed to be moved out, which I know was going to be a trouble issue, just wanted to see how bad it was going to be. Well to do a not only one test fit and knowing more were to come I removed the deck led and took an old sleeping bag and placed it on top of the car, somewhat limited for room here at the house. Also needed to get the hinges out of the way so we taped them up and padded them with a couple of shop rags. Got as much lined up as we could. And I know I tried to take a picture of this before but wasn't able to get a good view of the way I lined up and mounted the belts.
Here is the last shot of the replacement power steering bracket Here are a few pictures of the top view having the cradle removed Also here is a view of having the water pump mounted back onto the motor
IP: Logged
12:28 AM
GSXRBOBBY Member
Posts: 3122 From: Southern Indiana USA Registered: Aug 2003
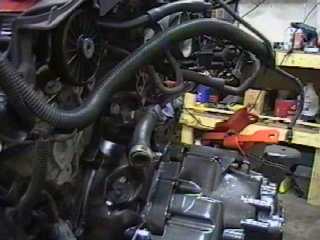
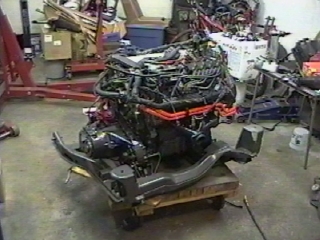
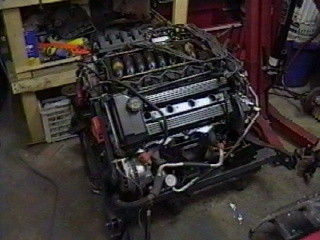
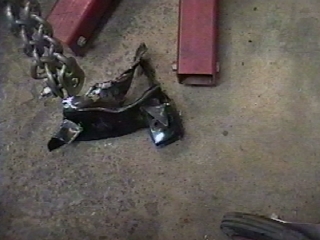
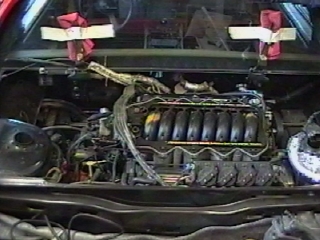
Here is the shot of the 93 Cadillac 4.6L Northstar motor mounted to the 5 speed Getrag Fiero transaxle and then mounted to the 88 Fiero engine cradle I bent the dip stick around the valve cover to get a little extra room and am hoping to still be able to use it "or reach it"? Here is a shot of the bracket that was mounted to the strut tower that also had the dogbone mounted to it. It is spot welded in a few areas and is a pain to remove but is needed for the extra room. It was somewhat easier with a big hammer, large plybar, air hammer, grinder and a spot welder drill bit with a cordless drill. The bracket put up a big fight but I won. I any sweeted my ass off and cut myself one time. (Blood, sweet and no tears, no tears only due to I did not brake anything this time that cost alot) hahaha
IP: Logged
12:29 AM
GSXRBOBBY Member
Posts: 3122 From: Southern Indiana USA Registered: Aug 2003
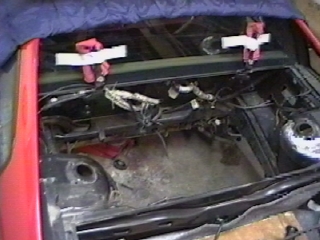
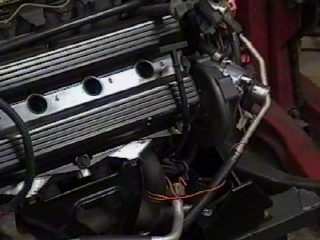
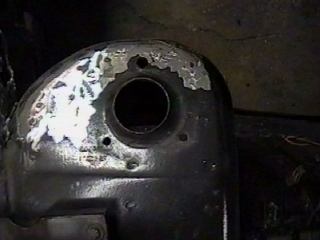
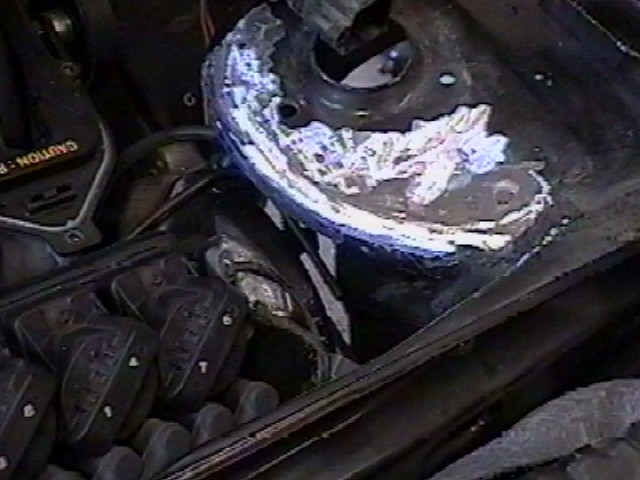
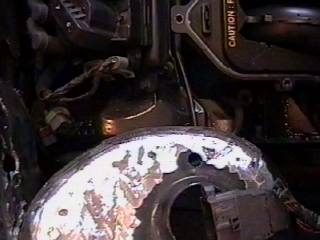
Here are a few shots of the strut tower that needs to be cut or at the least fixed so there is extra room for the valve cover of the corner near the coils of the Northstar.
IP: Logged
12:30 AM
GSXRBOBBY Member
Posts: 3122 From: Southern Indiana USA Registered: Aug 2003
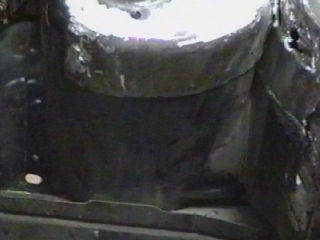
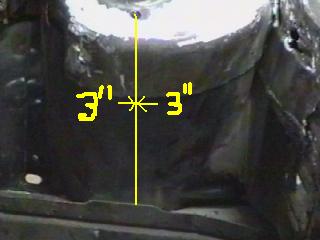
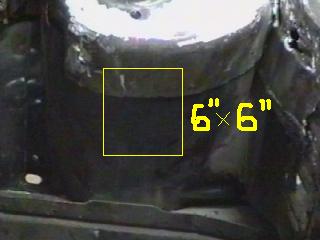
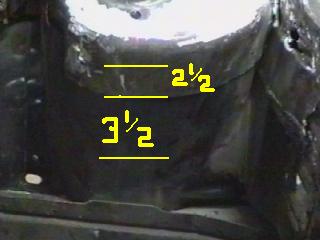
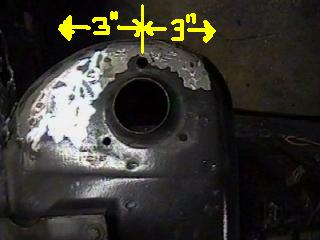
Here are a few pictures shots I added to with (paint) to help give an idea on whats needed. From the bolt hole straight down The needed goal, a 6"X6" space The help line, the line is from the thicker steel formed around the top of the tower, the lower metal is alot thinner steel, gives alot better idea on where to cut at. Going off the inner bolt hole
Well before anyone cuts off these pictures I am going to be making a few changes, I talked with Charlie and he passed along some of his sizes. If I get off work at a good hour tomorrow I will try to get some work done on this. "Nothing good on TV tomorrow anyway". Rides and Overhaulin are reruns, haha
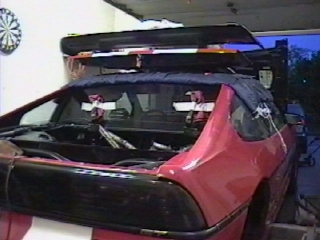
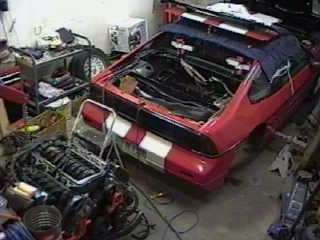
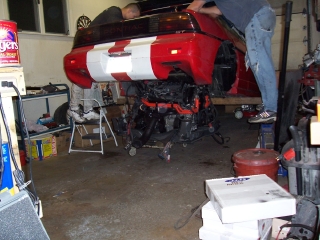
Well....I mounted the motor, trans., and cradle on the car today for the first time. I was happy to see it in and at the same time feel I am still so far away from having this done. And another I have a good amount of room on the pass. side for the belts I also have alot of room on the driverside but I knew that from the start And another shot of the clearance of the strut tower on the driverside
IP: Logged
04:29 PM
GSXRBOBBY Member
Posts: 3122 From: Southern Indiana USA Registered: Aug 2003
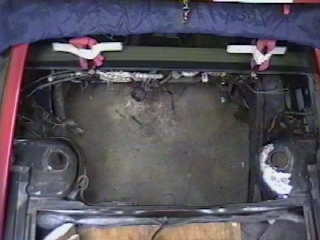
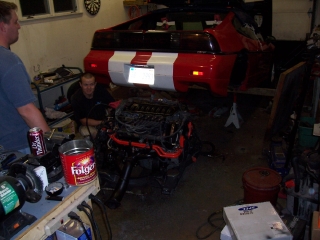
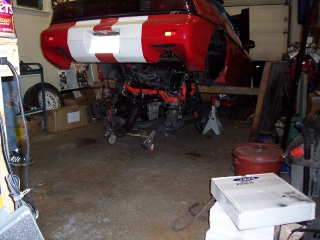
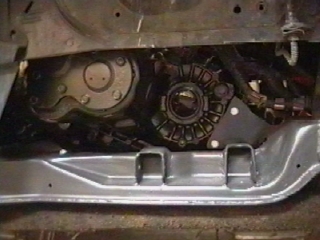
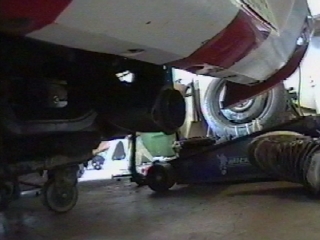
The driverside of the cradle mounted Driverside cradle mounted for the first time Another view of the pass. side clearance The pass. side of the cradle with the inner fender removed How much room the waterpump has Just enough room between the motor and the trunk and I mean just enough!!!
IP: Logged
04:30 PM
GSXRBOBBY Member
Posts: 3122 From: Southern Indiana USA Registered: Aug 2003
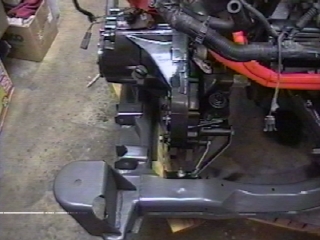
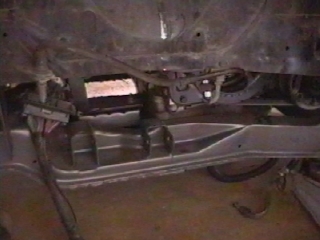
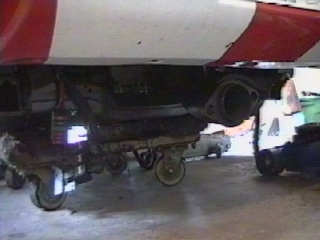
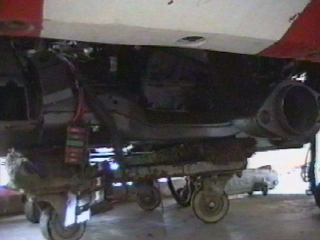
Well I wasn't just sure how far back the stock Cadillac exhaust was going to go but did not think it was going to go this far back, there is noway there is enough room to fit a muffler of any type off of this and have it go to each side. So I guess I am going to run a true duel system only using the stock manifolds...at least so far that what I have come up with? This view you can see better just how far back it goes One more shot of the bottom of the back
IP: Logged
04:32 PM
GSXRBOBBY Member
Posts: 3122 From: Southern Indiana USA Registered: Aug 2003
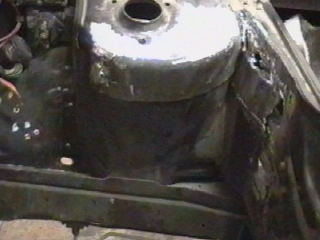
I talked with Charlie and he gave me the size he needed to have cut out of the pass. side strut tower. I went a 1/4" wider then he did just so I have a small amount of extra room incase my rubber mount system I made allows the motor to move a bit more, (A just incase issue) Here is a view from the driverside looking over Top view Here is a good view of just how close the oil cap is after the hinge is cut, its to close to remove the cap right now
IP: Logged
04:33 PM
GSXRBOBBY Member
Posts: 3122 From: Southern Indiana USA Registered: Aug 2003
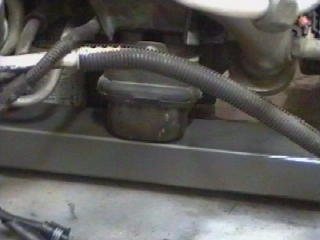
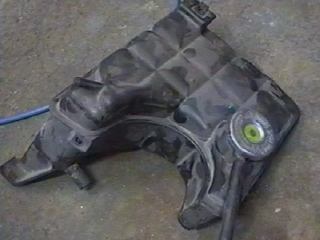
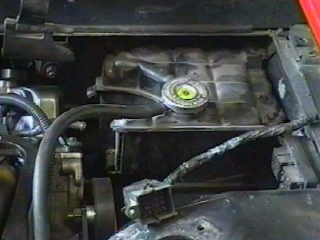
Cadillac overflow tank I am hoping to be able to use Here is where I am thinking of mounting the overflow tank, there is enough room and it looks high enough? I just have a question about the overflow tank, are you guys using the stock tank? I didn't remove the motor so I am not really sure where each hose goes, can you guys help I think that #1 connects to one of the steel lines that come around the head that I painted orange but not sure and really not sure which one? #2 I have no idea about #3 maybe just a run off but then again I am not sure.
IP: Logged
04:34 PM
GSXRBOBBY Member
Posts: 3122 From: Southern Indiana USA Registered: Aug 2003
Also guys I just wanted to see what throttle cable is being used, if I remember right I thought I heard a 4 cycl. 84 Fiero throttle cable would work on the 93,94,95 Northstars?
Can anyone tell me the way they ran the fuel lines from the pass. side of the car the the rear of the trunk side, which is where the fuel lines mount up at? I was wondering if the used steel lines or some flexable steel braided hose?
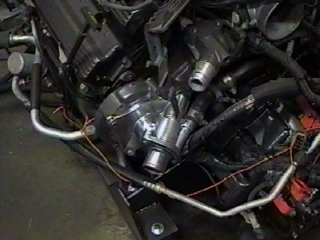
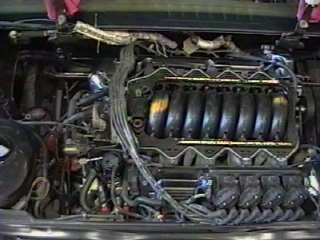
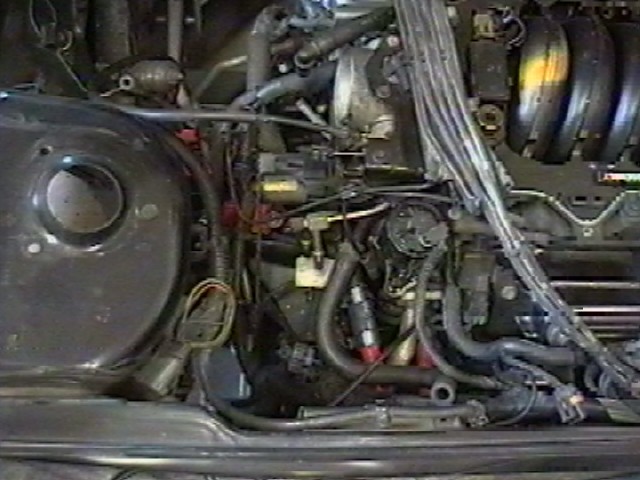
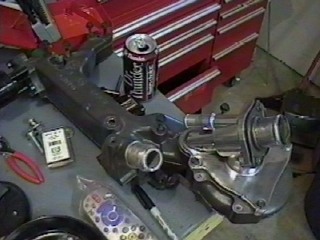
Coolant hoses are the only other thing I have not desided on what I am going to do. I have a picture that Aaron posted before that showed how he ran his hoses other then they connected to the water pump backwards. Here is a picture of my water pump, the thermostat goes to the pass. side tube and the other hose is connected to the driverside
Also looking for a few good pictures of how the other coolant hoses are run!!!!!! You know so the heater core is mounted in the flow line?
Well I just got some really good news from Will. I wrote him today and asked him if he could do the wire harness and he has agreed to do it. I can now focus on getting everything else done that I know I can get done. WOW I feel so much better right now, you guys may or may not even know.
How much room do you have on the front side of the motor? It appears from your pic that your coil pacs are almost touching the rear bulkhead, were-as, according to my calculations, I will have almost 2". I always use the standard measurment of 16 1/4" from the center of the crank to the front cradel mounting hole. is that about what you have?
You might want to check out my exhaust layout for some ideas on your clearance issues. I discovered the same shortcoming with the stock rear manifold and cross-under pipe that you have. scroll to the bottom of the page at: https://www.fiero.nl/forum/Forum2/HTML/054893-7.html
It seems like just about everyone had a head start on me, but I'm gaining fast
Your swap is looking good btw.
Russ
[This message has been edited by Russ544 (edited 05-29-2005).]
IP: Logged
01:37 AM
GSXRBOBBY Member
Posts: 3122 From: Southern Indiana USA Registered: Aug 2003
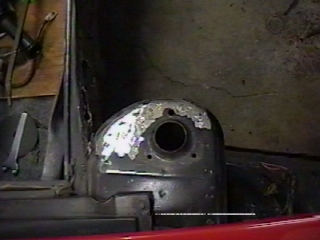
that hole looks good Bobby. were you able to salvage the cut out piece to reverse and weld in? did you notice PBJ's northstar for sale on ebay? also, the powerball is over 200million... if you see me in a nicely painted northstar fiero within the month, i won... wishfull thinking... lol
IP: Logged
06:15 AM
PBJ Member
Posts: 4167 From: London, On., Canada Registered: Jan 2001
Great thread. Looks to be a very neat installation, very involved and well thought out. What do you see as the main benefits and advantages of the Northstar swap over engines like the 4.9L , LT1, 3800SC and what drove your choice of this powerplant? Weight, drivability, mileage, performance, power to weight ratio?
IP: Logged
10:07 AM
GSXRBOBBY Member
Posts: 3122 From: Southern Indiana USA Registered: Aug 2003
that hole looks good Bobby. were you able to salvage the cut out piece to reverse and weld in? did you notice PBJ's northstar for sale on ebay? also, the powerball is over 200million... if you see me in a nicely painted northstar fiero within the month, i won... wishfull thinking... lol
HAHAHAHAHA...I was reading what you posted to Ashley and before I could even finish she said just about the same thing you posted!!!
No I didn't see his but I am going to go look now.
IP: Logged
12:07 PM
GSXRBOBBY Member
Posts: 3122 From: Southern Indiana USA Registered: Aug 2003
3 is not connected to anything on the other end and is overflow for the resivior to the ground.
Pete
You just helped me alot more then you might now, I am just going to have to ask Will when he redoes my harness to bring the wire for the over flow tank over to the otherside, The wire is over off the harness under the throttlebody.
Great thread. Looks to be a very neat installation, very involved and well thought out. What do you see as the main benefits and advantages of the Northstar swap over engines like the 4.9L , LT1, 3800SC and what drove your choice of this powerplant? Weight, drivability, mileage, performance, power to weight ratio?
You have asked alot more then you may know: 1st thanks for the good words, its been really nice hearing that I am doing a good job from you guy on here!
I knew I was going to be doing a motor swap on a Fiero even before I bought one. I looked at a few different swaps. SBC, 3800SC, the 4.9L and the Northstar. The SBC has a plus of I know I could have built it cheap and had alot of H.P., I have built up small block Chevy motors mst of my live for my Cameros and Firebirds. But I want to be able to drive and drive where and when ever I want. Anything over 300 H.P. at the wheels for me would have been over kill. Also I wasn't to happy on having the waterpump belt out in the wheelwell? And the Northstar doesn't need a adpter kit so that saved me over $1,000 right there. The 3800SC is a good swap also and if I did it alll over again knowing what I know now I am not sure if I would still do a N* swap, I would most likley would still. The 4.9L swap is really close to the Northstar swap with as much work but has alot less H.P. so I wasn't even going to think about that one. Before any 4.9L guys say anything, I am sure its somewhat easier but still alot of work and my goal was around 300 H.P.
The main reason I went with the Northstar was 300 H.P., about 270ish at the wheels. Strong long lasting motor when taken care of. Gets great gas mileage for a V-8 motor and even better in about 2700 lbs. car. When done it right the Northstar looks like the motor was installed by the factory. And the biggest reason is no adpterplate is needed so there was no extra cost and Will, William (Wcapmen), Aaron, Bushroot, Charlie, and a few others made it alot easier to do this swap. And I was able to buy a Northstar with just about everything else needed from the car for $1100.00.
Also now with Wcapmen reprogramming the chip on the 93, 94, and 95 PCM's and Will redoing the wire harnesses this has become alot easier swap if you have a welder or know someone!!!