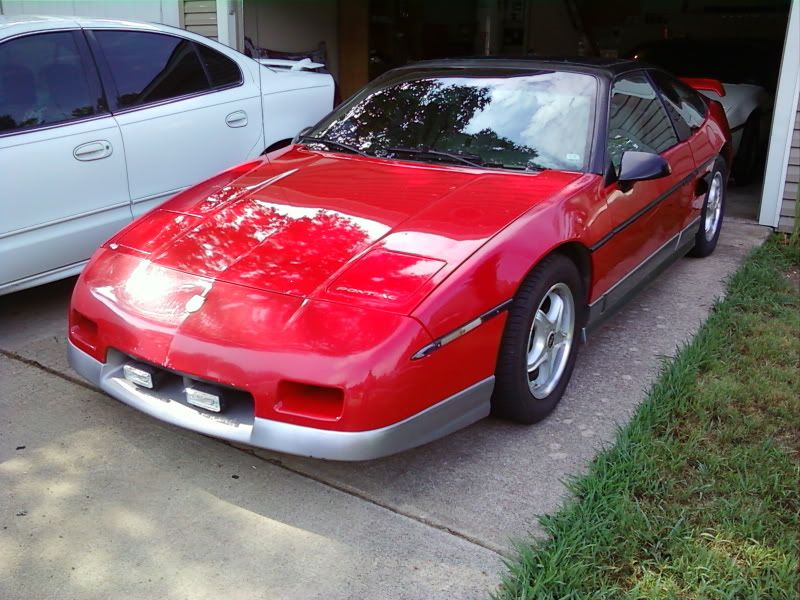
Well I thought I would start a build thread in my 87 GT. When I bought it I got it for $900 and got what I paid for. When I got the car the original plan was to fix the engine (had a broken exhaust manifold and what sounded like a bad lifter) finish stripping the body, paint it and drive it as is. Well...as those of you know who read the construction zone know it's just too hard to resist the I need more bug. SO I decided to strip the body of all it's paint fix the engine and do a Firebird dash and that was going to be it. Notice I said was. Then I decided to go with a 4.9 swap (still saving money for that) do the Le Baron brake up grade (thanks bizzie) and add a HUD (Thanks Jonathan). After the Round-Up in San Antonio and seeing JScott's Proud one and talking to him about mirros I have now decided to do a C6 mirror upgrade (man I love ebay). The paint on the car will be Nissan Carbon Silver Mettalic (the dark siver gray on 350Z's) and I have not decided on using the wing or not but it had been moved back 1 inch by the PO. Well here are some pics of when I got the car and some up till now. Thanks for reading.
How I picked it up:
the paint was so thick it litterally looked rolled on. I later found out it was single stage enamel and no flex had been added to the front bumper ( I picked it up and when it bent paint flecked right off)
I put the car in the garage and stripped it or the paint and two other layers of paint before I reached the primer over the original Maroon:
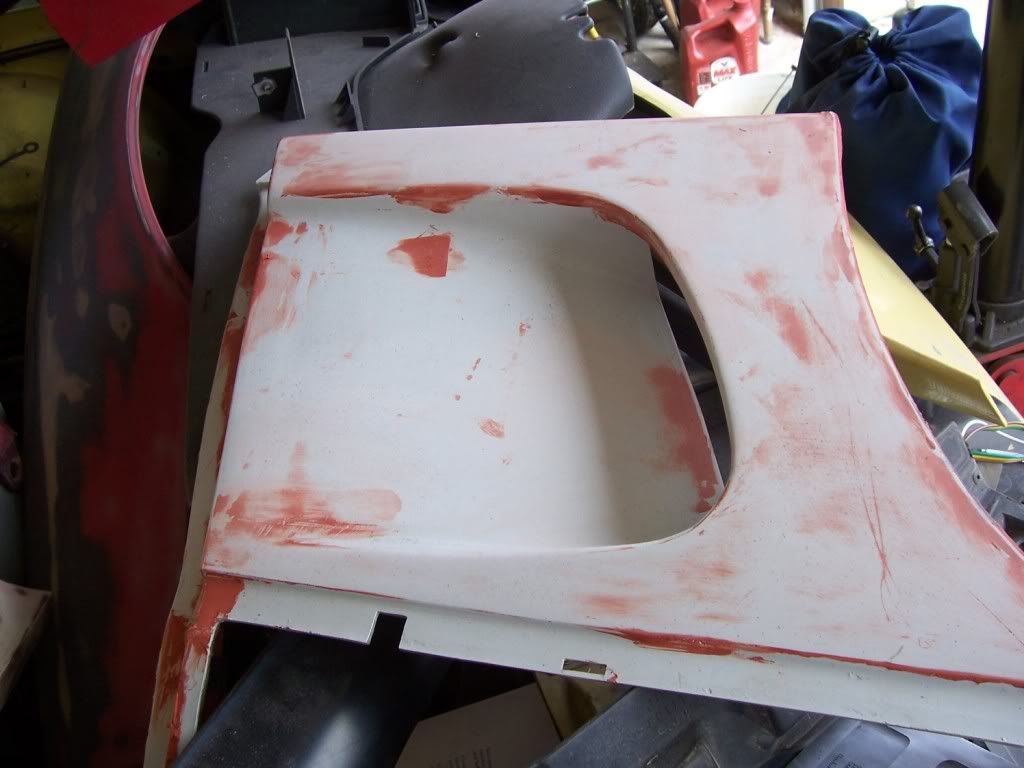
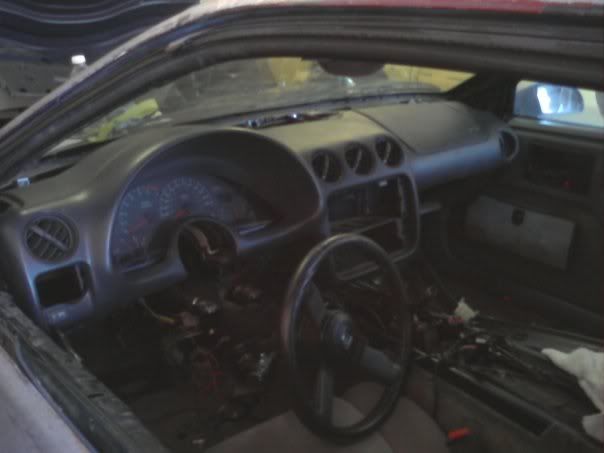
I then took the dash out and started the cutting and fitting:
Now the Firebird dash it hard mounted waiting for A/C ducting:
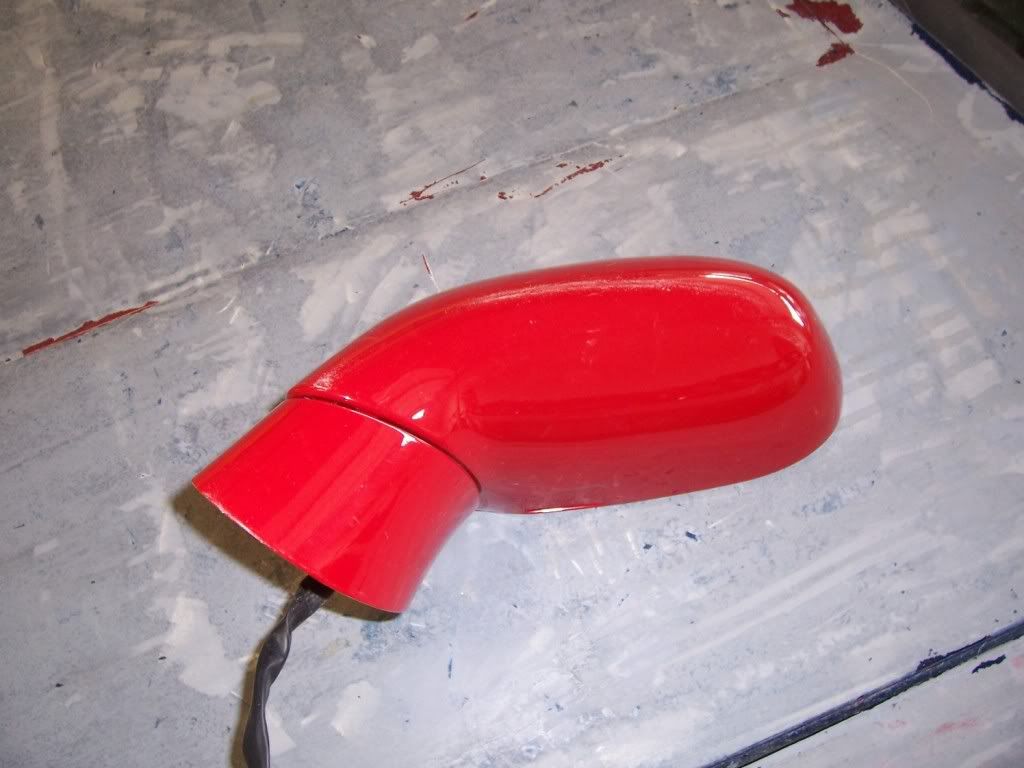
The Corvette C6 mirror:
Thats it for now...I have more pictures but it's dinner time.
Shelby
Edit to get the pictures right.
P.S. Cliff I tried to post this in the Construction Zone but it wouldn't let me Sorry.
[This message has been edited by ARFiero (edited 05-27-2009).]
IP: Logged
09:39 PM
PFF
System Bot
May 28th, 2009
1MohrFiero Member
Posts: 4363 From: Paducah, Ky Registered: Apr 2003
Looks like your new promotion is going to come in handy on this project, Shelby! You have got a lot going on but it will look great when you finish. Congrats again.
Cliff has to move 'worthy' build threads to the Construction Zone Shelby. Keep it up and he'll probably move it there.
I have personally checked this build out and there is a lot of good stuff going into it. Shelby also has another mostly stock GT that's pretty slick for the miles it has.
IP: Logged
08:35 PM
ARFiero Member
Posts: 1262 From: Savannah, GA Registered: May 2008
Thanks Guys. I am working on the pics for the build-up of the interior door panels. I took a different route than most and thought I would share that in detail and not the other parts due to it being discussed before. Pictures will be put up this weekend of the arm rests in thier current state.
Shelby
[This message has been edited by ARFiero (edited 05-29-2009).]
IP: Logged
08:52 PM
May 31st, 2009
ARFiero Member
Posts: 1262 From: Savannah, GA Registered: May 2008
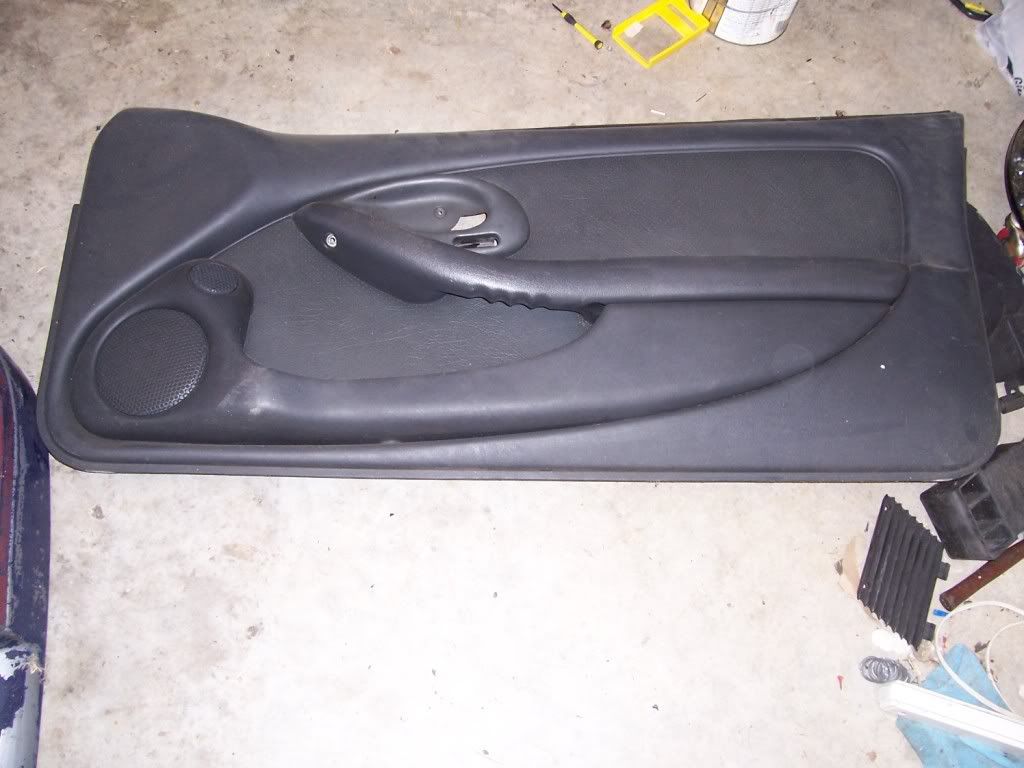
Ok now I am going to go over what I did to make the Firebird Door panels fit. In a nutshell I didn't make them fit. After carefull consideration I decided that I didn't want to cut the back end off the armrest and then have to build a cap with fiberglass, then cut the plastic surround down to fit the Fiero door. I started to look at the Firebird panel closely to see what I could do and what follows was my decision. I know alot of folks don't want to mess whith the armrests due to them having the vinyl on them and all but follow me into my delusional state and see what I have done.
Ok here is a complete Firebird door panel. I pick both of these panels up for $25 total and they came off a car with the monsoon package.
I turned it over and removed the perforated vinyl that sets between the plastic and the armrest. I pretty much just pops right off. In the second picture you can see the armrest is attached to the vinyl backing board with meted plasti. I cut the ends of with diagonal cutters because I found these to ba an excellent mounting source for what I plan to do (just have to get the right sized screws.
After this I cut the vinyl/rubber stuff off the armrest. This took off about 2 pounds of weight from the entire armrest.
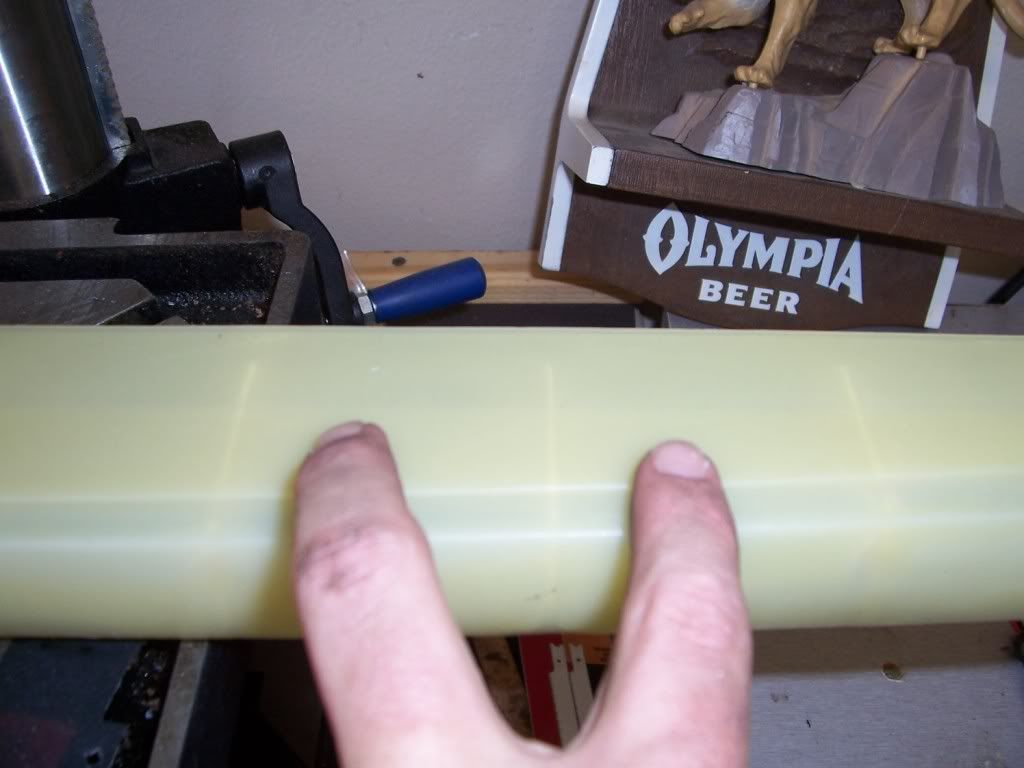
I then placed the arm rest next to the Fiero door panel to determine how much needed to come of and found 2 1/2" to be perfect. I nade a cut on the actual arm rest portion where you see my fingers. The second pic shows how much is removed.
Yes that was an Olympia Beer sign...do I give away my age???
Next I epoxied the two pieces together then when it dried I sanded the area to ensure it was level and to give the next step a good adhearing surface. Next I fiberglassed all the way around the cut both on the outside and on the inside
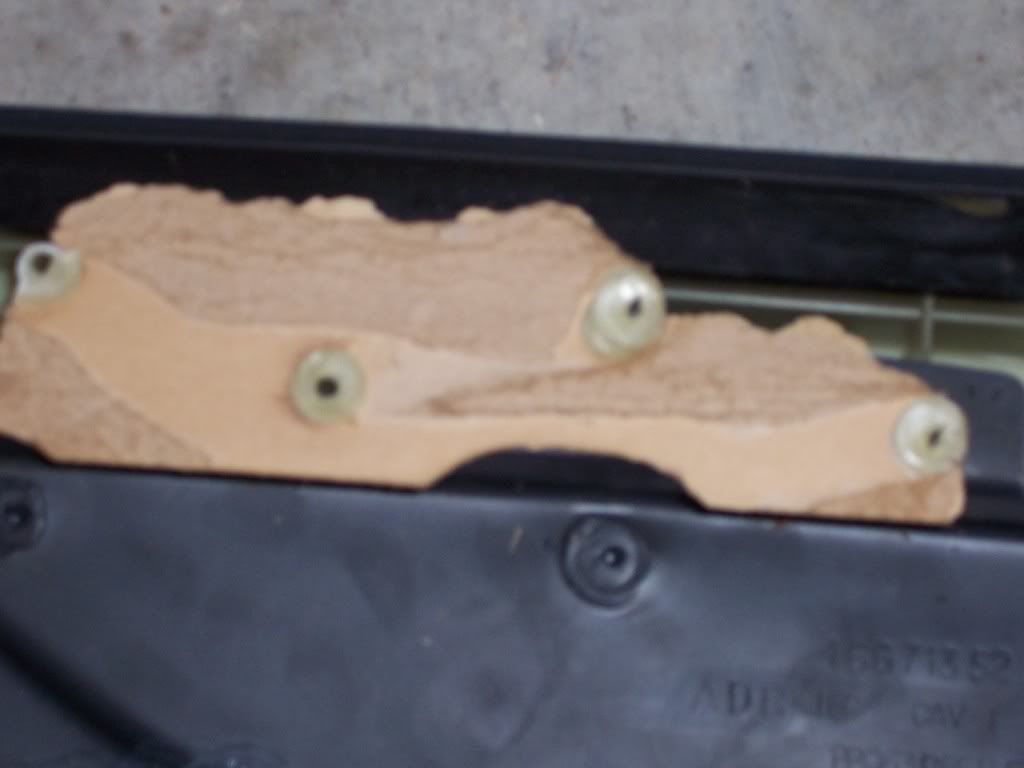
One thing I want to add. If you do this the way I am doing or something close you will find a black strip attached to the arm rest holding the foam where I cut. Keep this as it will guid you on how thick the foam needs to be and it finnished the angle at the back of the arm rest. Here is a pic of it.
Thats all for now But I am working on a center console that is going to be like Bowrapennocks in this thread https://www.fiero.nl/forum/Forum2/HTML/097751.html Thanks for the idea man...it helped solve a ton of problems.
Thanks for looking folks.
Shelby
[This message has been edited by ARFiero (edited 05-31-2009).]
IP: Logged
05:06 PM
Jun 18th, 2009
1MohrFiero Member
Posts: 4363 From: Paducah, Ky Registered: Apr 2003
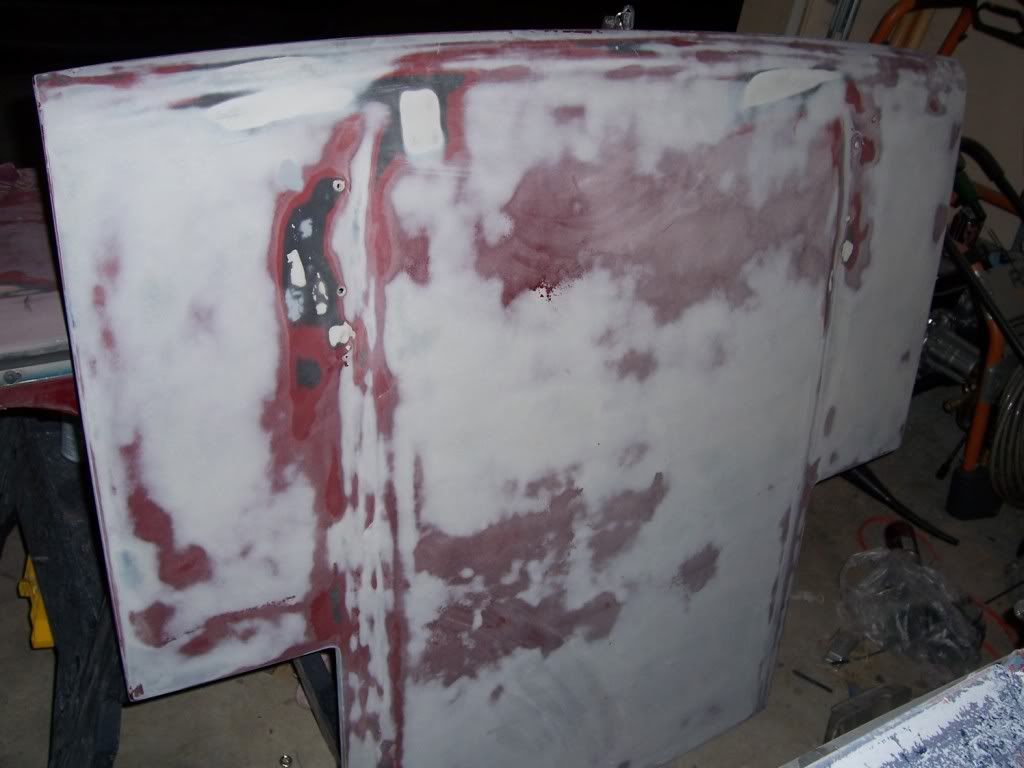
Ok here we go now. I have finnaly gotten the entire car stripped of it's mopped on paint by the previous owner. I decided to remove 90% of the panels and paint them off the car plus it does make it easier to sand on a decklid and hood whan it's not on the car. Here are some pictures of todays progress:
Drivers Door
Drivers Fender
C pillars and top
Decklid
Sanding this thing down has been time consuming due to the thickness of the 2 layers of paint over the original maroon color.
Now I am ready for the Mustang hood scoop if I can ever find one for sale that people don't want an arm and a leg for. More to come later.
Shelby
[This message has been edited by ARFiero (edited 07-19-2009).]
Figured I'd give Shelby's project a bump. I'll post a few pics that hopefully won't make him mad.
I've been over to help a few times but I don't end up doing much. More like I just drink his alcohol and check his progress... Although I really like his dash swap. This car is gonna be pretty nice when it's done.
IP: Logged
07:24 PM
ARFiero Member
Posts: 1262 From: Savannah, GA Registered: May 2008
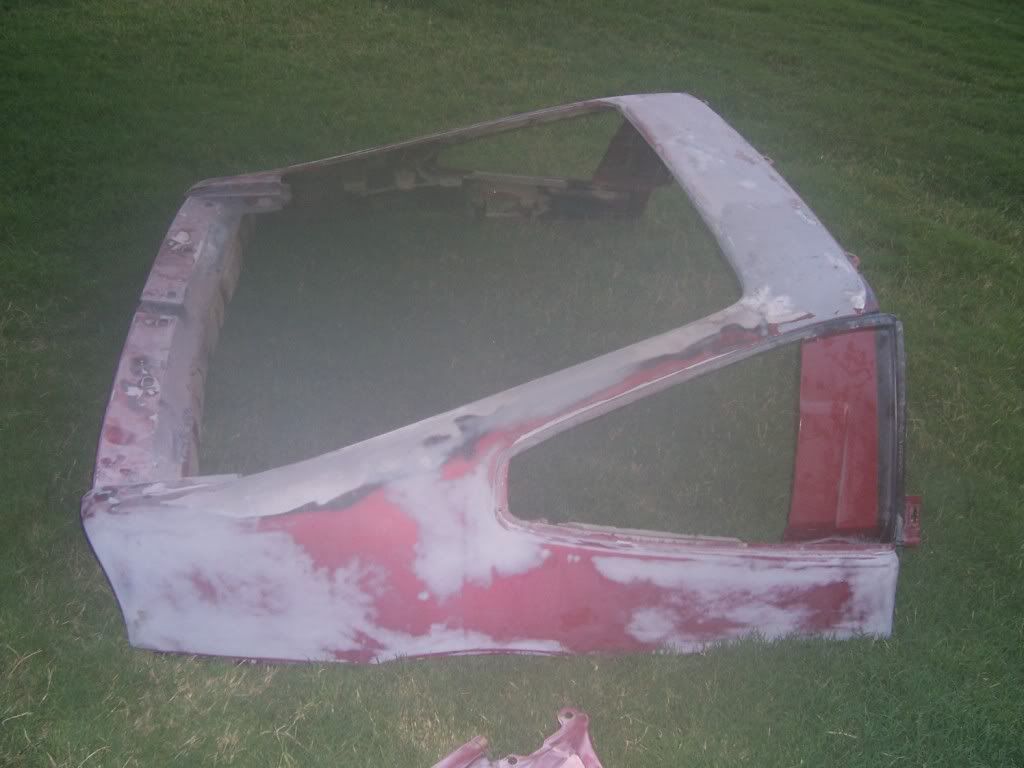
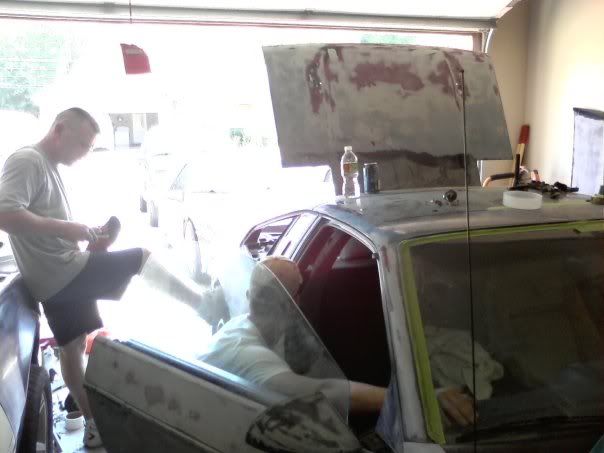
Heck no I don't mind you posting pics. I have a few other to post tonight. Ok so here goes. While we were removing the paint on the top of the car we found that one of the PO or a body shop had tried (unsuccessfully) to remove the top from the car and had done a crappy job (read laid one layer of fiberglass over the cracks and smothed it so the thick paint could hide it) repairing it so at this point we decided to remove all the body panels and do a body off repaint.
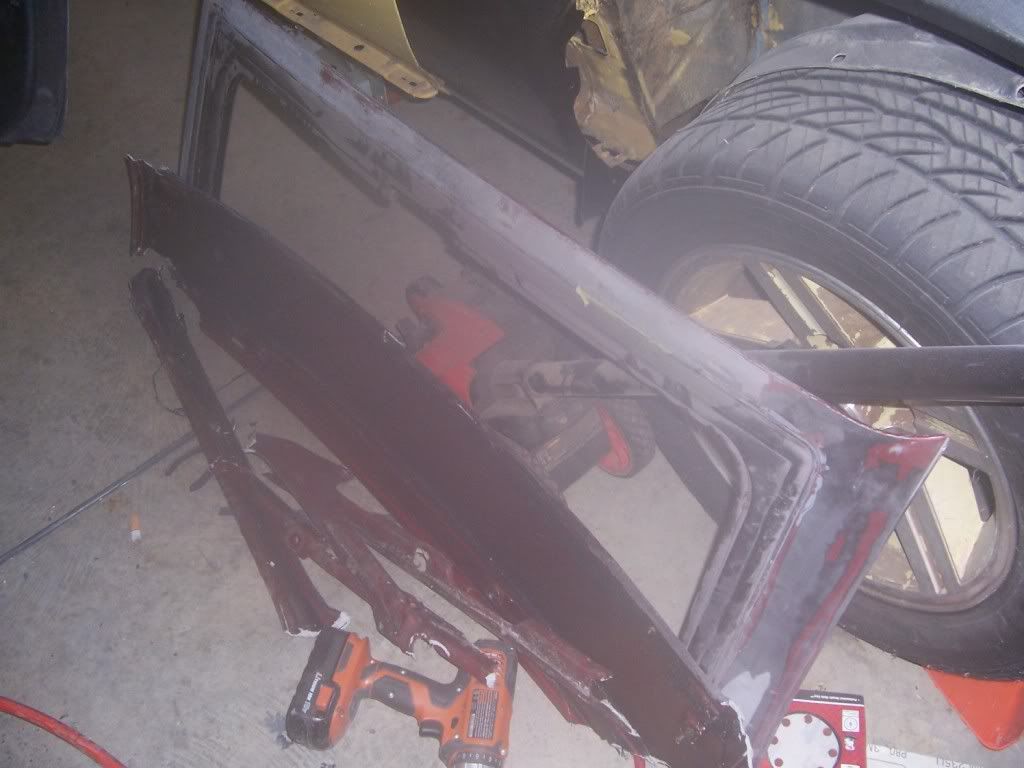
I will tell you it is fun to remove a top when you don't care about it When you remove it make sure you remove all the bolts and nuts holding it on otherwise it can...and will...look like this when finnished
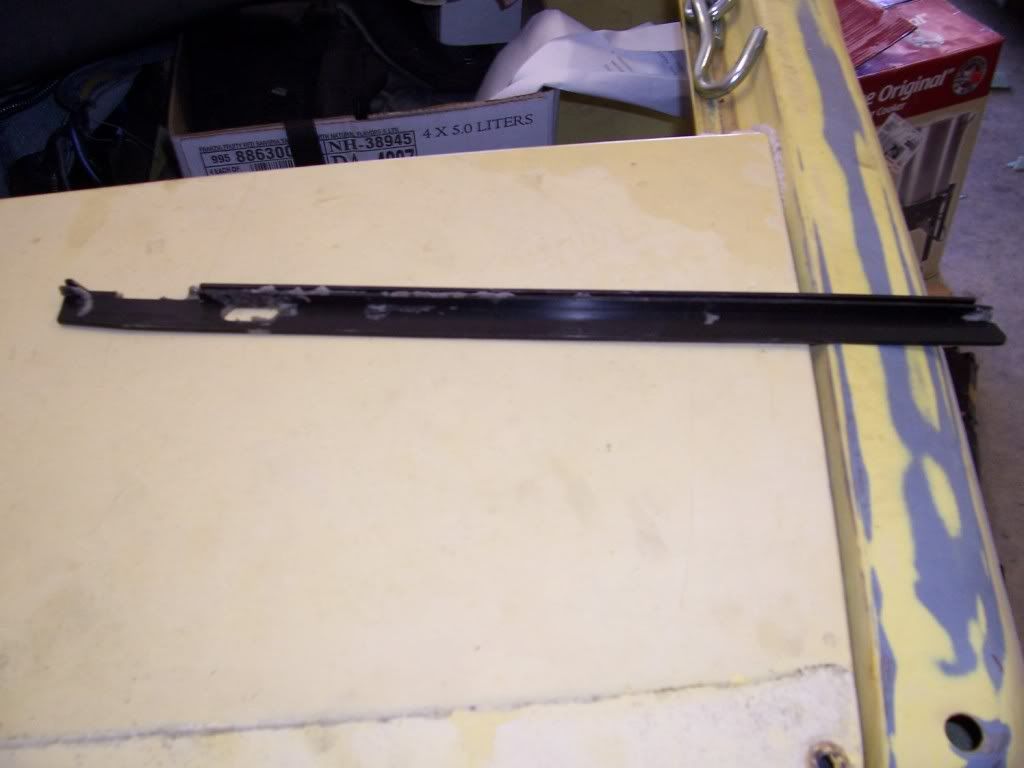
We then removed the GT fastback. First we removed the bolts and nuts inside there are 6 total (3 directly into the fastback and 3 that also bolt into the roof size 10mm for these) there is also one bolt on each B pillar holding the sides on (size 11mm). Then you need to remove the bolts outside the car 3 on each side (10mm) and several in the tail light area(remove all the bolts to include the ones sitting on balck clips...these are all 10mm). You also have to remove the lip bolts on the inner fenders and two outter most plastic screws (these will be 7mm for the bolts) Make sure you remove the trim as well as you will have to take out some plastic rivits that hold the peices together. And it is off the car:
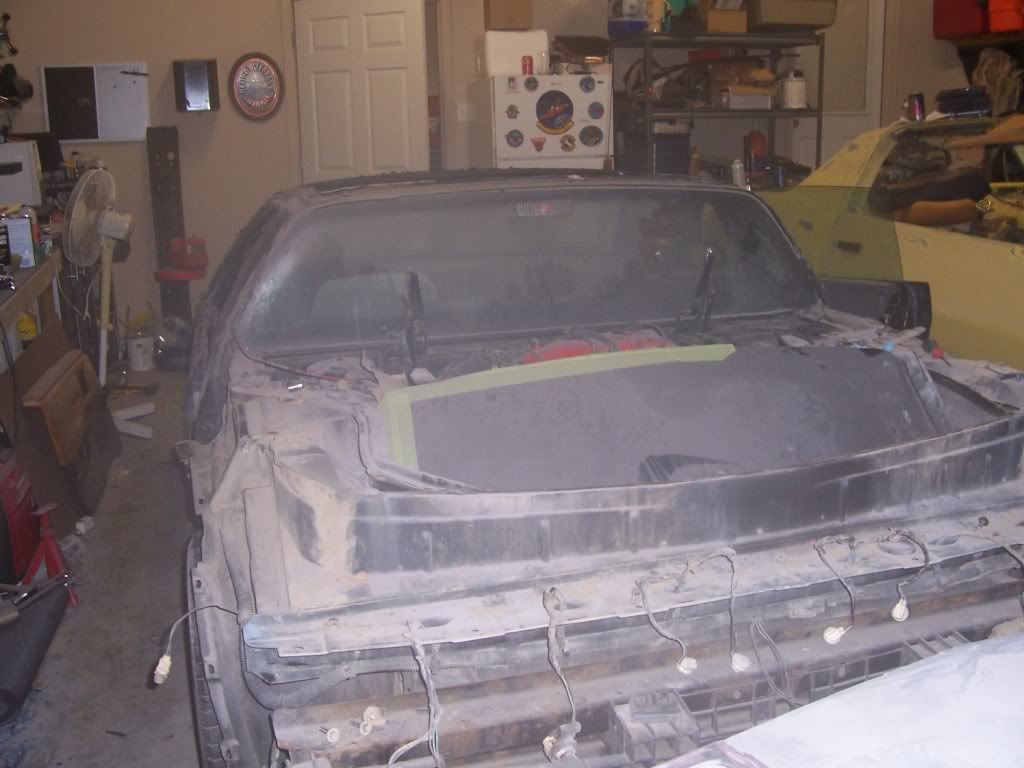
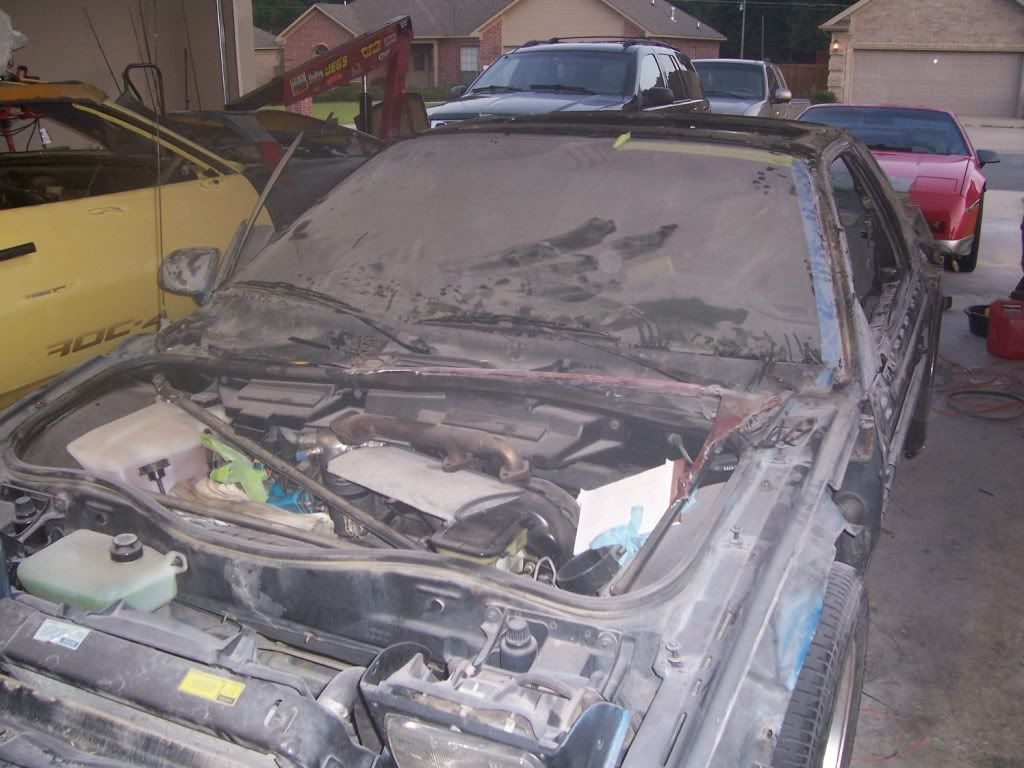
Here is the bare car from the back:
and the front:
In the back of the last pic you can see the 86 GT that is next on the hit list. Thank Herbert for posting the pics man. I am glad you got that one of me relaxing leaning against the IROC LOL
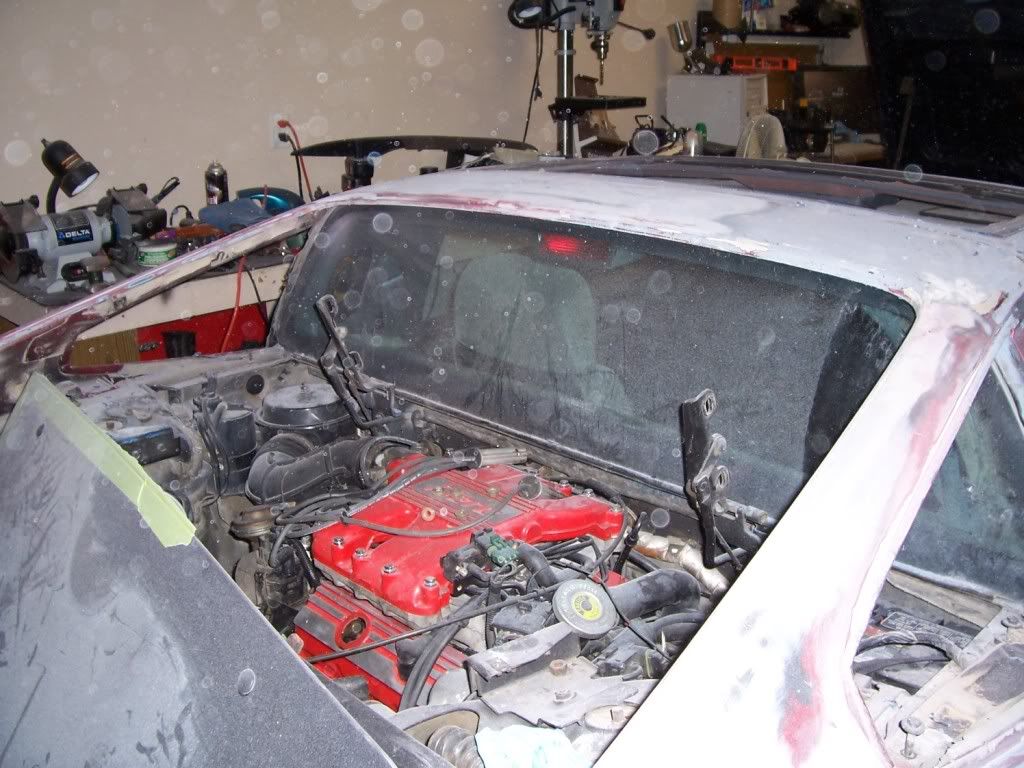
Jeez I didn't know you were that far ahead. I see you managed to get the windshield's skin off without breaking it (although I can't say the same for the skin itself... ...)
IP: Logged
01:15 PM
ARFiero Member
Posts: 1262 From: Savannah, GA Registered: May 2008
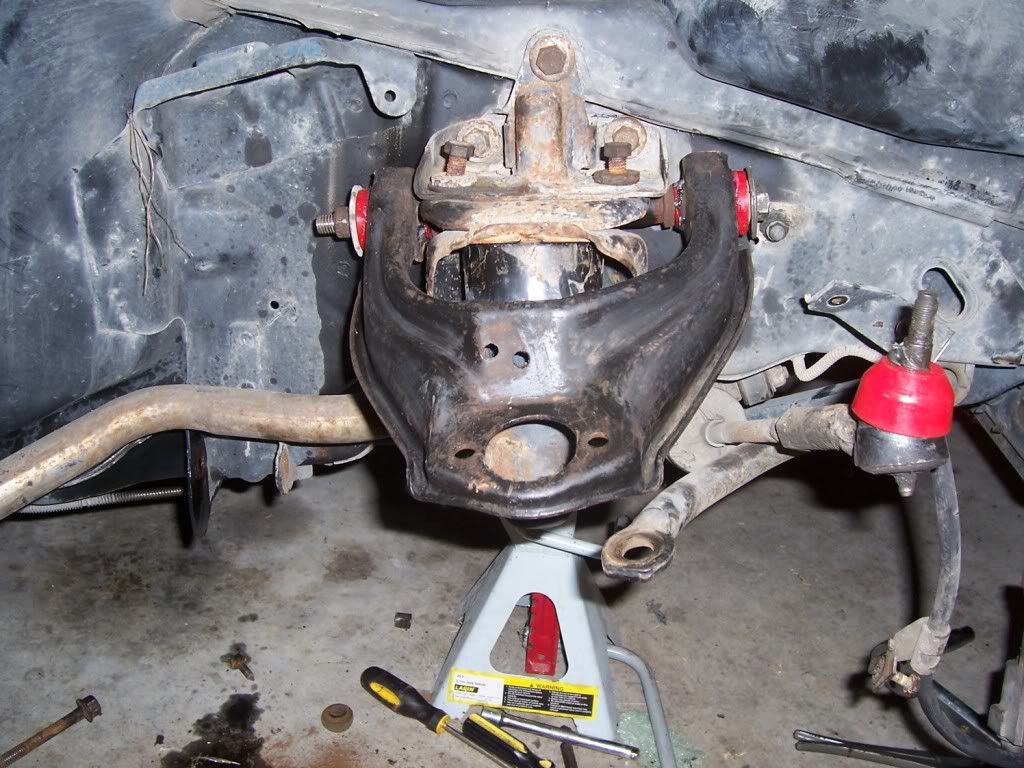
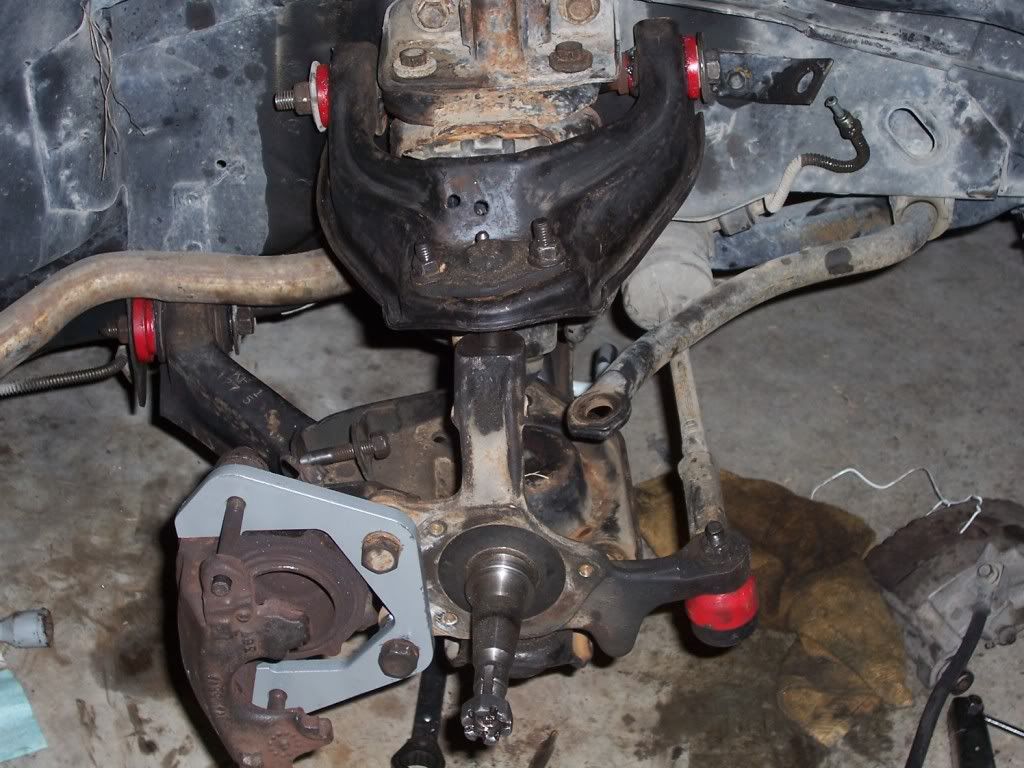
Ok been awhile since I posted anything on the build but I have been working dilligently. I started the poly-urethane bushing swap today and also the Le Baron brake upgrade.
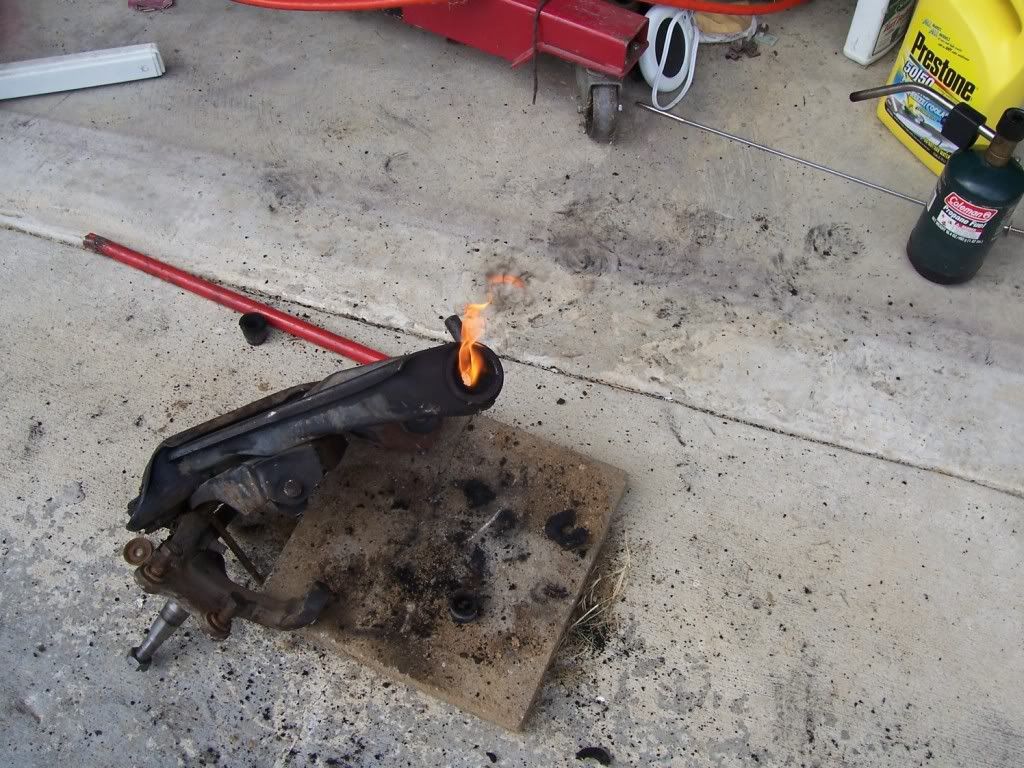
First was to get the old brakes off and since this has been covered a few thousand times I won't cover how it's done. Next you need to remove the upper ball joint from the spindle and hopefully you have the right pickle for for this; if not Autozone rents a set of them to get the job done right. Now you need to remove the spring and you can use spring compressors and if you are not cool with this I certainly say you should but I put pressure on the lower A-arm to compress the spring slightly with a hydraulic jack and when I released the upper ball joint I lowered the jack slowly to release all the pressure off the spring. If you do it my way be careful when you pull it out as you will bind up the spring a little and it could give you a little shot in the chest or lower. Now I hope that your bushings have been changed since the car was new when you do this because mine weren't. I love having to hammer out the long upper A-arn bolt due to it rusting itself solid to the inner sleeve of the bushing. After I got it out I took it and the lower A-arm (it was no more fun or easy than the upper one) I offered a burnt sacrife to the Poly-urethane gods so that my bushing install would go smoothy (and thanks to everyone here who said freeze the bushings it did). Here is pic of the burning sacrifice:
After I completed cleaning out the charred rubber and running some sand paper in the to ensure smooth surface I greesed the bushings and slid them in. and bolted them back in. As you can see from the photo above I started to install and test fit the brake upgrade parts but I have not yet had the rotor cut down to make the hub and I need to get a new upper ball joint.
When I got done with the passenger front I wanted nothing to do with suspension for the rest of the day due to injuries (thing severly bruised thumb and several lacerations on the hand) I decided to start working on some exterior mods I am doing. In this picture I started to putty and sand the scoops I got from Fierocarparts (thanks Steve) and make them smooth. I used glaze and spot fill due to most of the minor spots on here are very shallow and I didn't feel the need to coat the whole thing in bondo. These are AusFiero scoops and I love them. Now to let you know the nicks and pits in these is not from AusFiero's manufacturing or anything like that it just seems the owner that had these beforemyself and Steve didn't take really good care of them but nothing that can's be filled and sanded.
The next fiberglass part that I need to add some glazing to is this:
I got this off E-bay for $79.00 total deliverd to my door from an E-bay store that was fantastic to deal with and even upgraded my shipping for free. Well thats all for tonight I'll probably post more tomorrow evening. Have a great night and thanks for looking.
Shelby
[This message has been edited by ARFiero (edited 08-29-2009).]
Ok new word on the working of the 87 GT. I am now working with a guy who is selling me a 94 Bonneville SSEi Supercharged for 500 Locally. He has agreed to let me make some payments to him for the price of the car and he really like the idea of the engine going into the Fiero. I will have pictures of the car and the Fiero in the air (with the obligatory me in the engine bay shot) as soon as I get the car and it starts to warm up. This is just an update to keep everyone on track as to where I am.
Shelby
IP: Logged
08:53 PM
Feb 13th, 2010
ARFiero Member
Posts: 1262 From: Savannah, GA Registered: May 2008
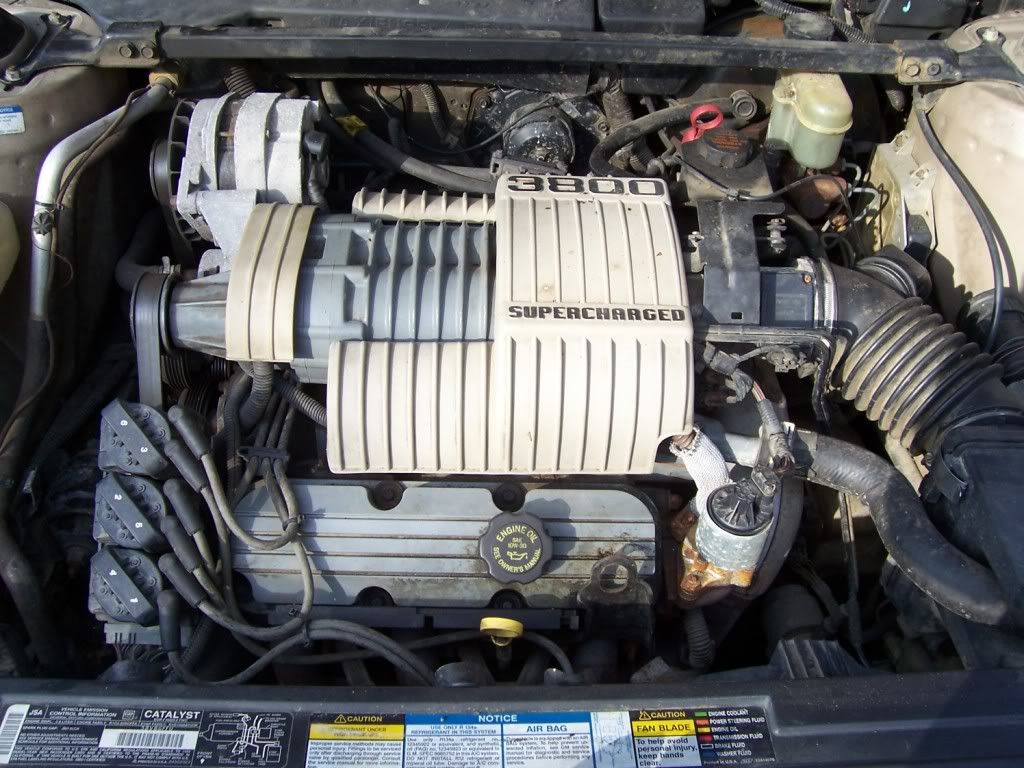
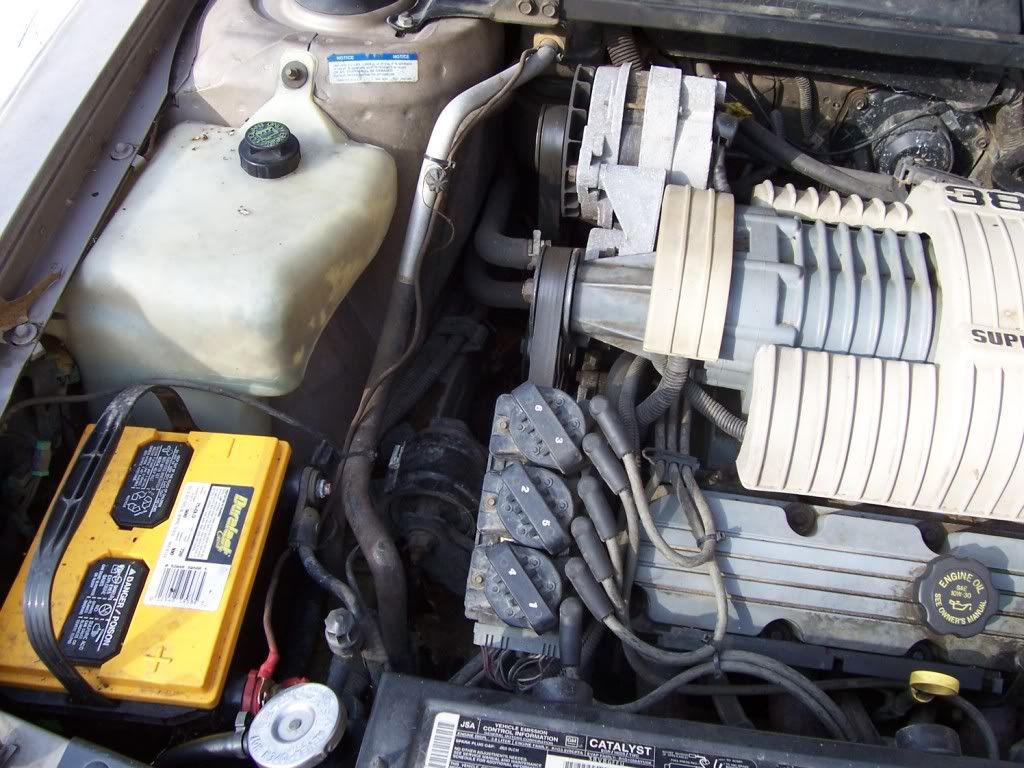
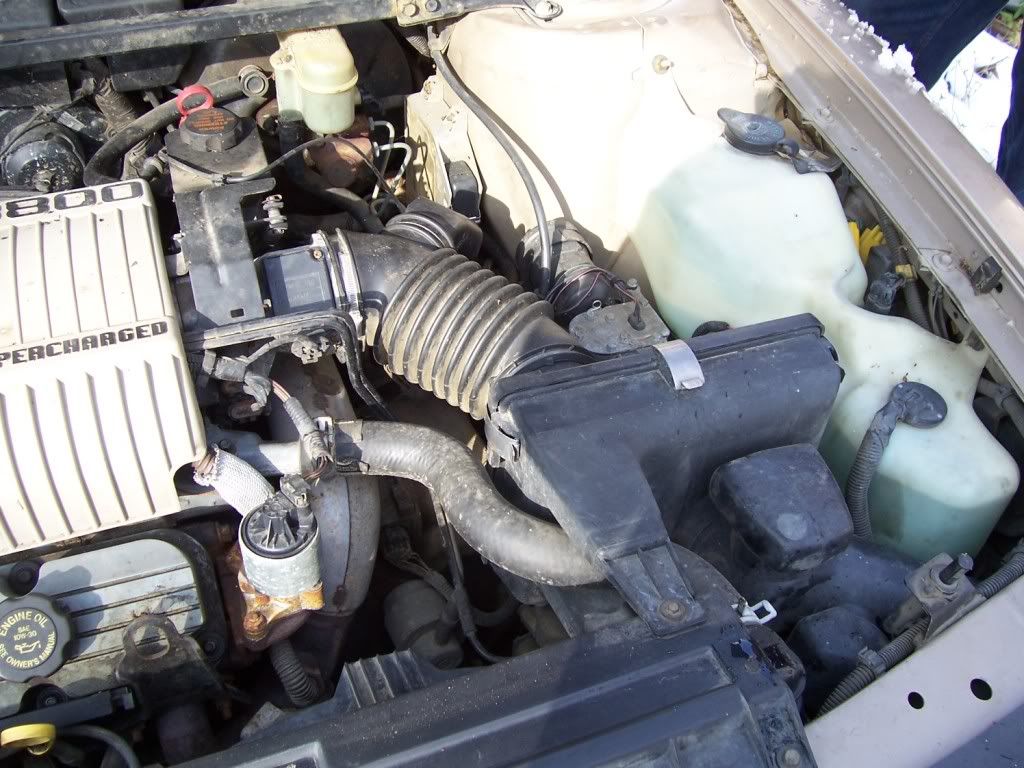
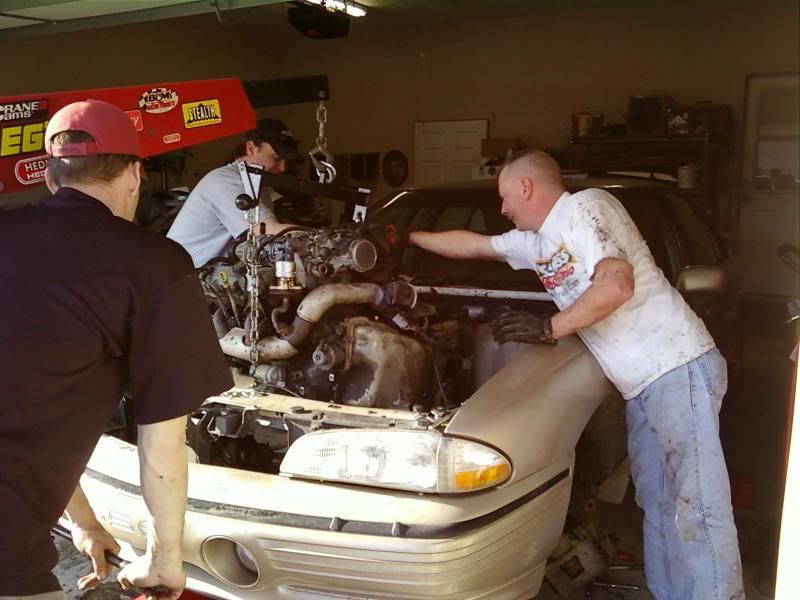
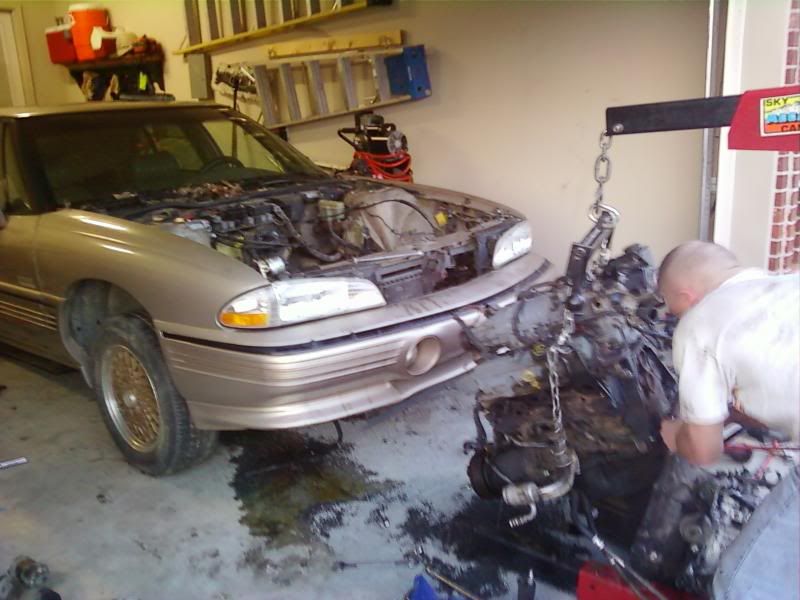
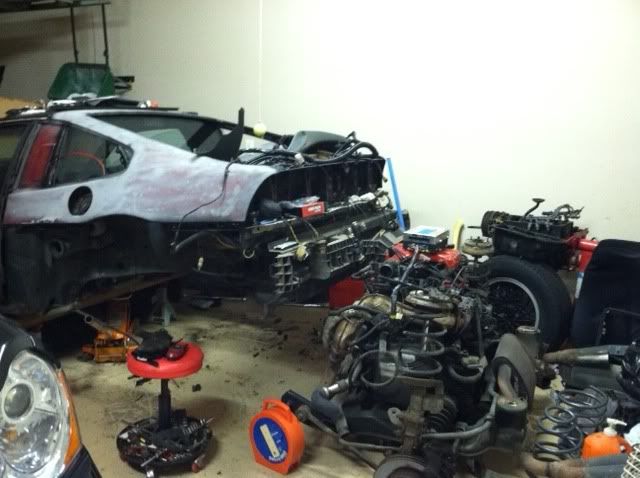
Ok here is an update. With the much appreciated help from Fiero84Freak, Rich, and Shane we got the engine pulled from the Bonneville and seperated from the transmission. Seems like they put about a 2 gallons or so of fluid into the tranny as it just kept dumping fluid on my garage floor. I haven't pulled the engine apart but we beilieve I got lucky and stumbled on a recently rebuilt engine as the exhaust manifold bolts came right out without even a fight and the flex plate to crank bolts were not extremely hard to pull off either. We also noticed some orange RTV sealant on the intake to block surface. Also the head gaskets that you can see are still very pliable so here is hoping on that. As I was inspectiong the block I checked for play on the snout of the supercharger and it was solid. The heads are clean as is the block with on a little dirt and road grime but no real oil leaks. This is strange for a car that registers 197K on the odometer. I will crack this thing open tomorrow and take a good look at it. Pictures to follow later when my back isn't sore from leaning over the car all day. Thanks for looking.
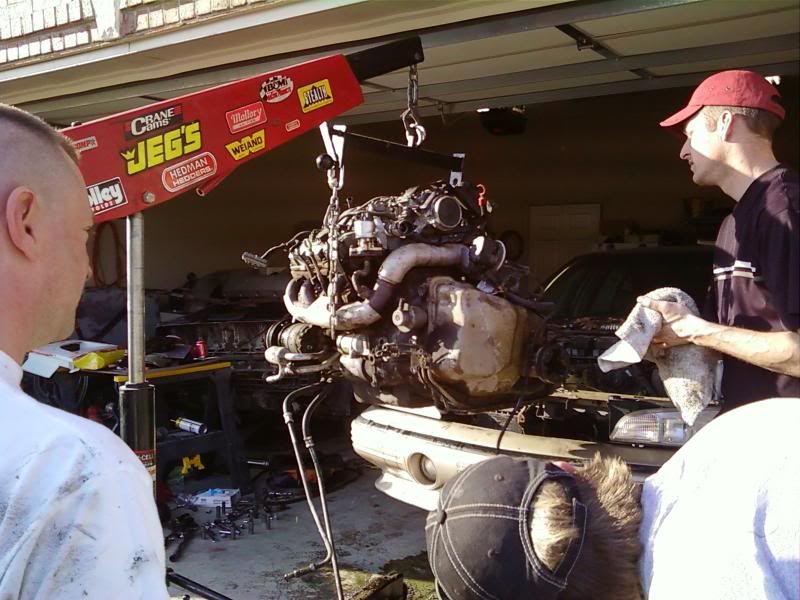
Pulling the 3800SC out of the Bonneville. Shelby's on the right side of the pic, Shane on the otherside, Rich handling the crane, me doing the hard work behind the camera.
Success!! You can see bits of the specimen in the background that's going to get this beast.
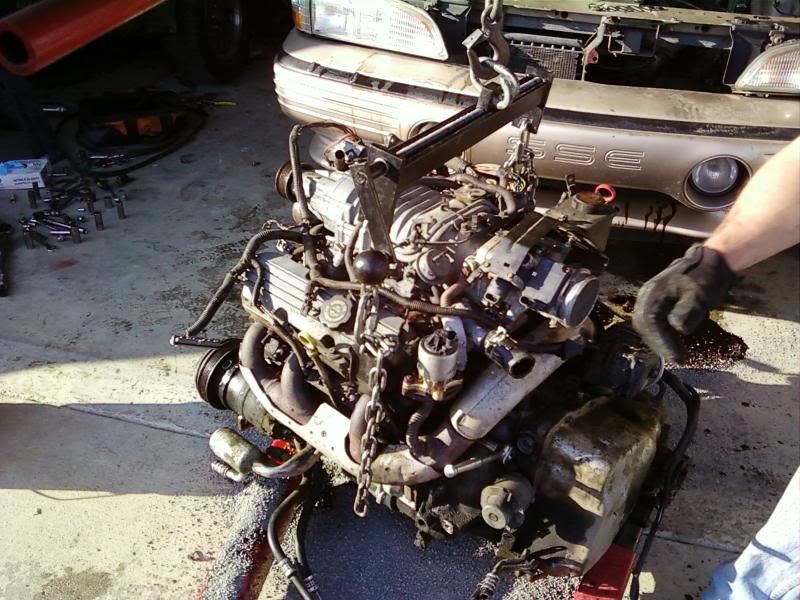
Off the cherry picker.
Clean-up begins!
Hopefully next either Shelby will be showing up tear down of the 3800 or we'll be pulling the Fiero cradle with more purdy pict-ters.
[This message has been edited by Fiero84Freak (edited 03-09-2010).]
IP: Logged
07:14 PM
PFF
System Bot
KurtAKX Member
Posts: 4008 From: West Bloomfield, MI Registered: Feb 2002
Herb thanks for the pictures...I didn't even know you were taking them LOL Folks don't let Herb fool you..he was working his butt off...payment for all the beer he has drank in the past LOL
The hoist is an Ex-Cell 2 ton hoist. I looked for them on the web but didn't find them except on E-bay and craigslist adds. The front boom extends out and the legs won't fold up. This unit takes up more room but it is about as sturdy as they come especially helpful is the leveler that has ball bearings that turns like butter.
Shelby
[This message has been edited by ARFiero (edited 03-10-2010).]
IP: Logged
02:05 AM
Mar 13th, 2010
ARFiero Member
Posts: 1262 From: Savannah, GA Registered: May 2008
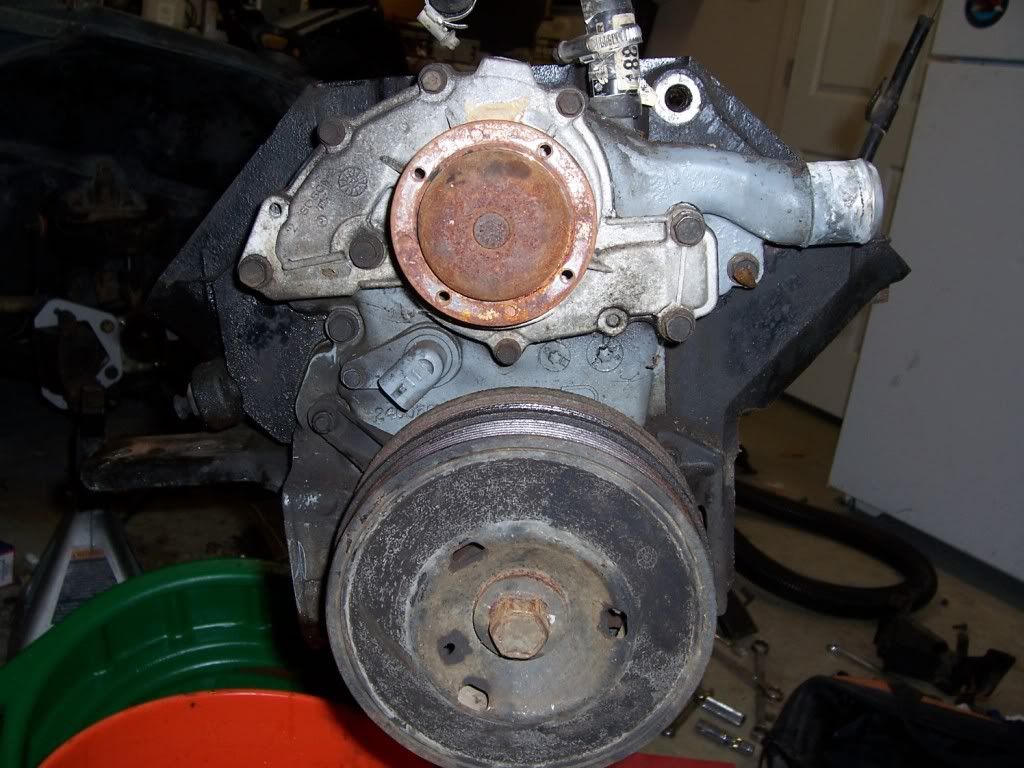
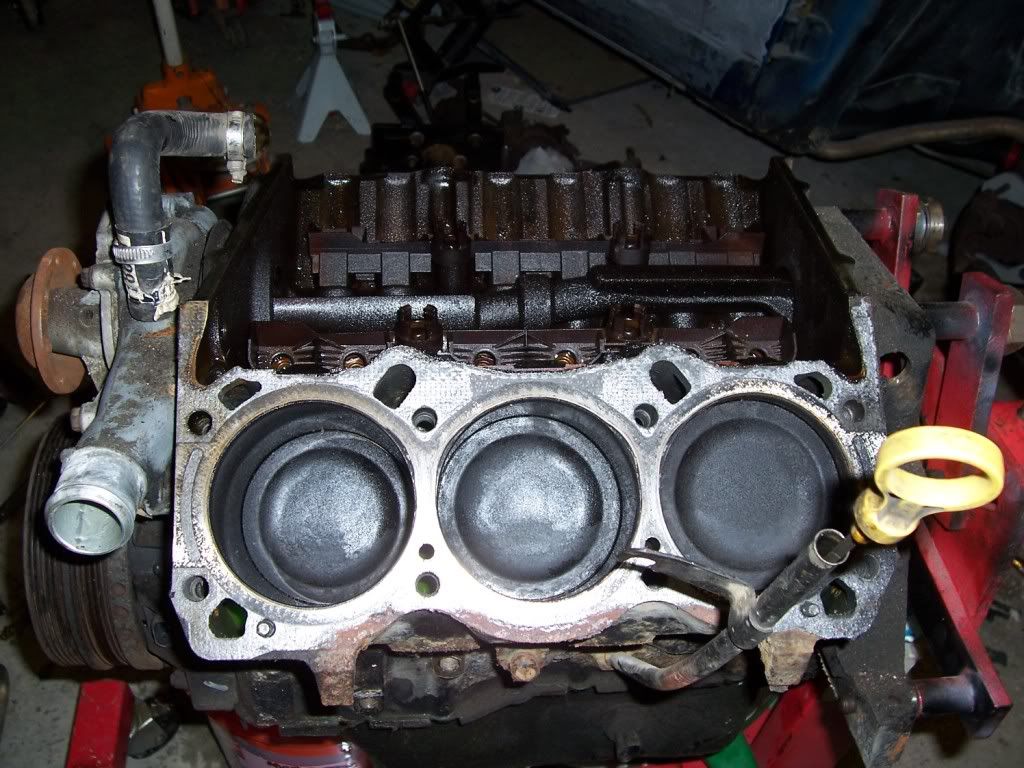
Ok I pulled the engine apart today and had a good look at what was inside. When I pulled the valve covers off one head looked amazing and the other look good:
Here ar some othe pictures of the engine as it sets right now:
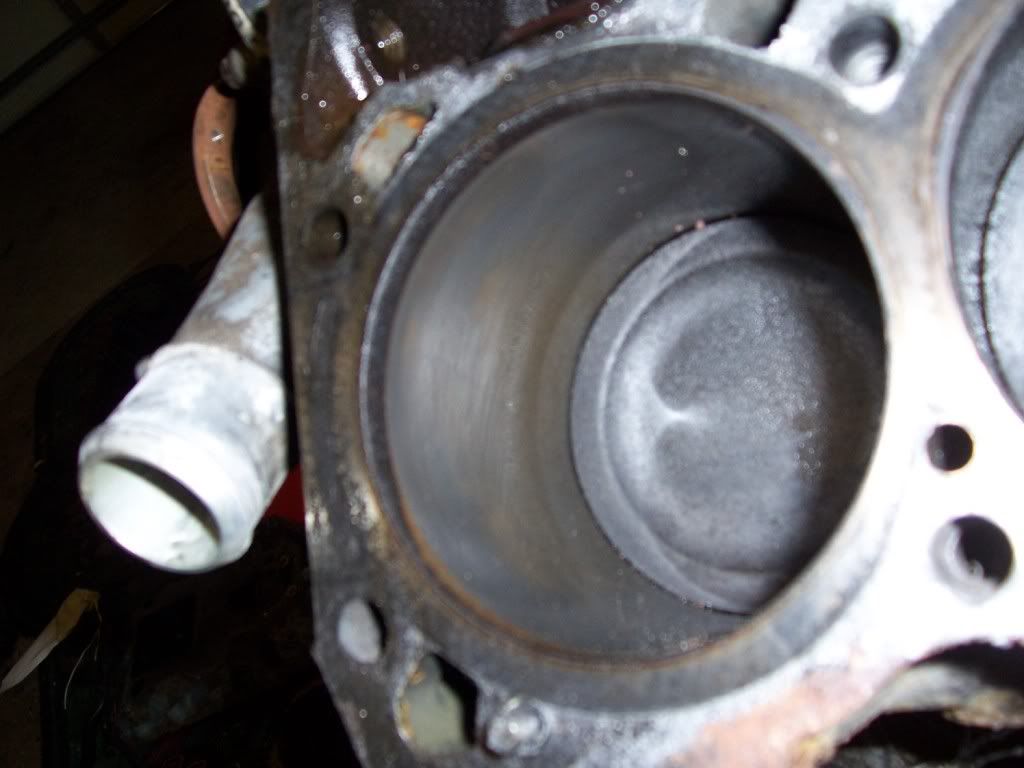
No I have a question. What is the original bore size for the 3800SC Series one? I measured 3.80" with my dial caliper and am not sure if it's stock size as I looked it up but could not find the answer. In the cylinder bores I still see cross hatching (not brand new but I can see it) also there is no ridge built up at the top of the cylinder walls.
What are you folks opinions here? Re-ring and put new bearings on, take it down and do a complete rebuild, or button it up with new gaskets and call it even? Let me know as I am new to this particular engine. Thanks in advance and thanks for looking.
Shelby
Edit for blury picture
[This message has been edited by ARFiero (edited 03-13-2010).]
Originally posted by ARFiero: Now I have a question. What is the original bore size for the 3800SC Series one? I measured 3.80" with my dial caliper and am not sure if it's stock size as I looked it up but could not find the answer. In the cylinder bores I still see cross hatching (not brand new but I can see it) also there is no ridge built up at the top of the cylinder walls.
I know the 3300 is 3.70" stock, so it would make sense that the 3800 would be a bit more since it has higher displacement. That might be stock. If anything if it is the same as the 3300 then that means they just did a .10" bore over.
quote
Originally posted by ARFiero: What are you folks opinions here? Re-ring and put new bearings on, take it down and do a complete rebuild, or button it up with new gaskets and call it even? Let me know as I am new to this particular engine. Thanks in advance and thanks for looking.
It doesn't appear that you need a complete rebuild Shelby. It looks to be in good shape. Maybe a 3800 SC expert will chime in here, but if you plan on just running stock boost for now it should hold up.
[This message has been edited by Fiero84Freak (edited 03-13-2010).]
IP: Logged
05:58 PM
Apr 3rd, 2010
ARFiero Member
Posts: 1262 From: Savannah, GA Registered: May 2008
Ok so I went out today with the intention of cleaning the garage around the Fiero so I would have more room to work and wound up doing this instead:
Thanks to skitime for showing me the 4x4 method of lifting the car as this is what I did and it worked tremedously plus for him. I also received the Ford V6 exhaust manifolds and will take them down to have them retro-fitted later. I also received this x2:
My new heat extractors (stealing SoulCrushers idea).
Well, Shelby hasn't updated in a while and there is a reason why. Obviously not to let loose anyone's personal business but lets just say for now Shelby's project at least here is put on an indefinite hold, as he will be traveling and living overseas.
However, that's not to say that the work done here is ultimately a lost cause. Obviously Shelby put a good deal of money and time into acquiring many of the parts you have seen in this thread. While I don't have the room to store everything, I did agree to store some of the major body work pieces that he bought, his LeBaron brake kit, his dash, and other little tid bits he wants to save. The 3800 SC he is planning on selling, as well as the Fiero chassis and original drivetrain. Also as the '87 GT is being disposed of, I have now acquired most all of the body work from this car other than the bottom quarters and the front fender and will be utilizing a good deal of the parts to place onto my '88 Formula to create a full fastback conversion.
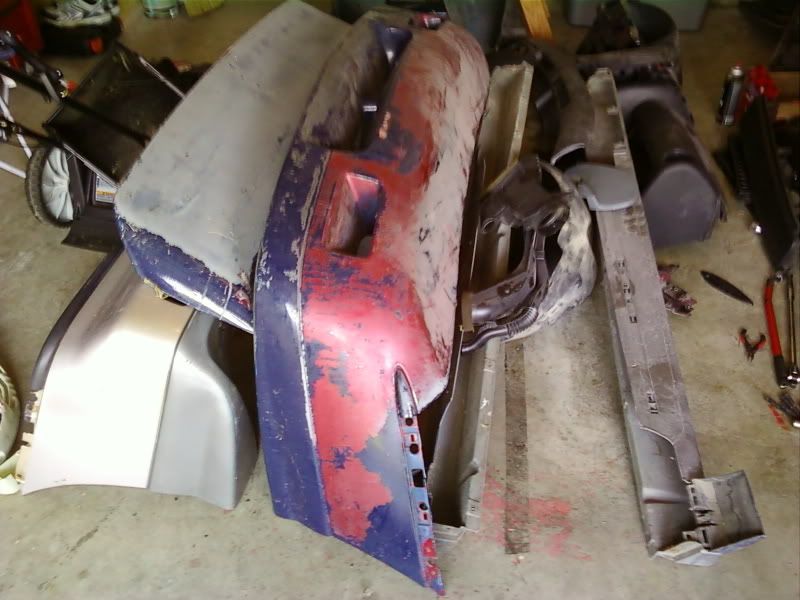
Some of the body work he's saving. Stu dew wipes, Mustang scoop, and a really nice set of side scoops and accompanying rockers.
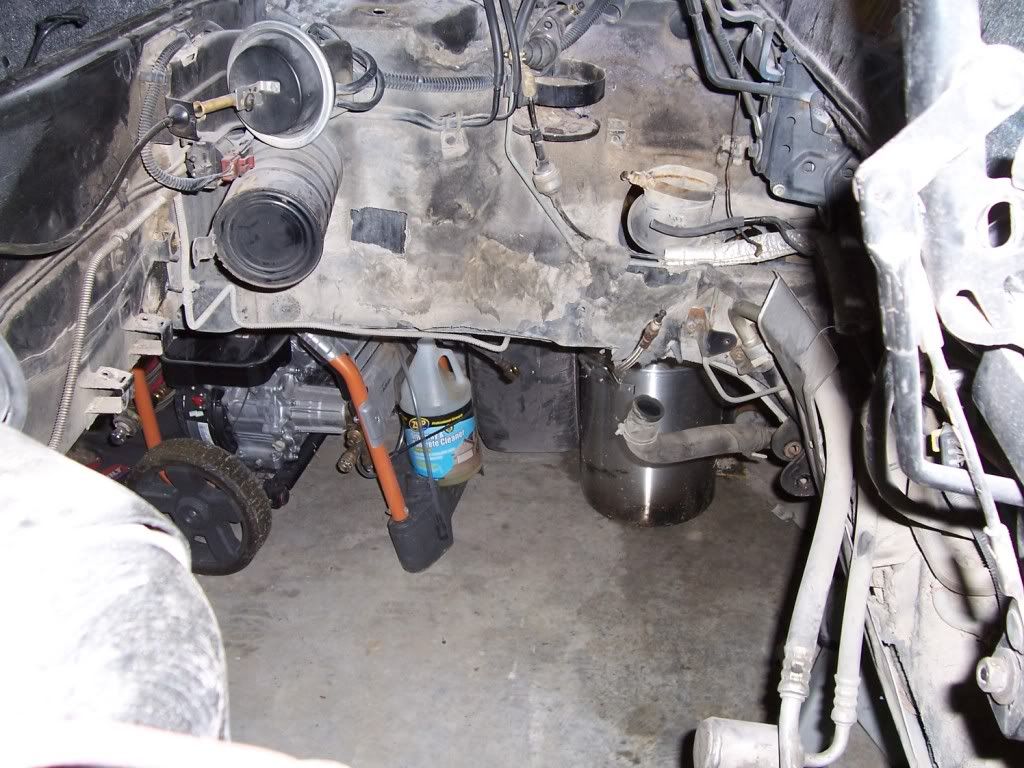
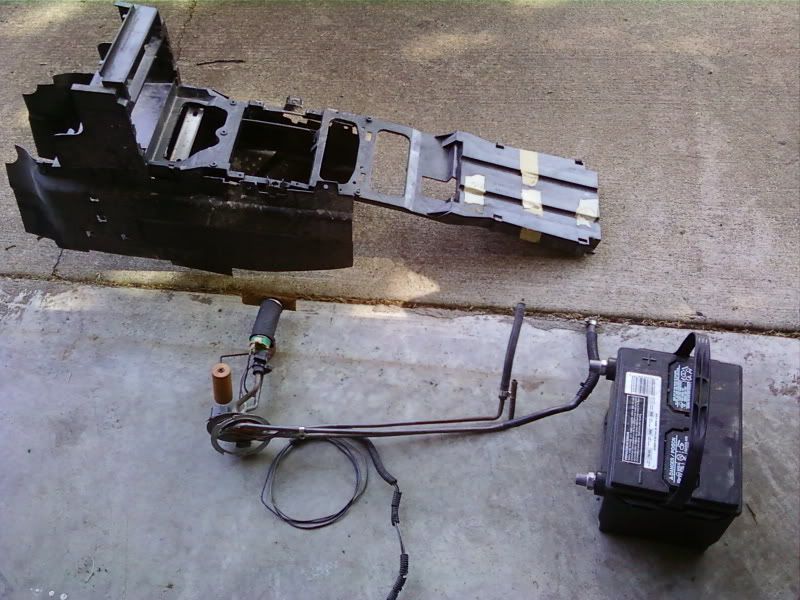
Goodies I acquired. Non-broken console skeleton, new battery (only hooked up once to check windows), and an accurate working fuel pump and sending unit assembly.
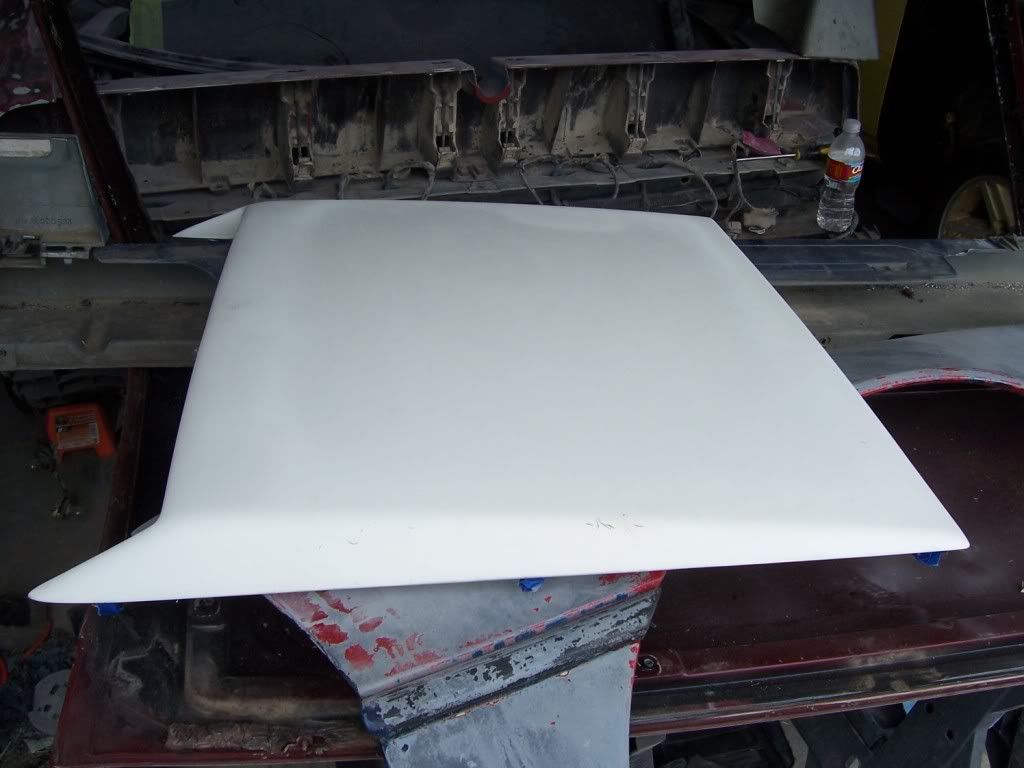
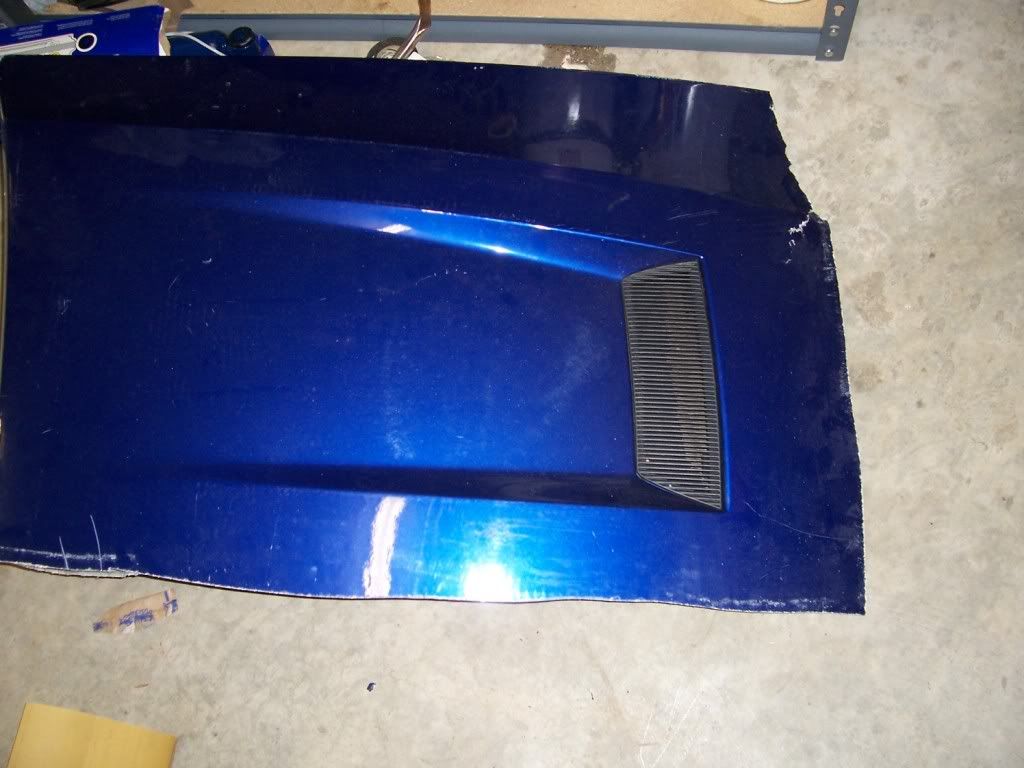
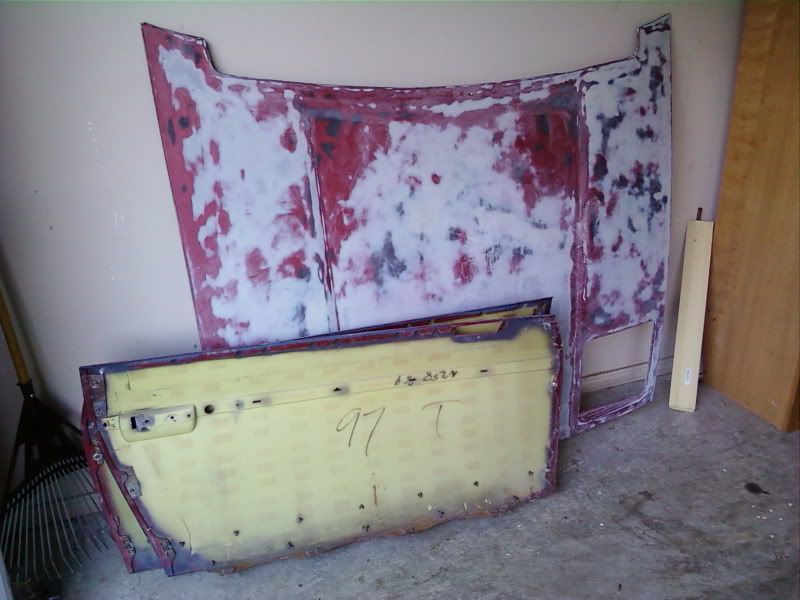
Spare hood and door skins with gfx pieces. I plan on using the hood to create a vent and flushmounts.
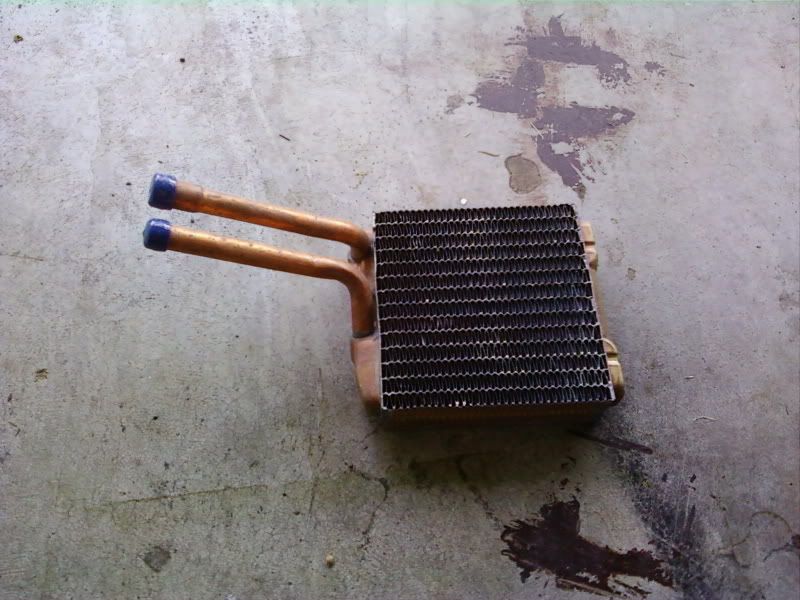
Basically brand new heater core.
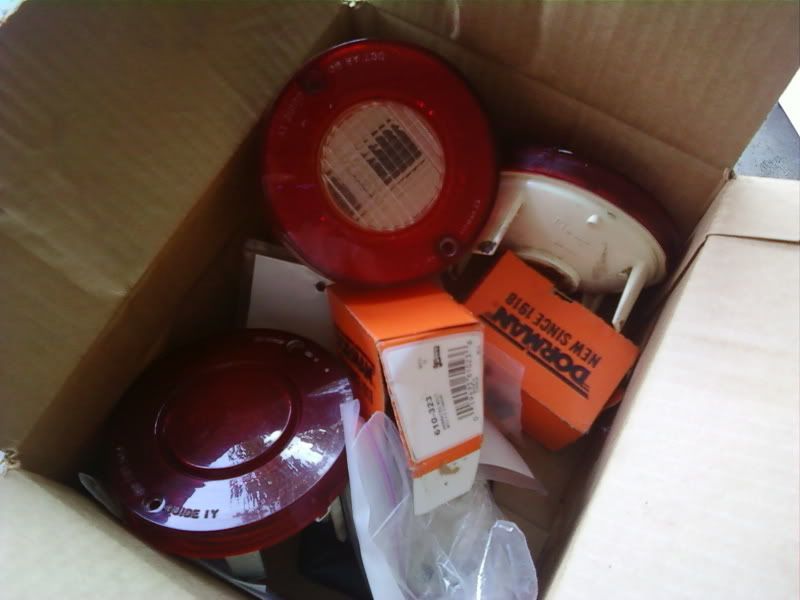
Shelby's 'vette lights and other misc parts he's keeping.
Shelby's LeBaron brake kit that he is keeping.
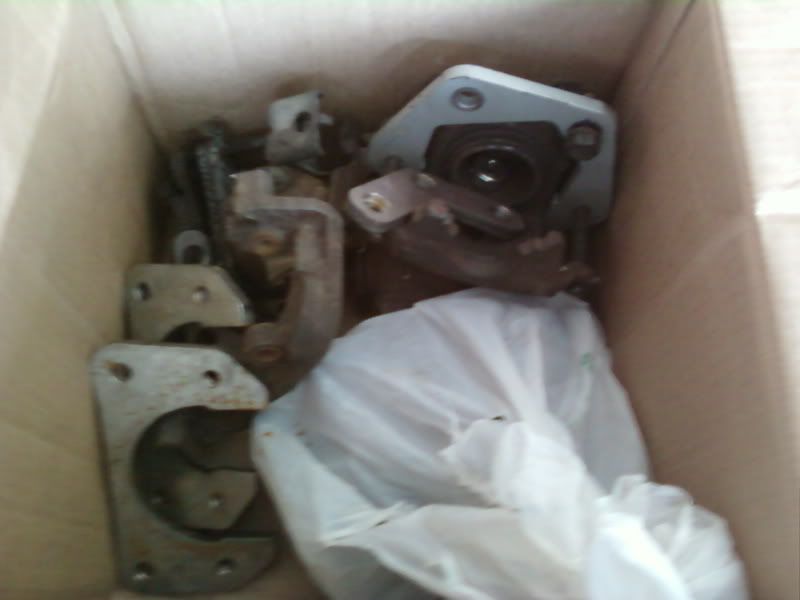
Some of the other misc components I have acquired. You can probably identify everything there. The battery tray is NOS OEM part.
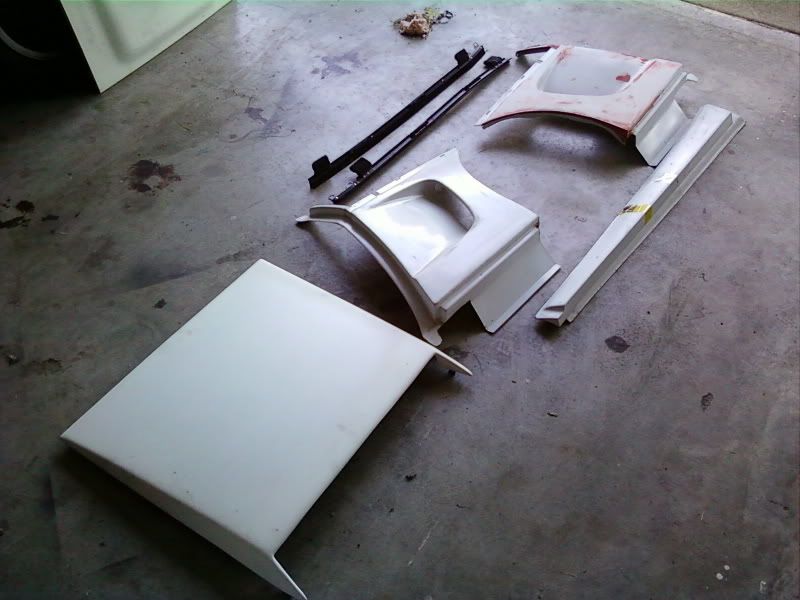
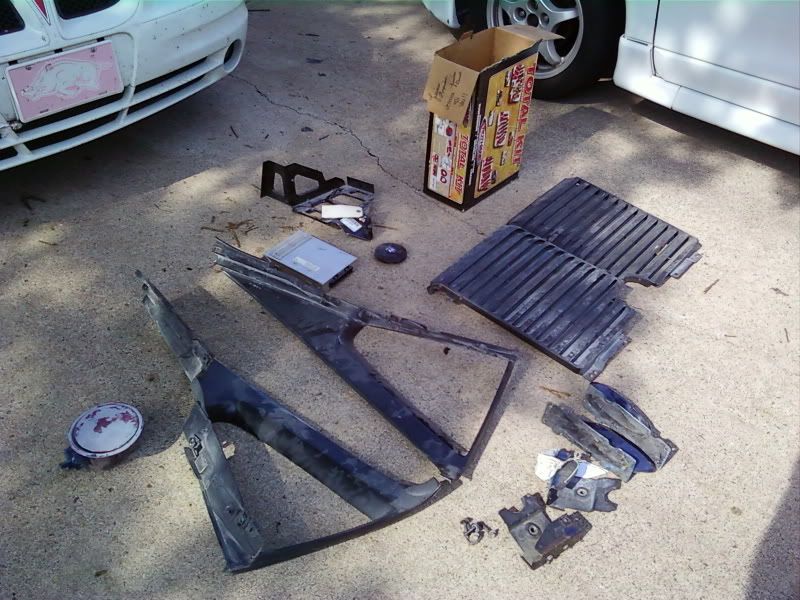
Front and rear GT fascias, spoiler, Firebird interior parts, and other misc pieces.
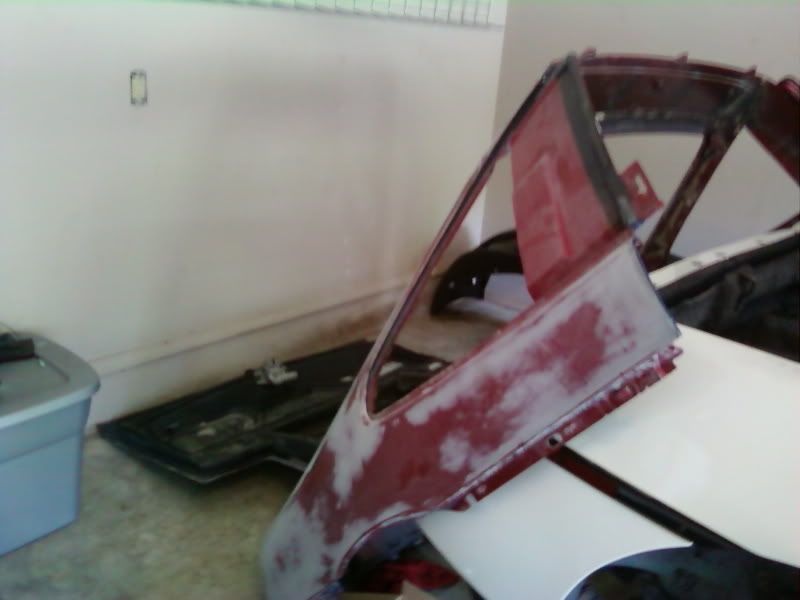
Fastback clip and rear decklid. You can see my '88 Formula victim that will get all the body goodies.
Thankfully I have a fastback GT to see how everything will fit.
Heh... wishful thinking here
Some other components not shown include a now complete nearly new GT steering wheel (now that I have the horn button) and other small things to round out the body work.
So hopefully I will have my own thread soon showing the work on the Formula that will be done eventually.
[This message has been edited by Fiero84Freak (edited 07-04-2010).]
IP: Logged
12:44 PM
Jan 4th, 2011
ARFiero Member
Posts: 1262 From: Savannah, GA Registered: May 2008
Ok..well the orders I had to Germany were cancelled so I am back to my projects. Well since the 87 GT is gone and I sold my 86 GT to someone (who will remain nameless...Fiero84Freak) I will be buying his 88 Formula from him to finish what I have started. In work for this car is the Trans Am dash conversion with the 3800SC put into it's engine bay along with all the other parts you have seen. Stay tuned I'll get pics of the car when I get it into my garage.
Shelby
IP: Logged
10:22 PM
Oct 9th, 2011
ARFiero Member
Posts: 1262 From: Savannah, GA Registered: May 2008
Ok well it's been awhile since I posted as I have been busy with work and life. I had to put the project on hold for a little bit as I got orders to Japan but again they got cancelled so I am on the project again. Well I pulled the engine from the Formula to start getting prepped for the 3800SC install.
I have a buyer for the 2.8 maybe but if that falls through I might just part it out.
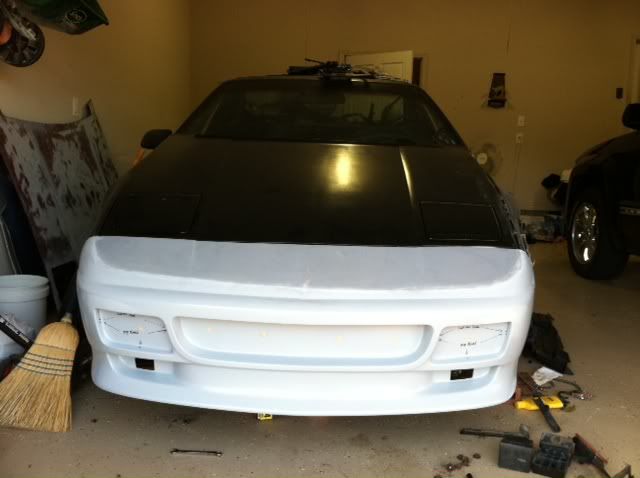
I received from the Greyhound guys a gigantic package and put it on the car to see what ya'll think.
I love the way this looks on the car. Pictures do not do it justice! Thanks Amida for a fantastic piece!
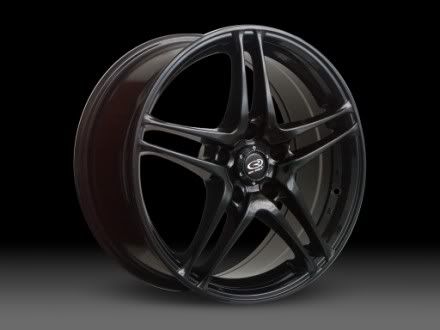
I found the rims I would like to put on the car. I have decided to go with a white for the color and use these:
Shelby
[This message has been edited by ARFiero (edited 10-09-2011).]


 Although I really like his dash swap. This car is gonna be pretty nice when it's done.