Pennock's Fiero Forum Technical Discussion & Questions - Archive
Engine Removed from my 87GT today, prepping to install my 4.9 V8 5spd. Lots of Pics. (Page 2)
T H I S I S A N A R C H I V E D T O P I C
Engine Removed from my 87GT today, prepping to install my 4.9 V8 5spd. Lots of Pics.
Fieroseverywhere, I am going to leave the speedo/tach stock, as I might use it in my 88GT as the tach reads 12% high. However thanks for the offer.
As to the exhaust, with the 4T60 auto, not having any major cables or slave brackets it should work just fine. The muffler is a Sebring Tuning Stainless muffler. Its about as long as the stock cat and about as wide, just taller. At idle its quieter than the stock V6, only earth shattering loud when I am WOT at higher rpms. Its great for scaring the Honda owners, they blap there fart tip, I blast my side pipe in there ear.
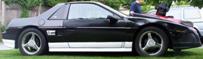
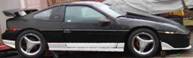
------------------ 85GT Soon to be 87GT,93 Eldorado 4.9, 5spd Dual O2 Custom Chip, Custom Exhaust. MSD Everything Capt Fiero --- My Over View Cadero Pics Yellow 88GT 5spd Full Poly Suspension, Lowered 1/2" in front, Corner Carver.
IP: Logged
12:30 AM
Carver1 Member
Posts: 2843 From: Edgewood, New Mexico Registered: Nov 2000
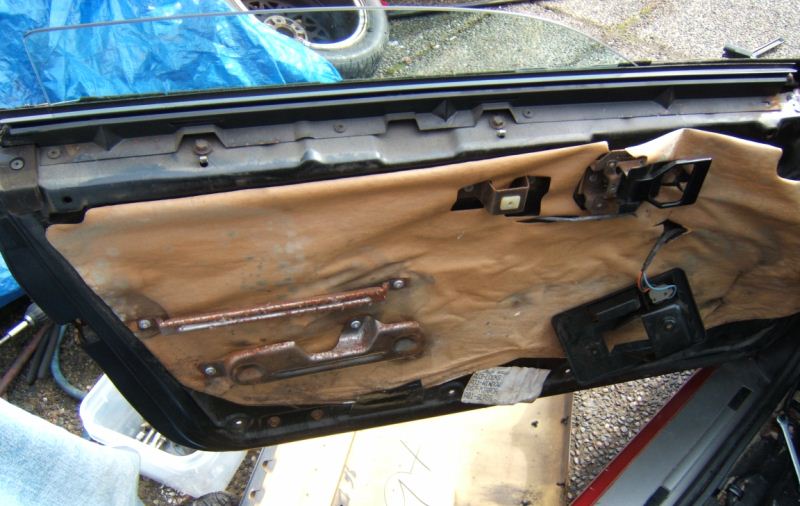
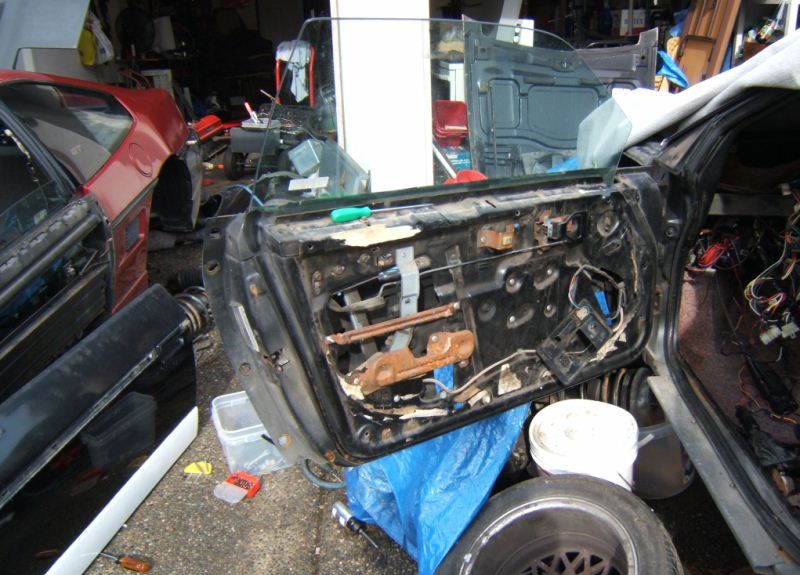
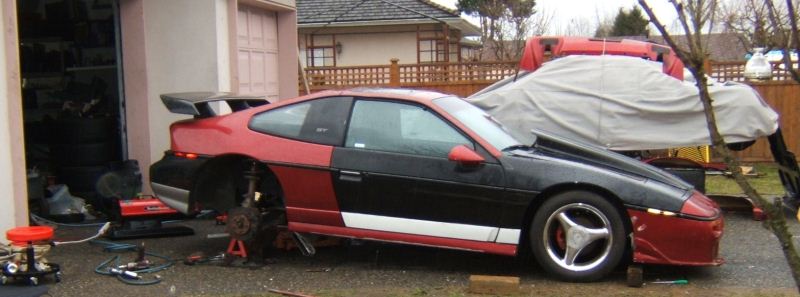
Every now and again, someone that feels they are an expert at working on something, has a moment, that makes them sit back and go WOW. I just learned something totally new. I had been fighting with myself over the issue of moving the 85GT doors to the 87GT or, skinning the 85GT and 87GT and swapping the inner/outer door panels and locks.
From work previous to dozens of Fiero's doing work on the lock rods can be a frustrating, time consuming task that leaves me with bloody cut up hands and tool throwing fits of rage. I talked to a few people that have done lock swaps in Fiero's and they gave me the same story, one of the biggest pain the butt jobs going. I was just about ready to say screw it and just swap the entire doors.
Then again after talking to a few more people that have done complete door swaps, gave me yet another horror story to think about. The doors over the years kinda mold them selfs to the cars. Getting a 20 year old door to line up perfect on a different 20 year old car, can be from difficult to near impossible.
Oh great so do I spend agony over the locks or years of frustration over doors that won't open/close perfect or have a major gap when closed.
I turned to the great knowledge base call PFF. Thanks to a couple helpful members pointing me to a thread that had a most awesome step by step on how to skin the doors, I decided that skinning would be far better than doors that don't seal.
I got the tools together and went out to the car. I had my Air-Punch to remove the pop rivets, and got started. Removal on the 85 is where I found the new piece of knowledge that made me go WOW.
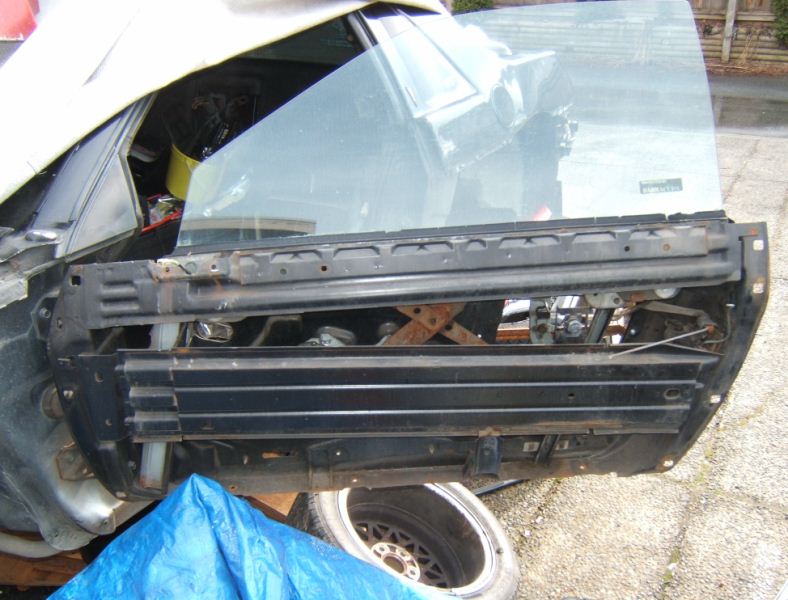
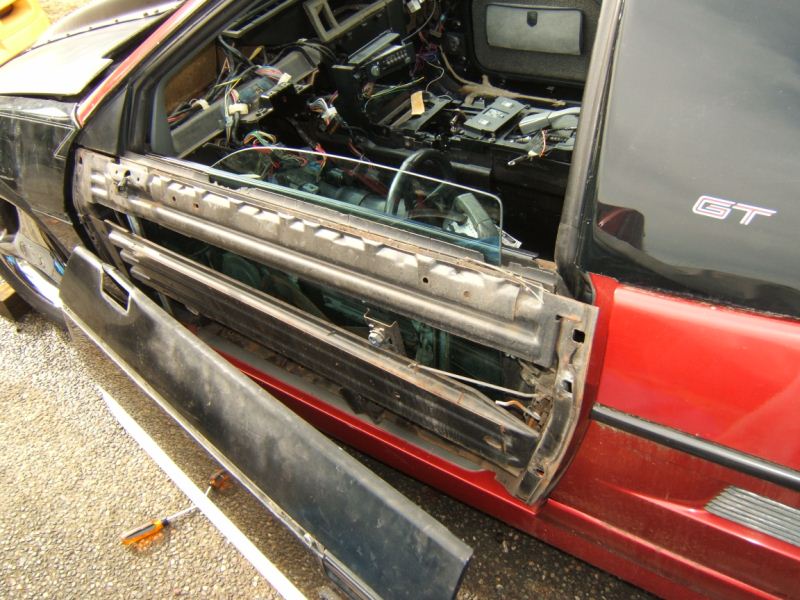
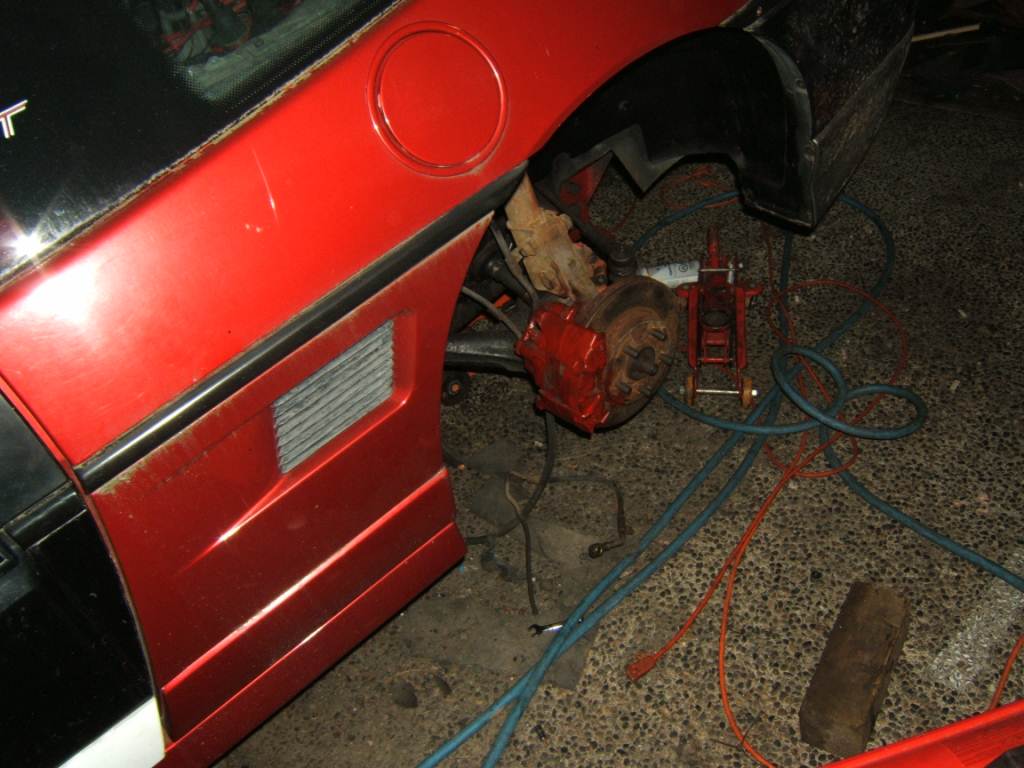
The lock is CONNECTED TO THE DOOR SKIN, not part of the door. Once you get all the skin screws off and rivets out, all you have to do is unhook two rods and the lock/tumbler pulls away with the door skin. I just about fell over with this piece of knowledge. I DON'T HAVE TO FIGHT THE LOCKS. Just pop the skin off the other door, slide this one on, hook up the 2 rods and its done. A job that I had planned for 2 full days of monkeying around, is only going to take 2hrs. WooHoo. Well here are todays pics. I was only able to spend about 2hrs on the car today as it started raining. So I did not have time to get the tools out, then get one door done, then get the tools put back away before I was soaked.
Inside of 87 door, was pleased to find the OEM paper was still on the inner door.
Insider of my 85 door. Paper has been gone for 10 years, and always had a bad draft
Impact beam, on the 85 door.
Skin removed on the 87 showing the 87's impact beam
All back together. Man that really changes the look of things.
------------------ 85GT Soon to be 87GT,93 Eldorado 4.9, 5spd Dual O2 Custom Chip, Custom Exhaust. MSD Everything Capt Fiero --- My Over View Cadero Pics Yellow 88GT 5spd Full Poly Suspension, Lowered 1/2" in front, Corner Carver.
IP: Logged
06:25 PM
joshh44 Member
Posts: 2166 From: Nanaimo, B.C, Canada Registered: Aug 2007
3 spoke wheels are really retro, and retro is coming back. They were hugely popular in the 80's them became passé in the 90's and a few years ago the Drift Cars started running them and at least here in the Richmond/Vancouver/Surrey area they are making a come back. I think they suit the cars RatRod look/style that I am building into it. They are 16x7.5 made by Miles wheel company that closed its doors in the late 90's. I have been trying to find a set of replacements, and believe it not the "name" is what is making the search really slow. If you go a google for Miles Wheels, or ebay car and search for Miles you get a bazillion results for this car has xxx.xxxx miles on it. Even in the rare time I find a set of these wheels, no one wants to sell just the centre caps. I hope to find some nice caps in a wrecking yard someday.
------------------ 85GT Soon to be 87GT,93 Eldorado 4.9, 5spd Dual O2 Custom Chip, Custom Exhaust. MSD Everything Capt Fiero --- My Over View Cadero Pics Yellow 88GT 5spd Full Poly Suspension, Lowered 1/2" in front, Corner Carver.
IP: Logged
07:04 PM
Feb 24th, 2009
Capt Fiero Member
Posts: 7657 From: British Columbia, Canada Registered: Feb 2000
Well most of the stuff today was non photo stuff. Swapped out the passenger side CV as it was toast, and a few other mechanical changes. The good stuff was I got the passenger side door skin on, and got the rear skin to finally line up with the aid of some heat, so know the marker lights are properly installed in the back. Also got the metal clips moved around so the front marker lights are installed.
Of note, the 85 Power windows use a different connector and even different colour wires than the 87 power mirrors. So I went ahead and used the 87 mirrors.
------------------ 85GT Soon to be 87GT,93 Eldorado 4.9, 5spd Dual O2 Custom Chip, Custom Exhaust. MSD Everything Capt Fiero --- My Over View Cadero Pics Yellow 88GT 5spd Full Poly Suspension, Lowered 1/2" in front, Corner Carver.
IP: Logged
07:34 PM
Fieroseverywhere Member
Posts: 4242 From: Gresham, Oregon USA Registered: Mar 2006
Of note, the 85 Power windows use a different connector and even different colour wires than the 87 power mirrors. So I went ahead and used the 87 mirrors.
You want to let that set of 85 mirrors go? I've been having a hell of a time with the manual mirrors in my 85. Apparently at some point during the previous owners possesion the mirror cables got wrapped around the edge of the window. The cables got all stretched out and now it won't work properly. Its really quite annoying. I'd love to give you some cash for a working set or we might be able to work out a trade if there is something you need that I have. Let me know.
Going to download that program now.
IP: Logged
07:54 PM
Feb 25th, 2009
Capt Fiero Member
Posts: 7657 From: British Columbia, Canada Registered: Feb 2000
Sorry I am not getting rid of the mirrors, with 1 85 and 3 86's still on the road here, I am going to hold on to them.
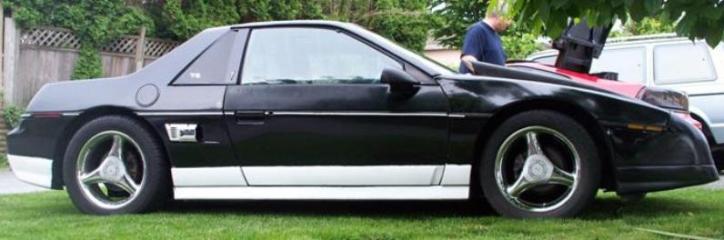
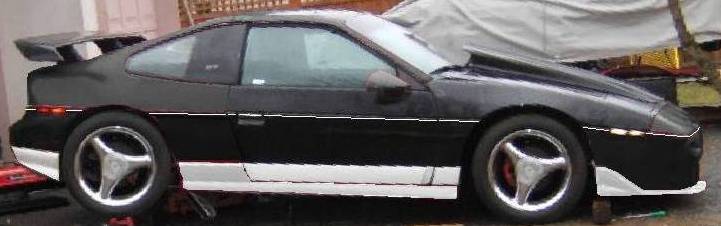
However to add to this thread, a friendly photo shopper in my home forum, did this up for me.
and
If you missed the original thread, where this whole thing started, its here, //www.fiero.nl/forum/Forum1/HTML/073587.html I am going to post a link at the end of that thread to this one.
My car as it was 85GT. (I had to invert the pic as I could not find a dead on side profile) Then my car as it will be once it's repainted.
------------------ 85GT Soon to be 87GT,93 Eldorado 4.9, 5spd Dual O2 Custom Chip, Custom Exhaust. MSD Everything Capt Fiero --- My Over View Cadero Pics Yellow 88GT 5spd Full Poly Suspension, Lowered 1/2" in front, Corner Carver.
[This message has been edited by Capt Fiero (edited 02-25-2009).]
IP: Logged
01:40 PM
Fieroseverywhere Member
Posts: 4242 From: Gresham, Oregon USA Registered: Mar 2006
So progress has slowed down a bit. Running out of time to work on it, and it snowed a couple days ago. It just melted off enough yesterday that I could go back to work on it this afternoon.
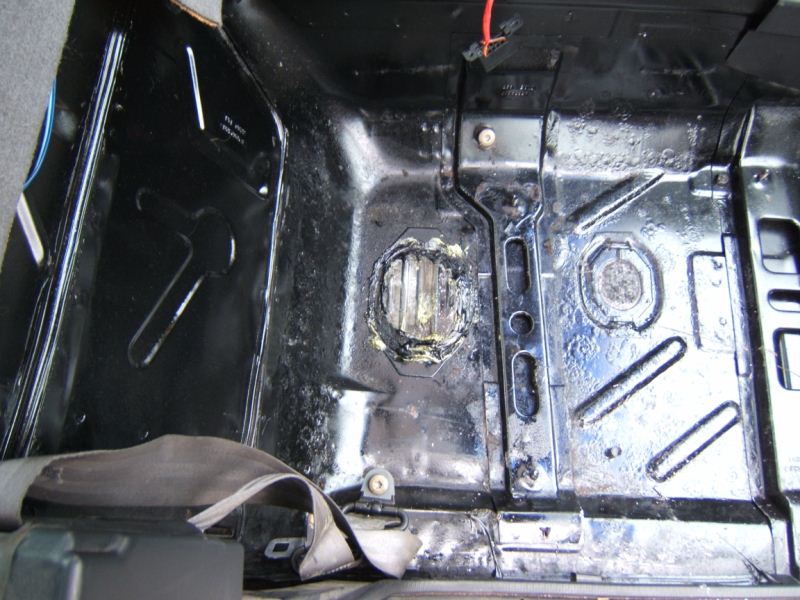
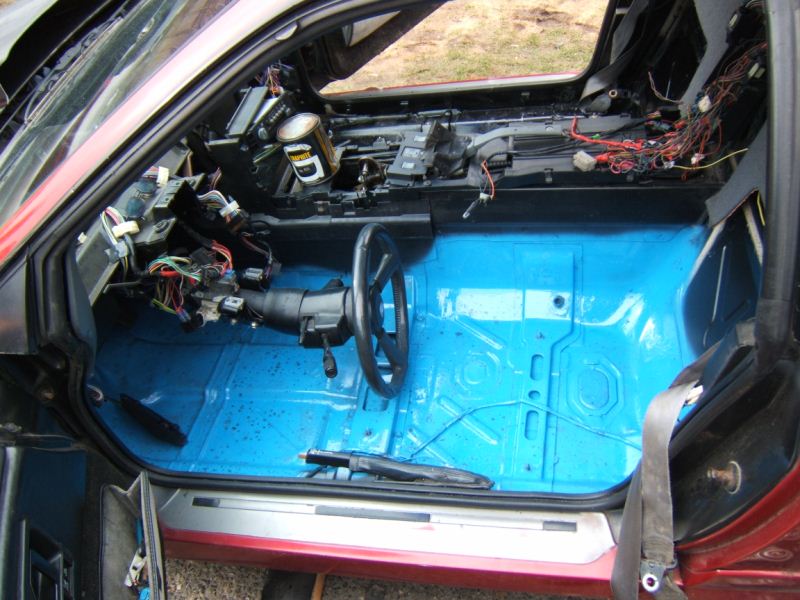
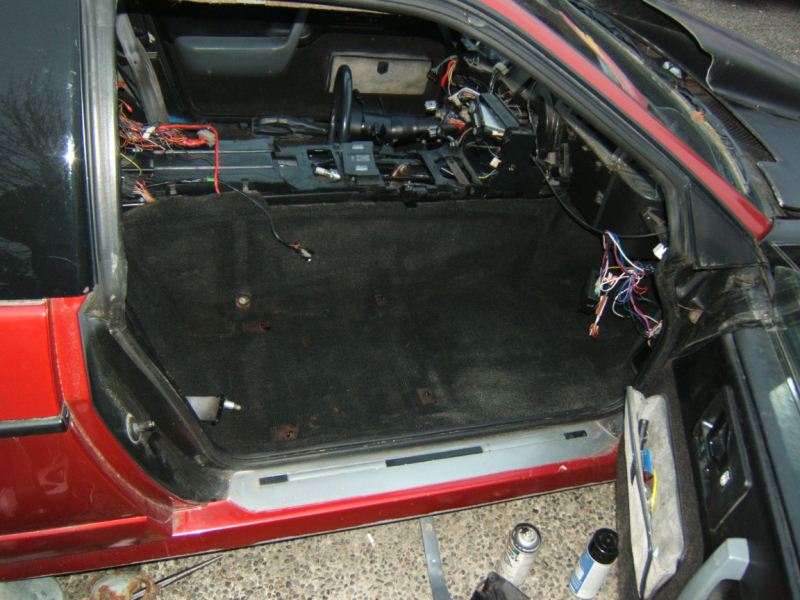
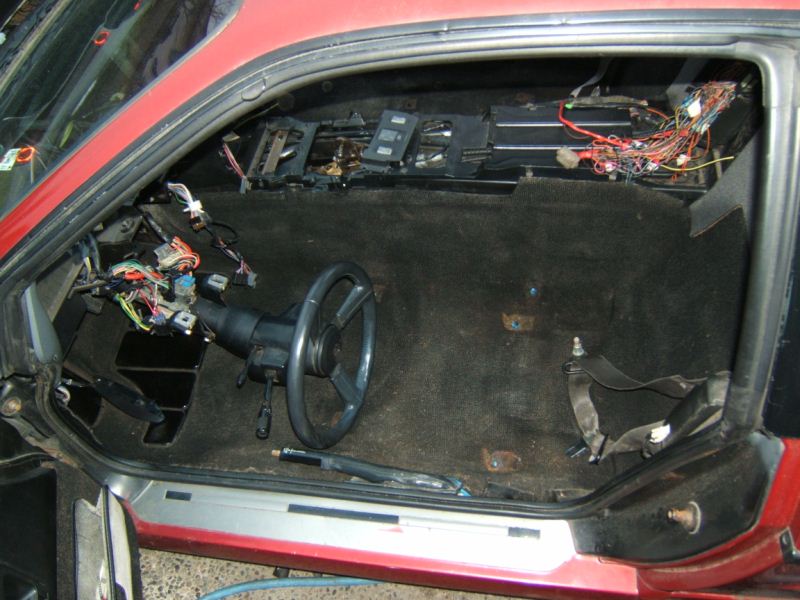
I almost did not post these as nothing got "finished" today. I ran out of dye for the carpets, but decided to get them in the car regardless and do the final dye with them installed. I LOST my good tail lights so I had to install the not so good ones. Passenger side door lock is still acting up. I am banging my head over it and can't figure out what the issue is. I am still trying to decide how to route the coolant hoses, another bang my head on the wall moment. About the only thing that went good today was the floor pan plugs in the 85GT are the same as the 87GT, so I was able to pop them out of the 85 and install them in the 87 then with a little bit of expanding foam and some black silicone locked them in place with no chance of leaking.
Well here are the pics from today.
Patch job on floor pan plug
Blue anti rust paint to prevent the floor pan from ever rusting. I was out of black and am using blue in the places that won't be seen later.
Passenger carpet re-installed
Drivers carpet installed.
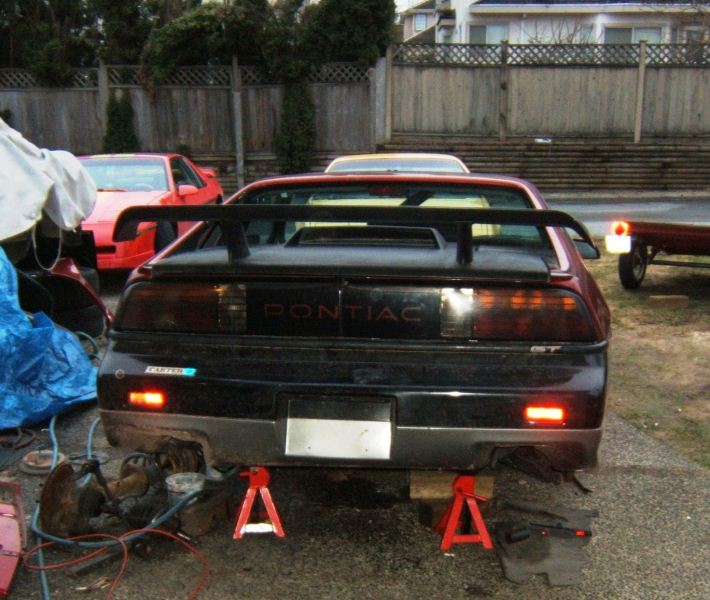
Rear lights installed.
------------------ 85GT Soon to be 87GT,93 Eldorado 4.9, 5spd Dual O2 Custom Chip, Custom Exhaust. MSD Everything Capt Fiero --- My Over View Cadero Pics Yellow 88GT 5spd Full Poly Suspension, Lowered 1/2" in front, Corner Carver.
[This message has been edited by Capt Fiero (edited 02-28-2009).]
IP: Logged
08:42 PM
Mar 1st, 2009
Capt Fiero Member
Posts: 7657 From: British Columbia, Canada Registered: Feb 2000
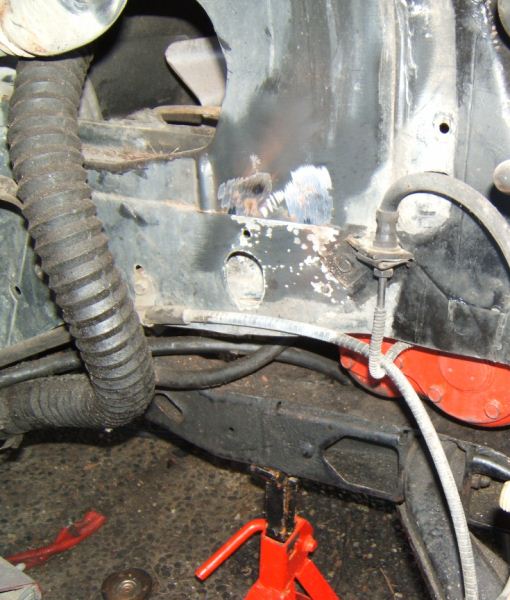
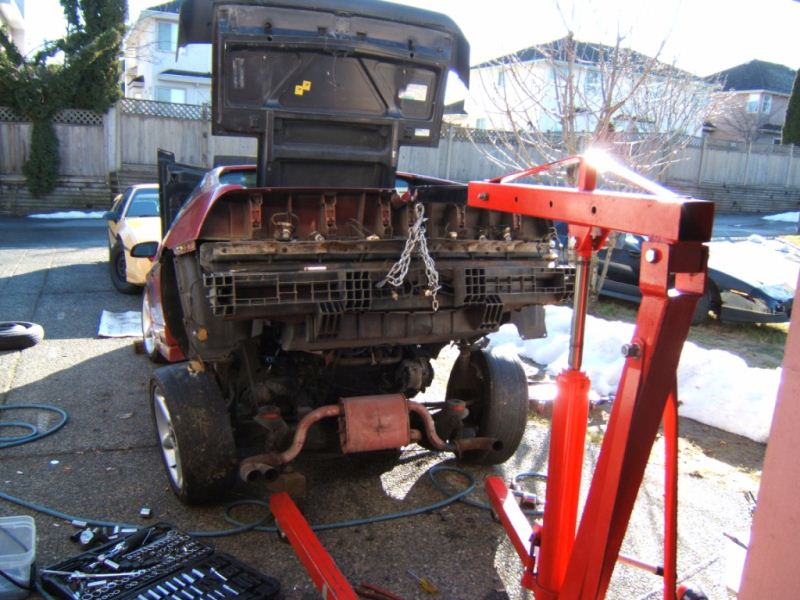
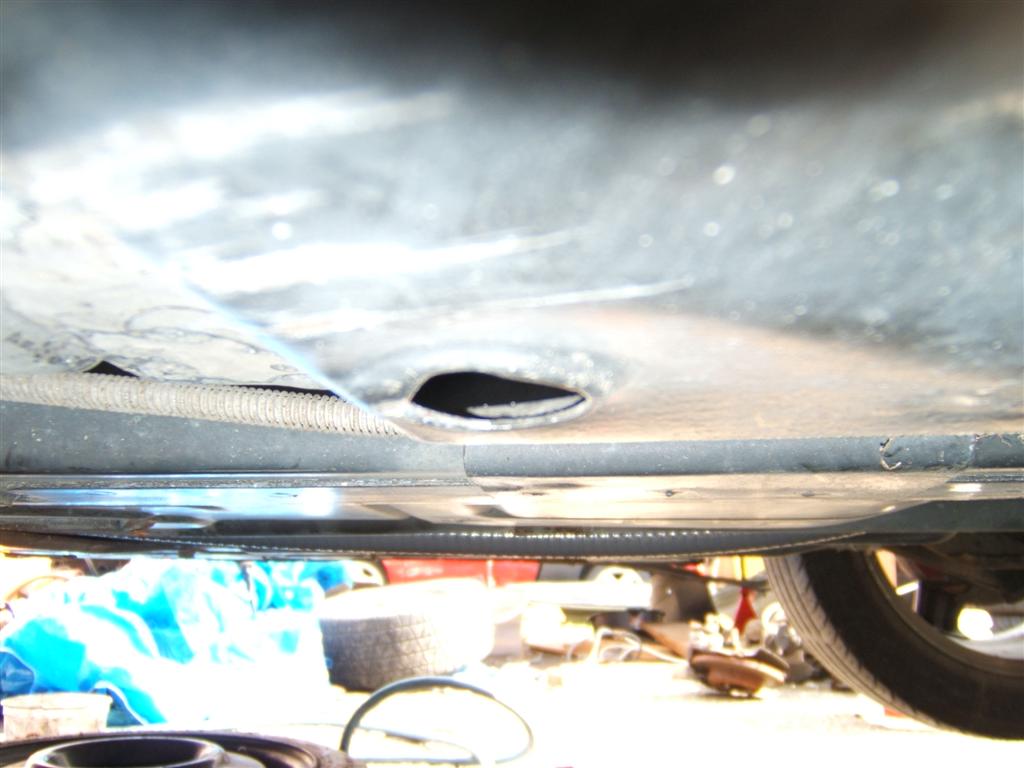
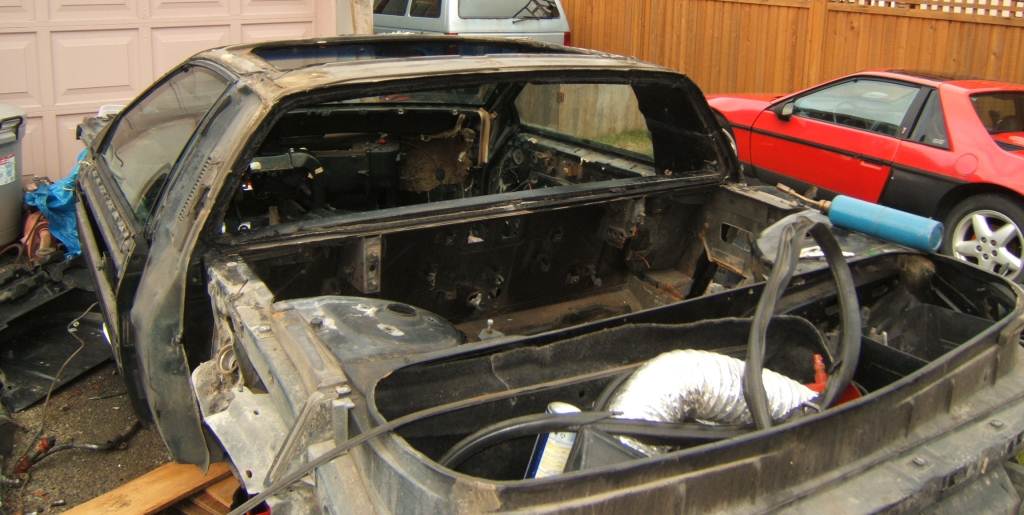
I got PISSED. I was just trying to do some small stuff today. Install the left rear suspension, CV shaft, sort out some power wires, was going to be a simple day. Until I got to Removal of the battery box. Sounds simple, its just tack welded in place. Should be a little grinding maybe a little wedge to pop the welds. YA RIGHT. I had a 5lb sledge hammer, 2 chisels, an Air Chisel, with nibbler attachment and punch attachment. A 4" angle grinder with a Zip Disk on it. That Bastard was not going to come out. IT was ripping out the metal on the car before it was going to come out. It was a nice looking battery box, but I needed it GONE. I needed the space for other things so it had to come out.
The removed battery tray.
The mess I left pulling it out
See lots of room now
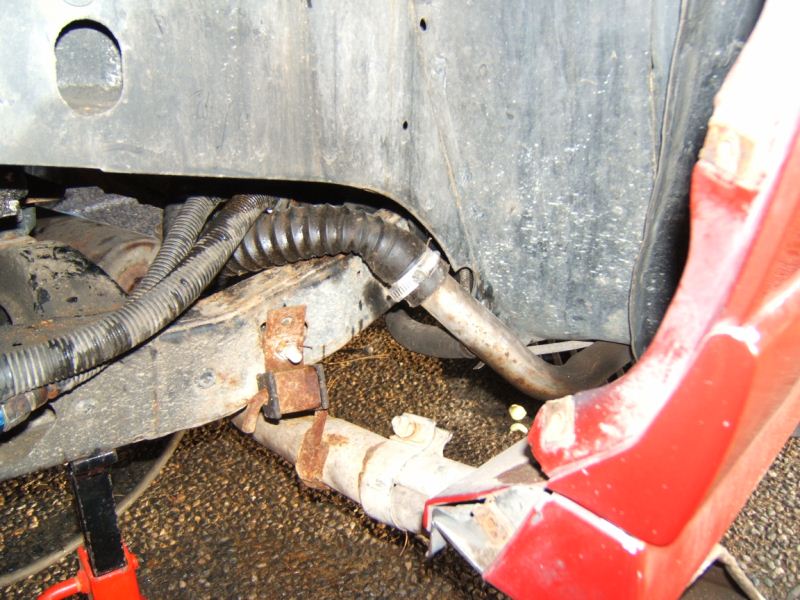
fuel lines with fittings laying in place.
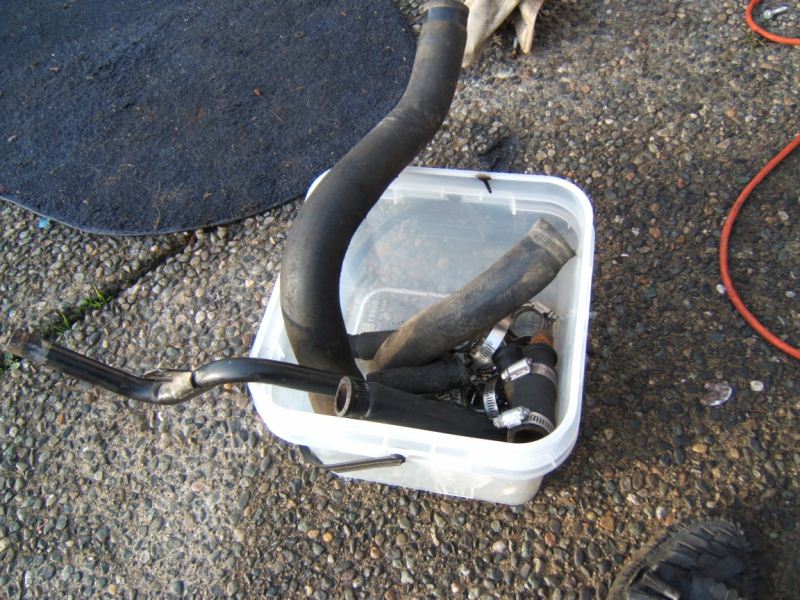
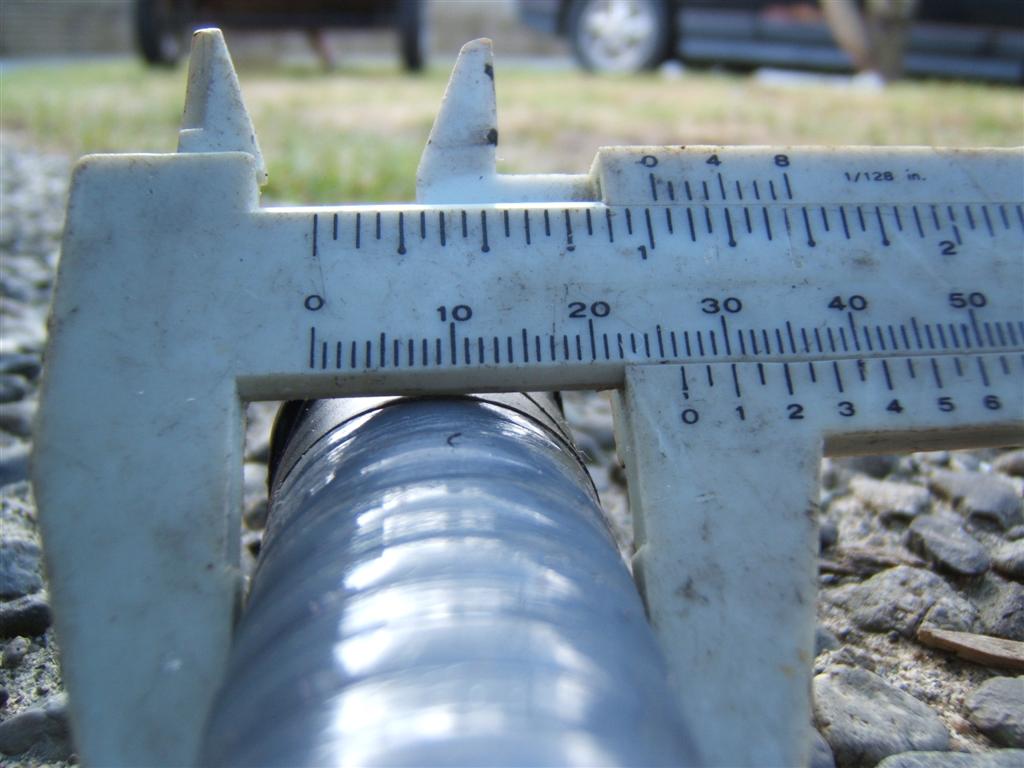
This crazy long pipe is actually from my 85GT and is my answer to getting the heater line from the trunk wall, all the way around the engine bay and back to the heater core line near the fuel tank.
------------------ 85GT Soon to be 87GT,93 Eldorado 4.9, 5spd Dual O2 Custom Chip, Custom Exhaust. MSD Everything Capt Fiero --- My Over View Cadero Pics Yellow 88GT 5spd Full Poly Suspension, Lowered 1/2" in front, Corner Carver.
IP: Logged
08:51 PM
PFF
System Bot
Mar 4th, 2009
Capt Fiero Member
Posts: 7657 From: British Columbia, Canada Registered: Feb 2000
OK so I got a bit more done today to the car. Really messy, but still made some progress.
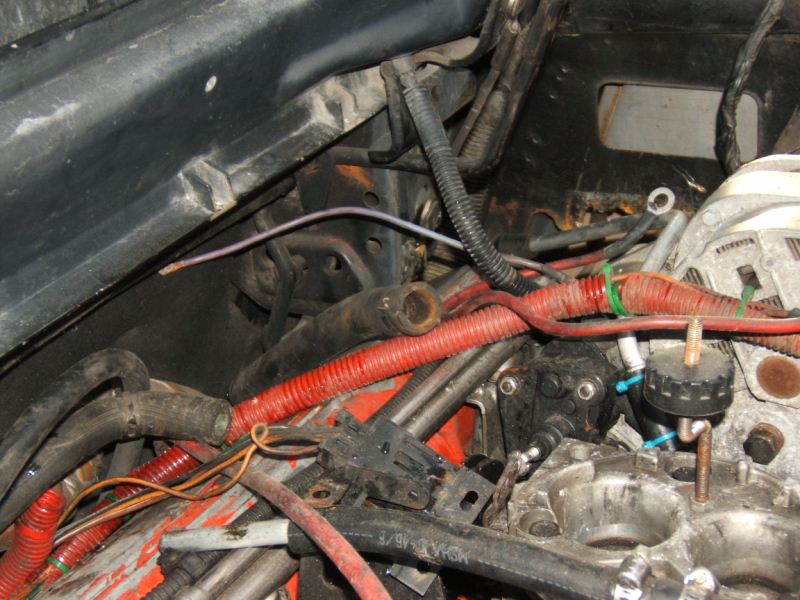
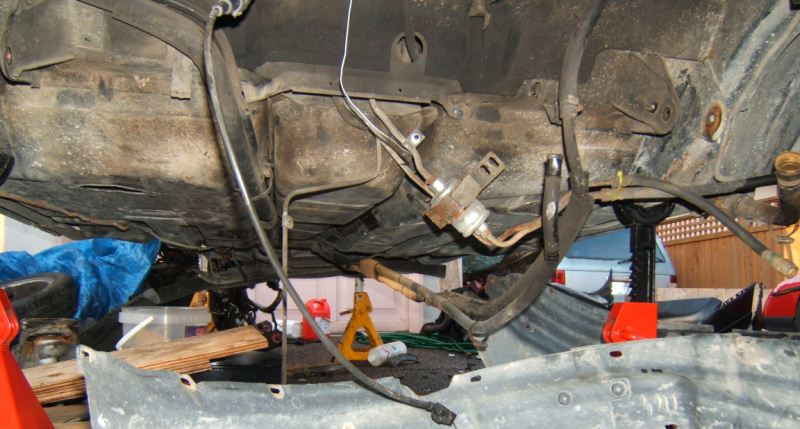
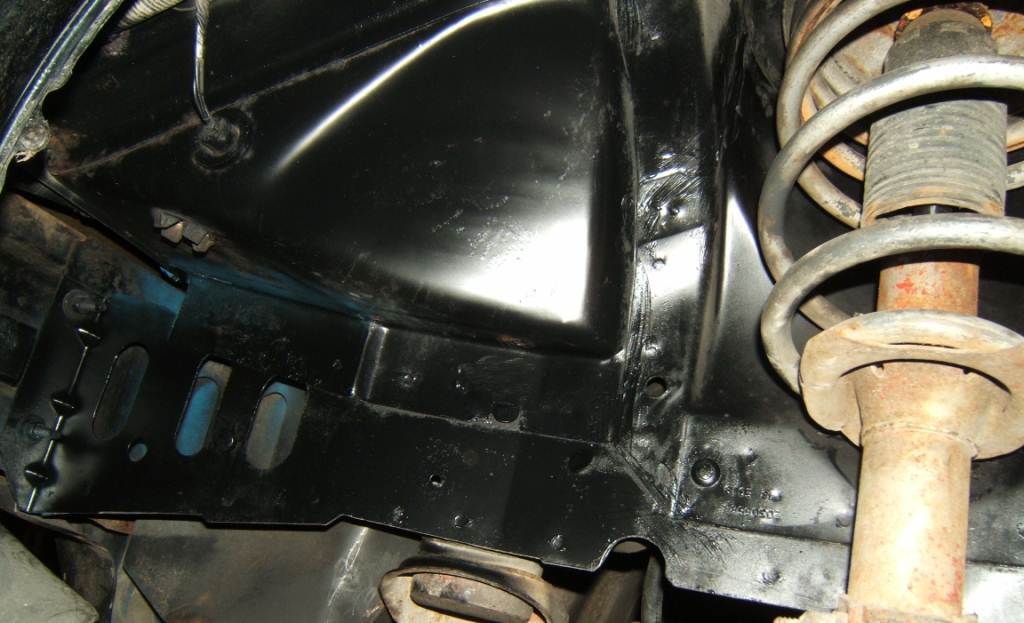
Lower passenger side rad hose re-routed and attached.
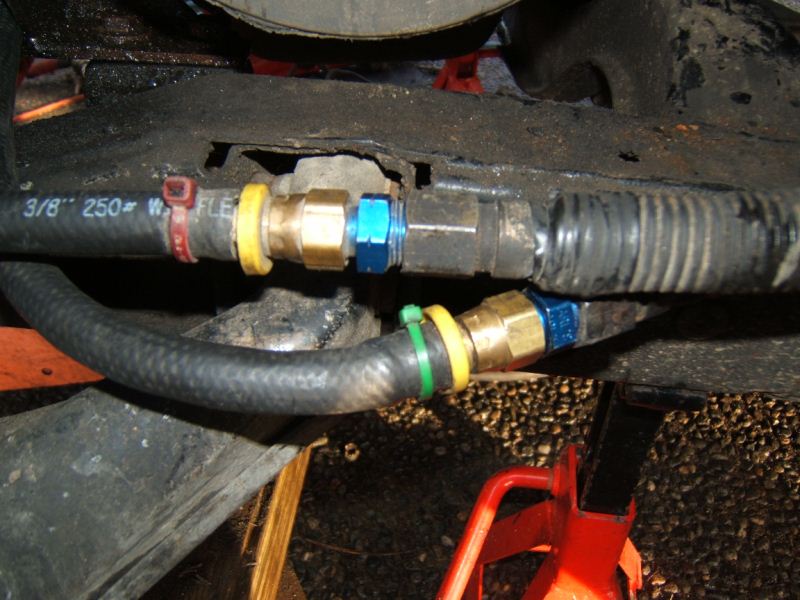
Fuel line adapters installed. The coloured zip ties are there to identify the feed vs return line for the fuel
What a frickin mess. However the fuel lines are in place now.
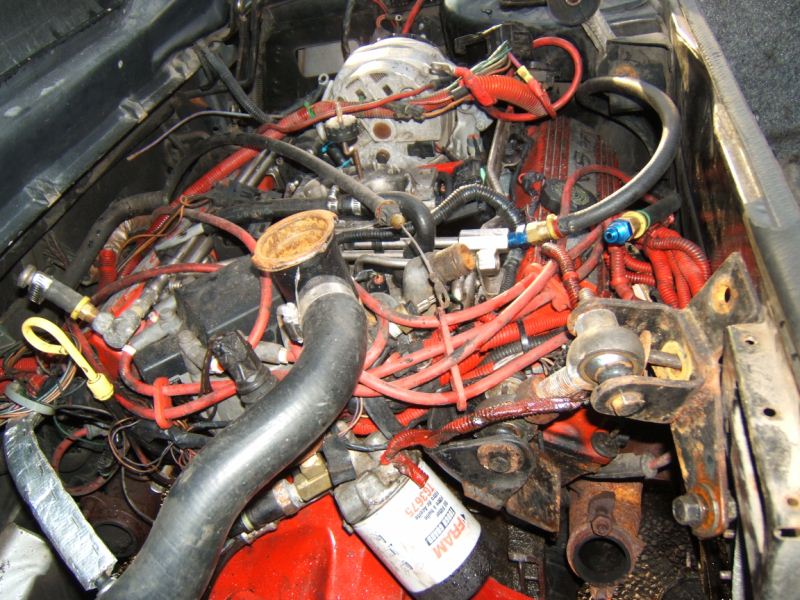
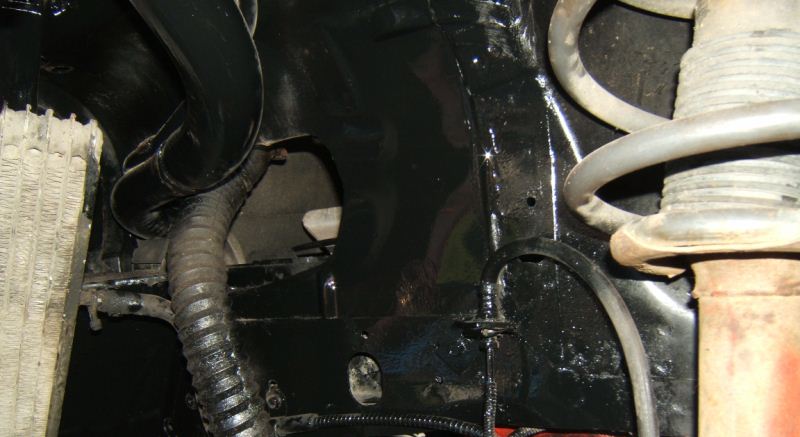
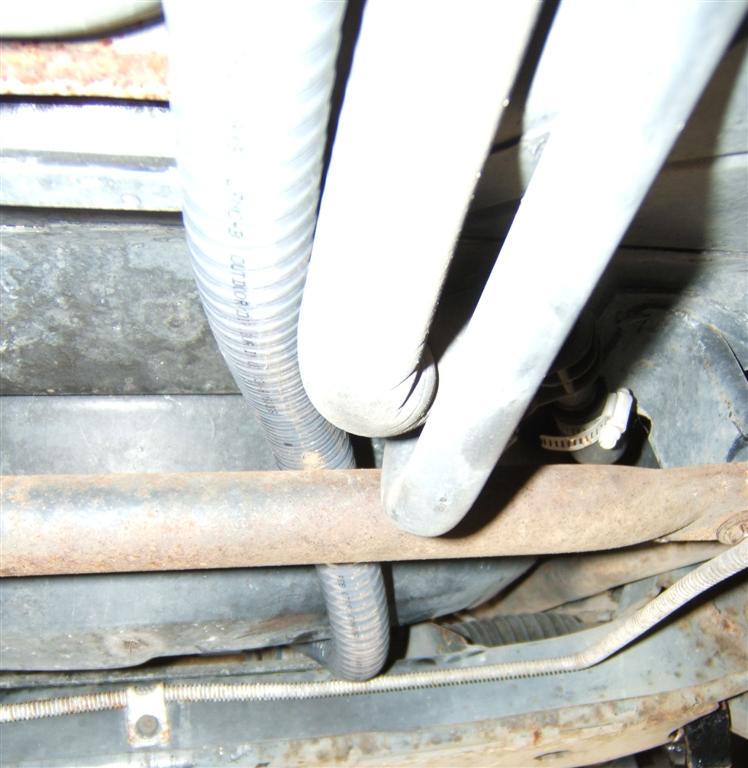
Drivers side coolant pipe attached, and oil cooler placed into position. I have to make a bracket and clean everything before final install.
Hmm, kinda like a puzzle, which heater hoses and adapters are going to make the shortest and cleanest to get from the coolant neck to the heater core pressure side line
There is the heater hose sticking up on the back of the engine. It has to be connected all the way around to the thermostat housing.
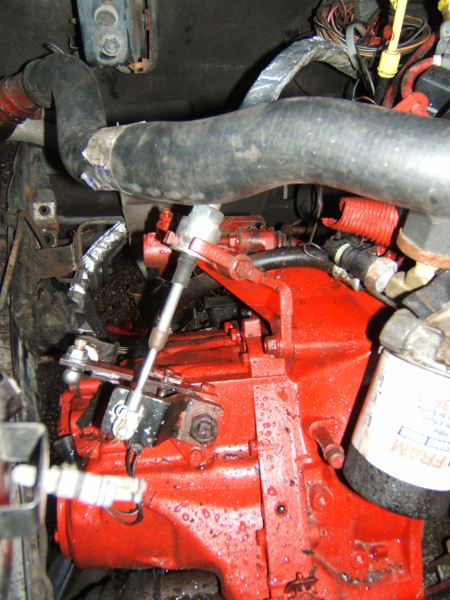
Getrag Cables installed and tightened down
The exhaust guy is going to hate me, need to connect both of those exhaust manifolds together and and go straight down. Gonna have to be some crazy bends.
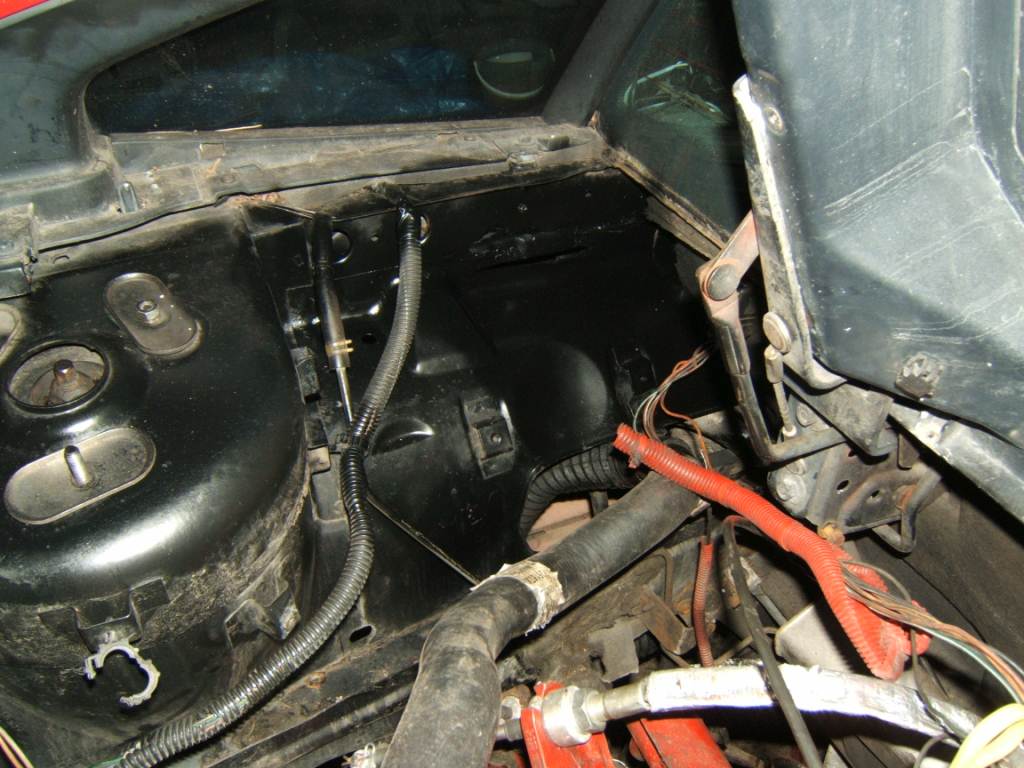
See that black hose looking thing, its just shy of 3/4" outside diameter. Thats actually 3 ought welding cable and will be the supply line for my front mounted battery.
I had been racking my brain all day trying to think how am I going to keep that safe from under car debri. The insulation is too soft to just leave it tied up. Hmm what to do, what to do. Thats about the time I went to my old 85GT and sat down to take a look at the underside of the car. Can you guess what I am going to do with the cable. The old heater pipe, is perfect. I can feed my cable through the pipe, it even has a nice bend that'll point it right to the starter. The Pipe is already covered in foam, but I will further insulate it, to make any remote chance of the wire getting beat up and arcing inside the pipe. If I leave the foam on, and even run a few layers of electrical tape around the foam at any mount points I should eliminate any chance of problems and it'll even look like its suppose to be there.
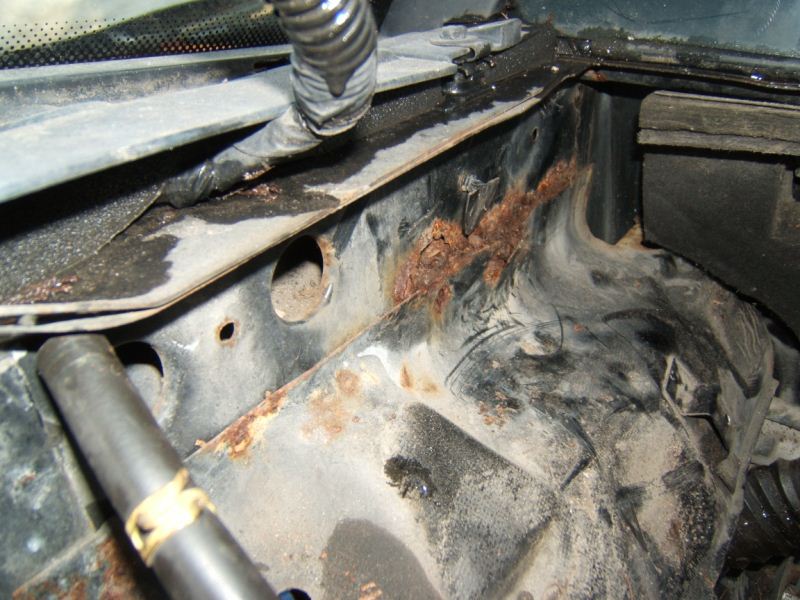
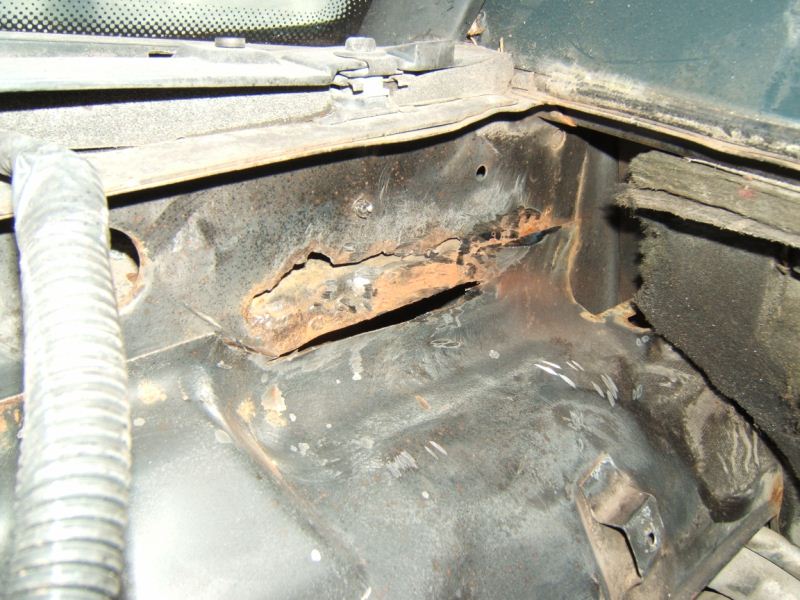
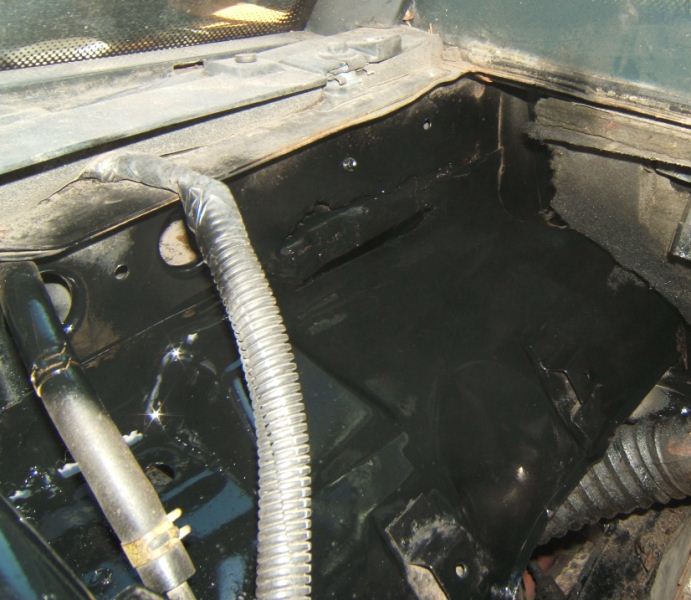
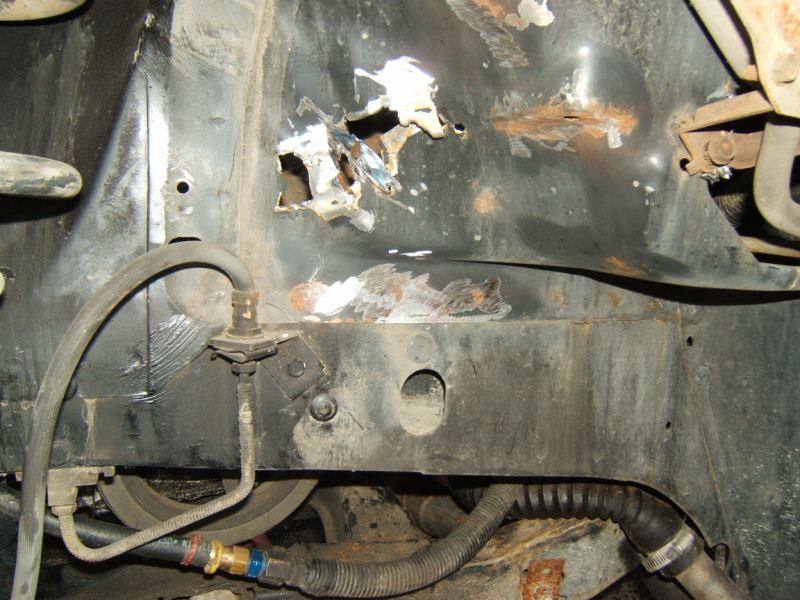
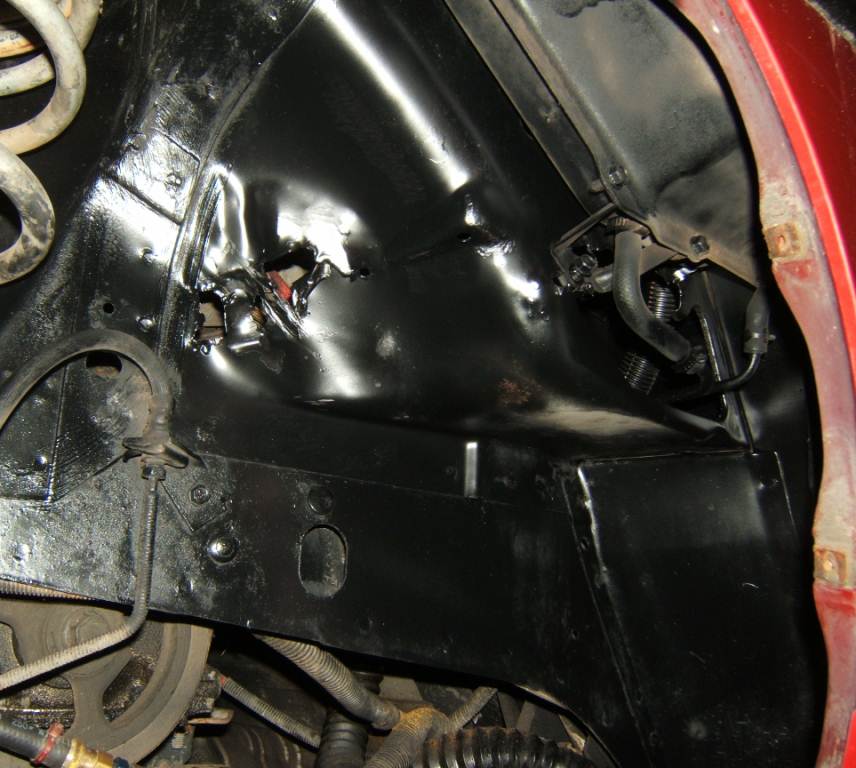
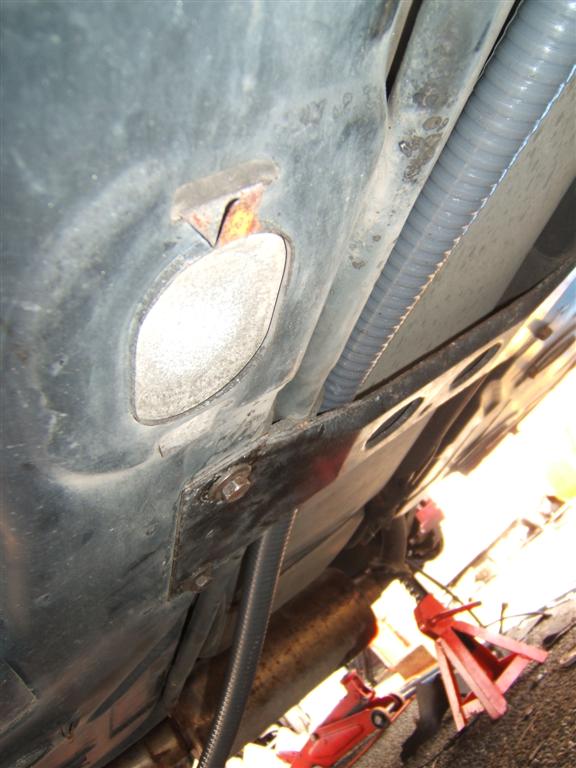
This is about the only thing that frustrated me today, finding a patch of rust, I HATE RUST. That will be on the top of my list of repairs tomorrow is to clean the area, grind it clean and put several layers of TremClad on it.
------------------ 85GT Soon to be 87GT,93 Eldorado 4.9, 5spd Dual O2 Custom Chip, Custom Exhaust. MSD Everything Capt Fiero --- My Over View Cadero Pics Yellow 88GT 5spd Full Poly Suspension, Lowered 1/2" in front, Corner Carver.
IP: Logged
01:57 AM
Mar 5th, 2009
Capt Fiero Member
Posts: 7657 From: British Columbia, Canada Registered: Feb 2000
Ok so last pic in the last post was this NASTY A$$ Rust Spot. I HATE RUST of any kind. So my very next project was remove and start prepping for anti rust coating. (TremClad)
So I tried my wire wheel and couldn't get what I wanted, so I grabbed the angle grinder and a zip disk, then angle grinder with a grinding wheel, then finally back to the assorted wire wheels on my air die grinder. (Funny story with video on that later.
After grinding and cutting, I end up with this.
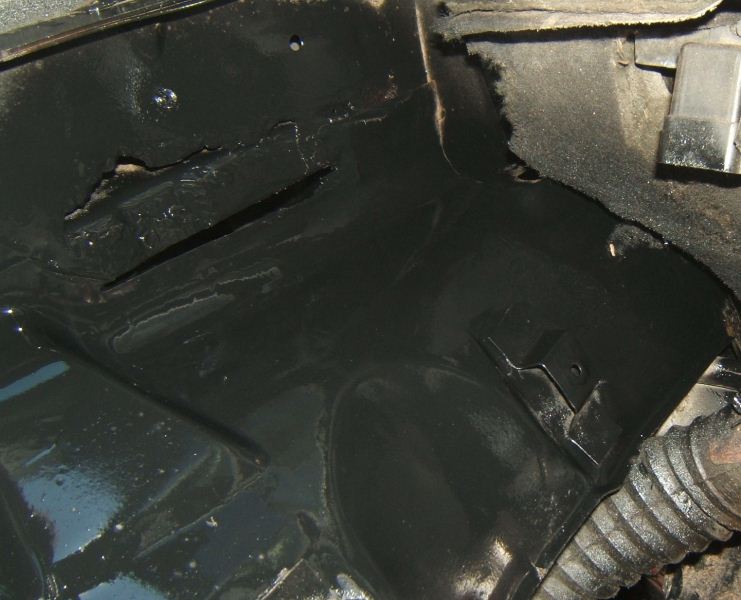
In all these pics, I only have one coat of paint, I'll do a 2nd coat tomorrow. But this is after the first coat.
This was mainly surface rust, but I still did pretty much the entire area behind the fender liner.
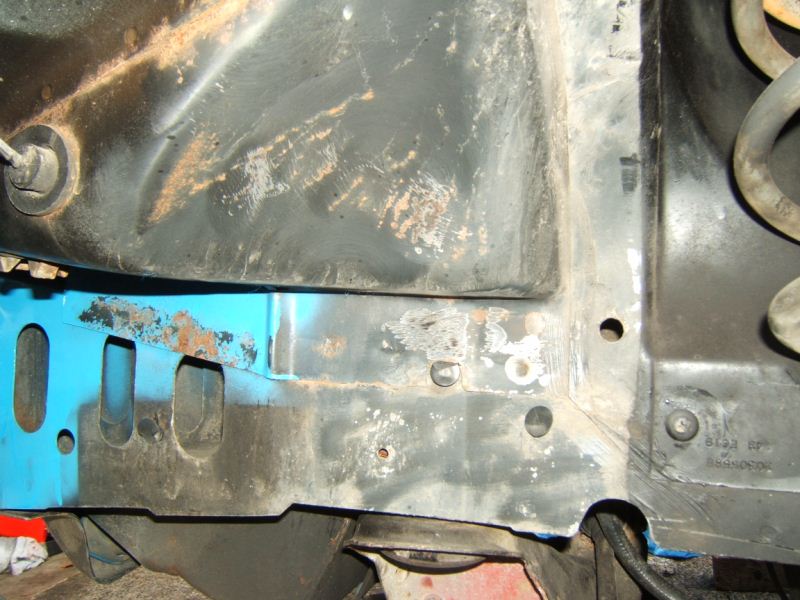
Ah Thats Better
This is where I destroyed the metal removing the battery box. I plan to get a proper piece of sheet metal and make a proper patch, but for now, lets not let it rust.
Well its not pretty, but it wont RUST.
I had hit part of this area with the blue TremClad but I went in there with a grinder today and touched up some really rough areas, then gave it another shot of TremClad
Hey Thats not too bad.
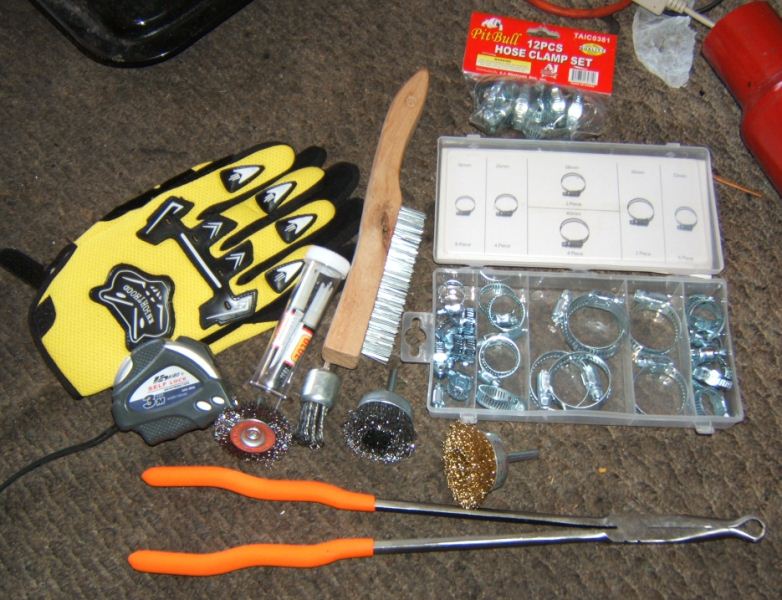
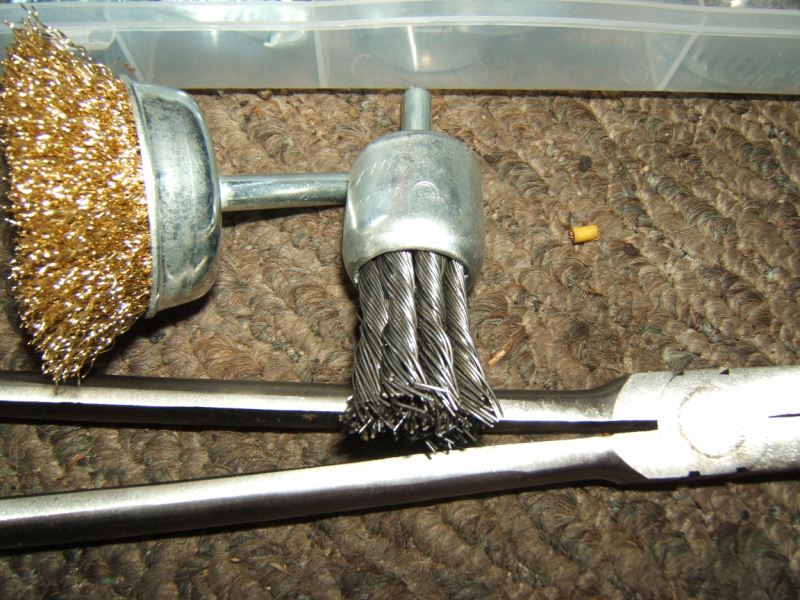
This kinda strays away from the car for a min to reflect on Tools. I am not a rich mechanic with the "Snap-On" truck on speed dial. However, I do understand the value of good quality tools, hence why most of my stuff is Canadian Craftsman, MasterCraft Pro Series, Husky and Dewalt. However there are some times, when just need a few things for a project NOW, little odds and ends. There is a place in Surrey called Bionca's Liquidation World. 1/2 of there stuff is Tools, 1/4 is Electronics and 1/4 is Household Stuff. Everything from cheap $20 Air tools, to trailer Parts. I went in there today to browse around for a few odds and ends.
Well this is what I came out with. That entire pile Gloves and needle nose pliers included came to a grand total of $21 bucks.
Gloves $5 Tape Measure 6ft AutoLock $1 Wire Brush Wooden Handle $1 Hose clamps, in Kit were $4 12pc Hos Clamp Set was $2 Wire wheel and wire drums, $1 each. (4 in total) $4 Cool Needle Nose Pliers, $4 Super Glue .50 cents
I had some serious fun with that. Its stamped Max Speed 4500 rpms. I figure whats the worst that will happen, it might fly apart and explode the wires. So I chuck it into a 20,000 RPM Air Die Grinder. (Insert Tim Taylor Power Grunt)
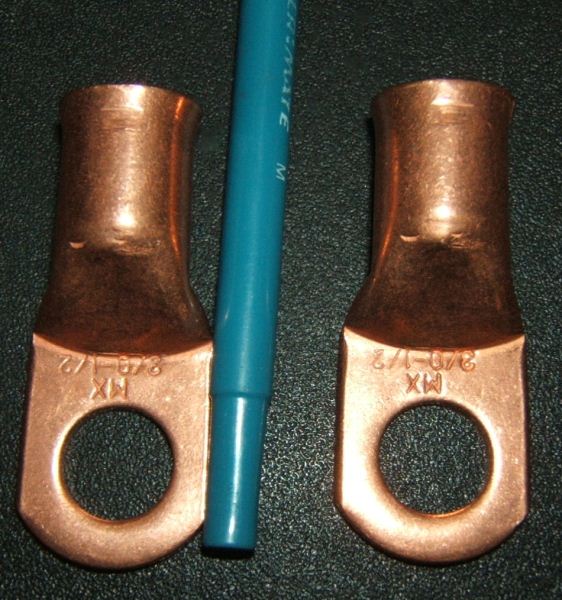
Now I needed Lugs for the remote battery kit. I bought these nice 3 ought lugs. They looked pretty good.
Then I found these Bad Boys. I used a standard pen, to give a size reference.
When heat that, crimp it and drill a pilot hole anchor a set screw then fill with solder, that baby is never going to break or come loose.
Now if you have read this far, and actually read it, you'll get an early peak at a video that I'll post later in the forums. Remember that 4500rpm wire drum, it met my 20,000 rpm die grinder. And it Didn't blow up. Stretched a fair bit though, http://captfiero.com/85gtre...h/airgrinderwire.AVI If the video won't open, pop over to http://captfiero.com/85gtrebuildpics/March5th and manually save the airgrinderwire video to your computer and watch it.
------------------ 85GT Soon to be 87GT,93 Eldorado 4.9, 5spd Dual O2 Custom Chip, Custom Exhaust. MSD Everything Capt Fiero --- My Over View Cadero Pics Yellow 88GT 5spd Full Poly Suspension, Lowered 1/2" in front, Corner Carver.
[This message has been edited by Capt Fiero (edited 03-05-2009).]
IP: Logged
07:20 PM
Mar 6th, 2009
Capt Fiero Member
Posts: 7657 From: British Columbia, Canada Registered: Feb 2000
Well today was Wiring Day with a little paint here and there.
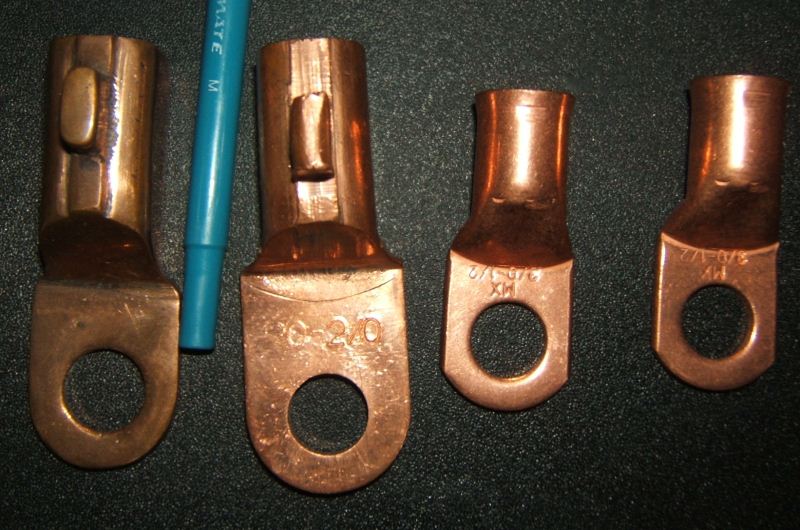
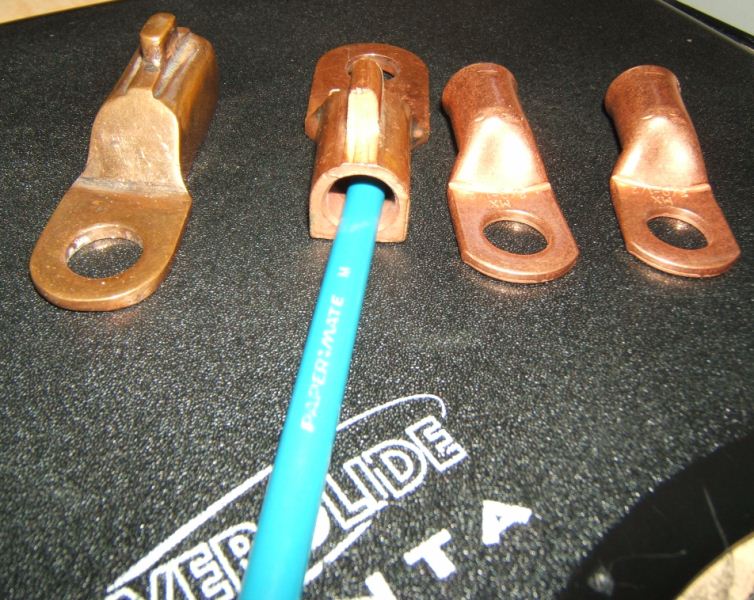
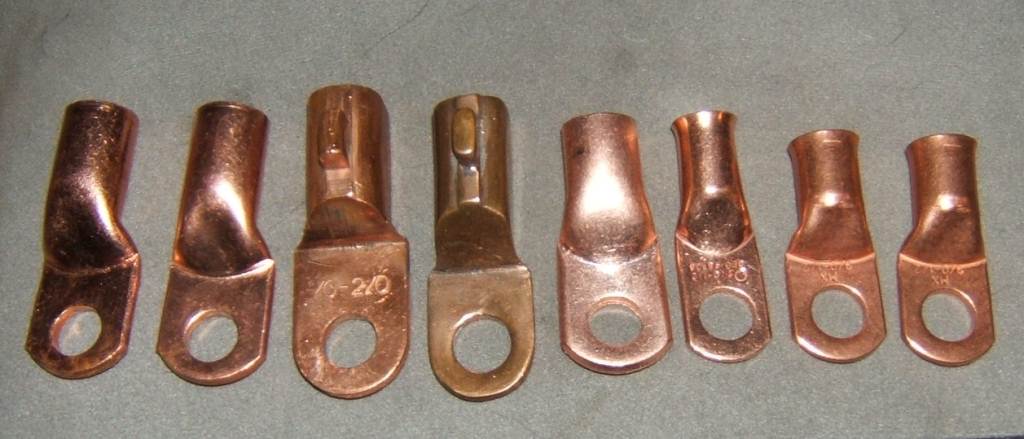
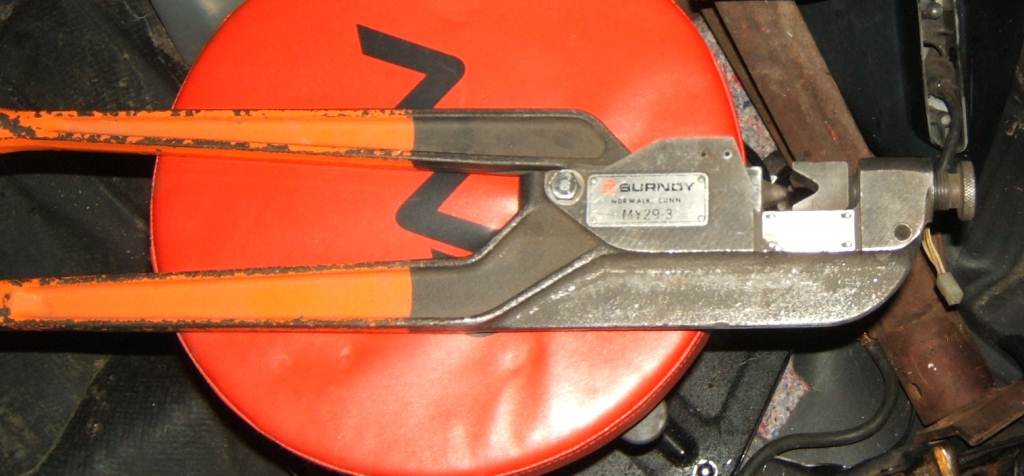
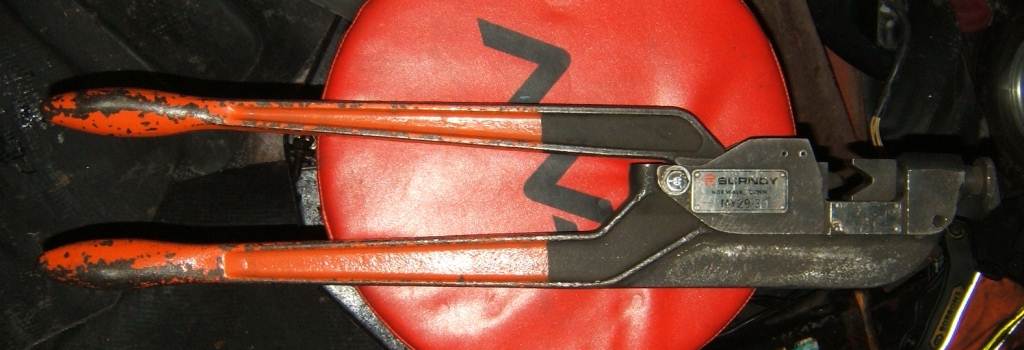
I got in the last of the Copper Lugs for the power and ground cables today. I however did not get time to install them today for reasons you'll see below.
New Copper Lugs
Very specialized Crimper's for these Giant Terminals. You can't really tell in the pics, but they are the size of medium bolt cutters.
Another coat of TremClad the metal is starting to look good.
I still missed those damn back seams.
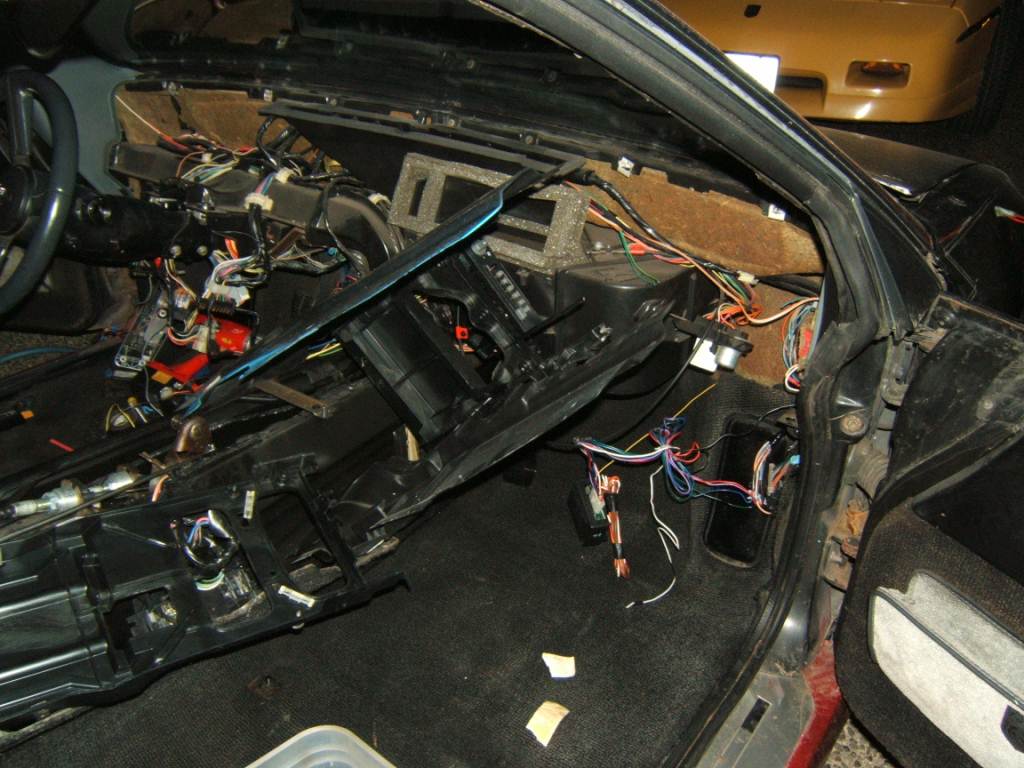
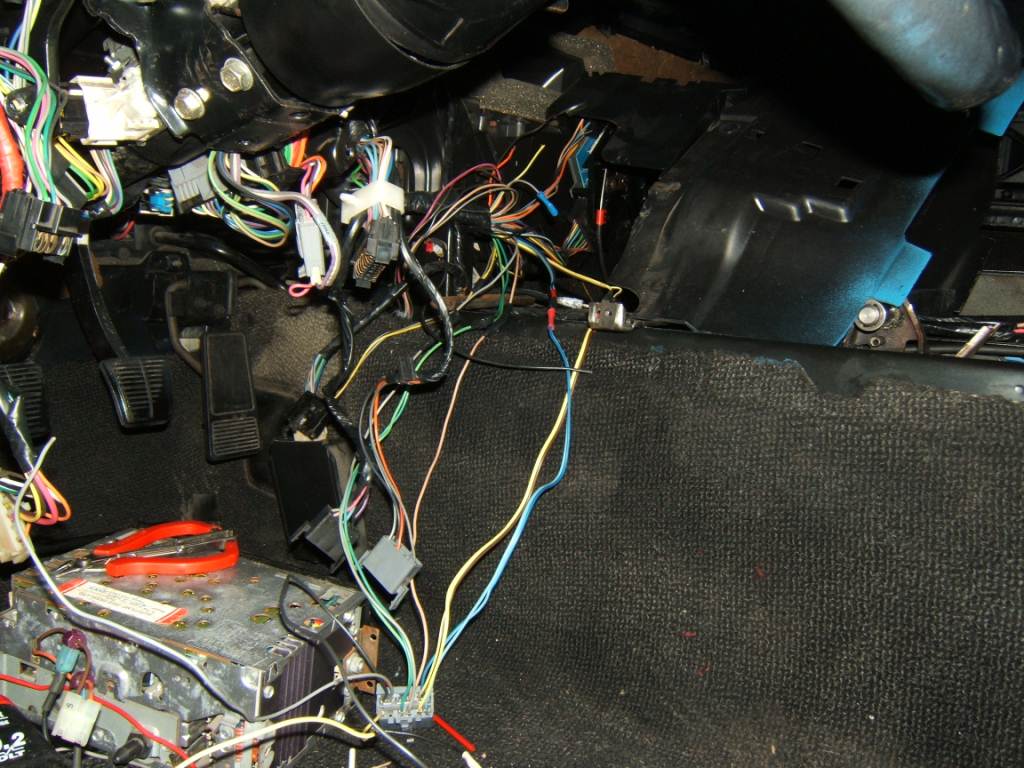
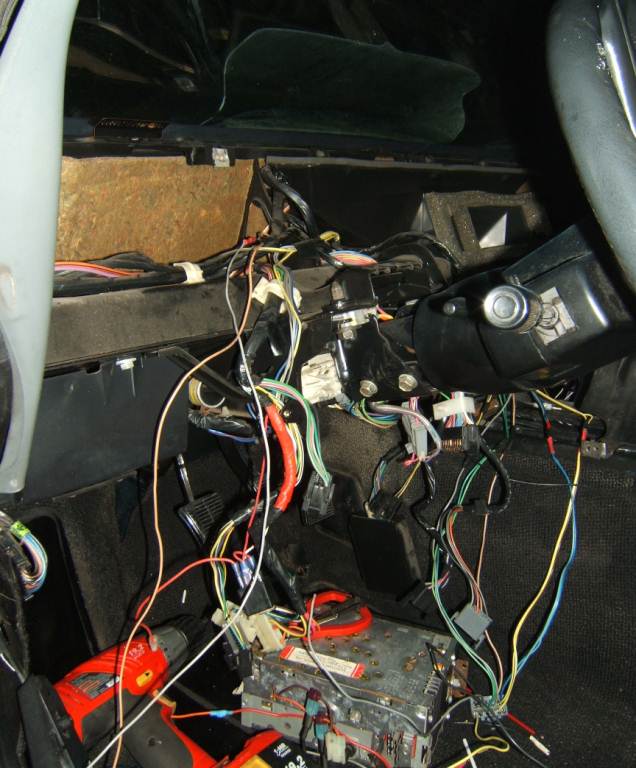
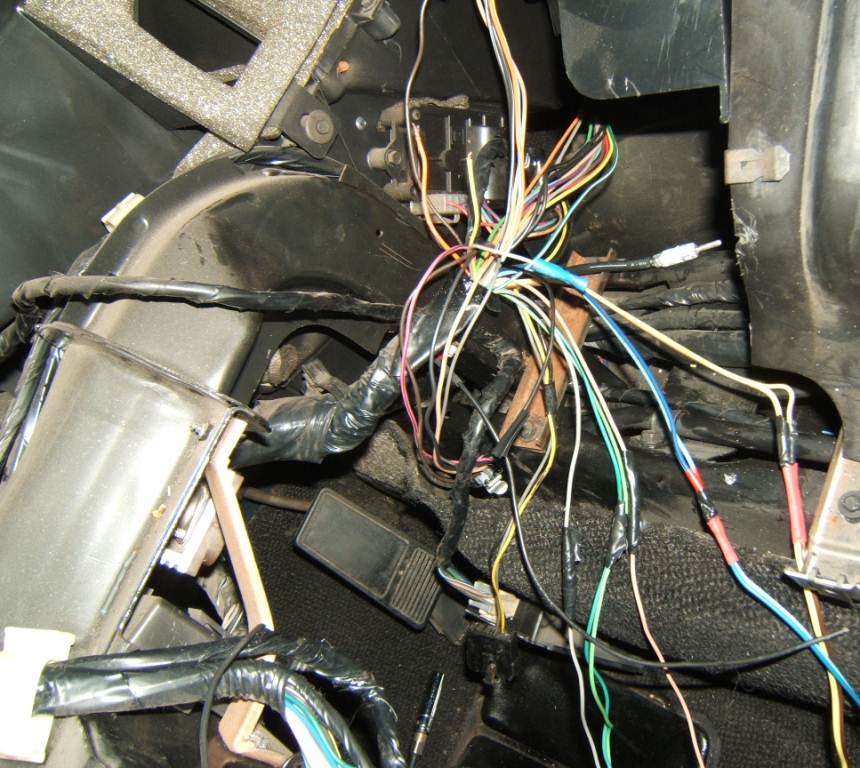
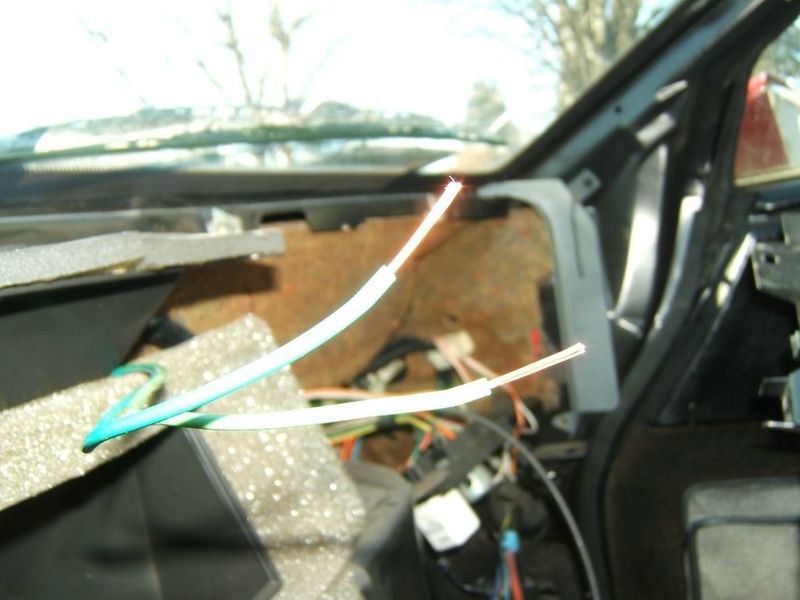
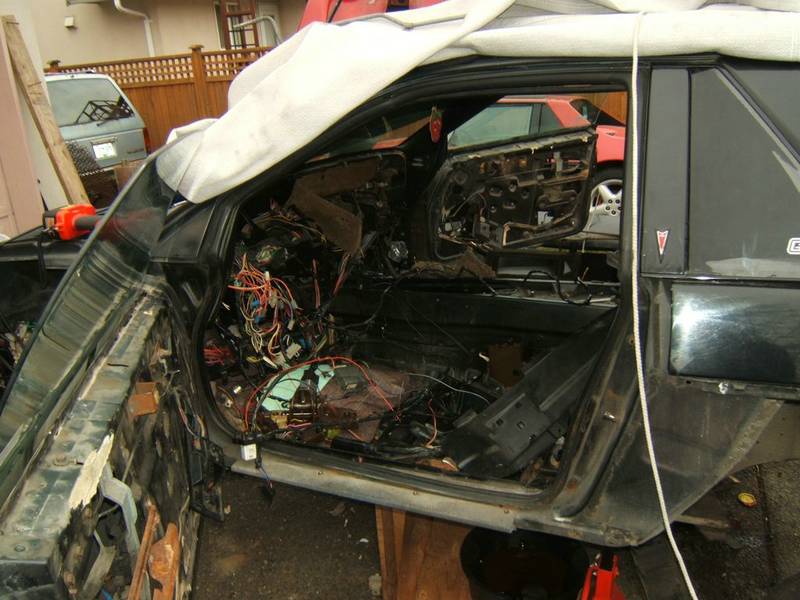
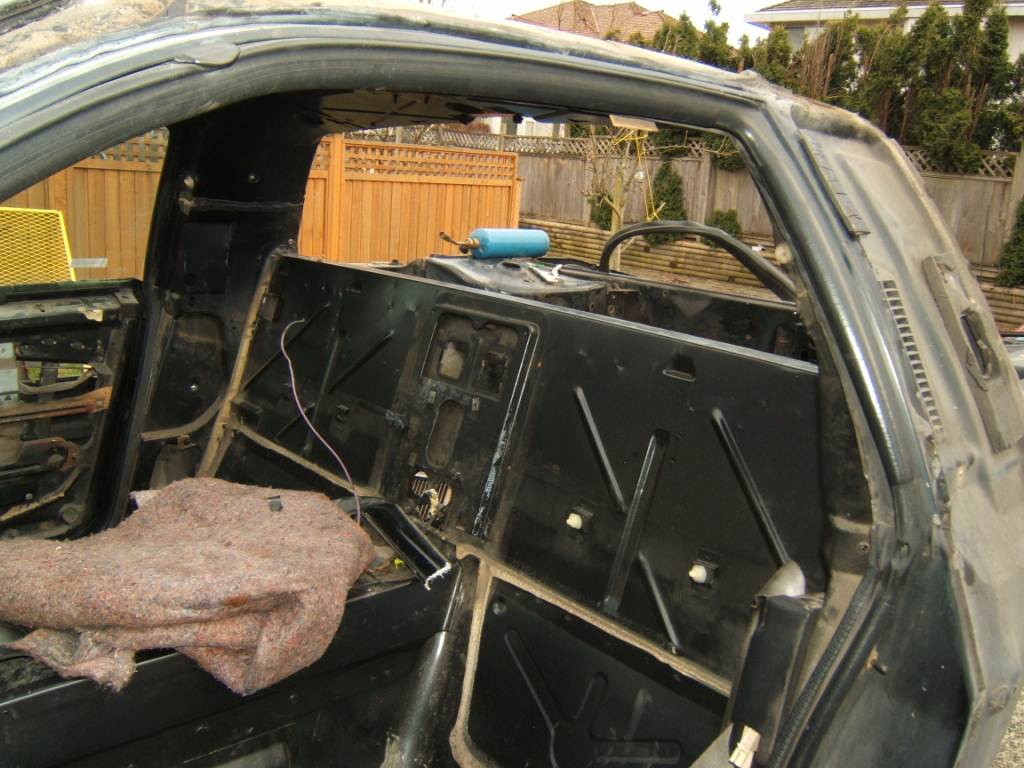
So I had to gut the center console to change the throttle cable. The V8 uses a different cable and end than the V6. So out it came. I have diced up hands now from reaching in there to run the cable. I also found out, "dry graphite powder" is not a good cable lubricant.
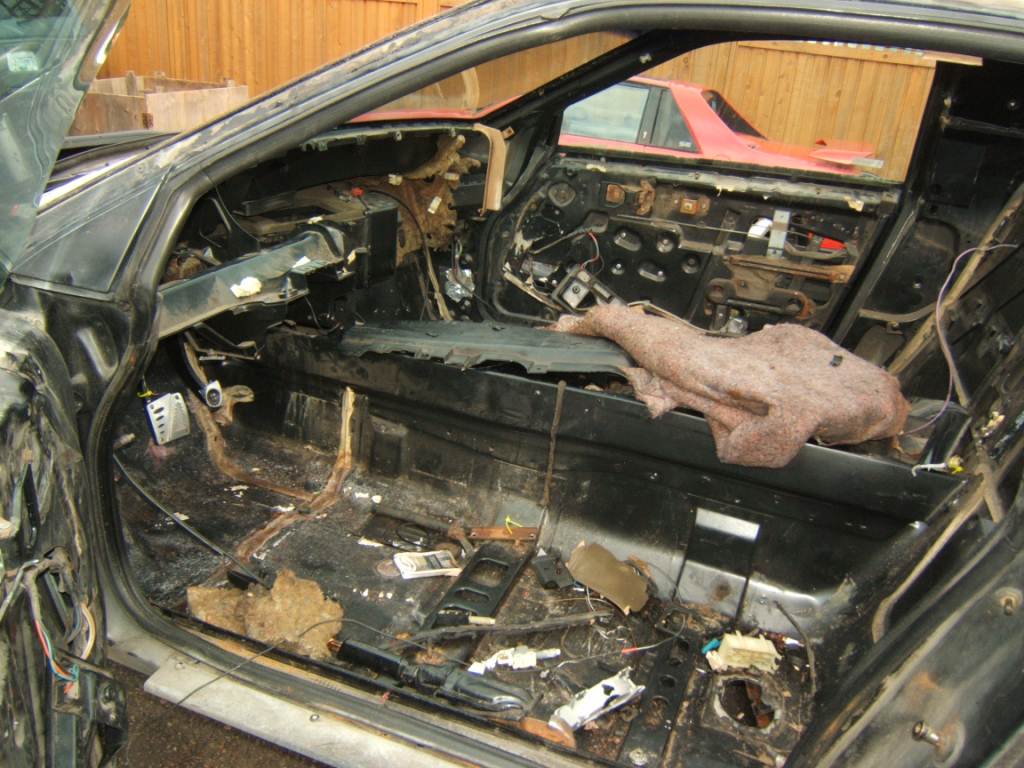
Now I had not really payed much attention to the cabin wiring during the tear down. I knew the stereo wires had been cut when it was supposedly stolen. Well I think the thief did me a favor by removing some of the crap that had been done in there. I found tons of wires just cut, some had butt connectors over them to keep them from shorting, some had tape, all the OEM plugs had been cut. Looks like the aftermarket deck was installed by cutting all the stock wires instead of using a proper adapter harness.
So I went back to my 85 and started carefully removing the proper harness connectors leaving about 12" of wire off of each plug then brought them over to the 87GT and carefully started splicing in the new parts.
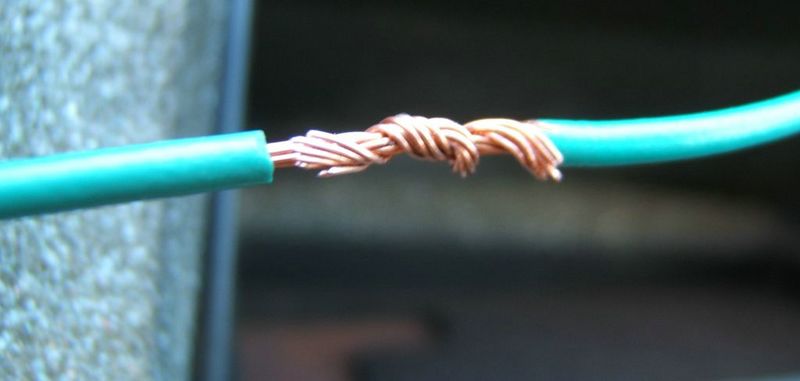
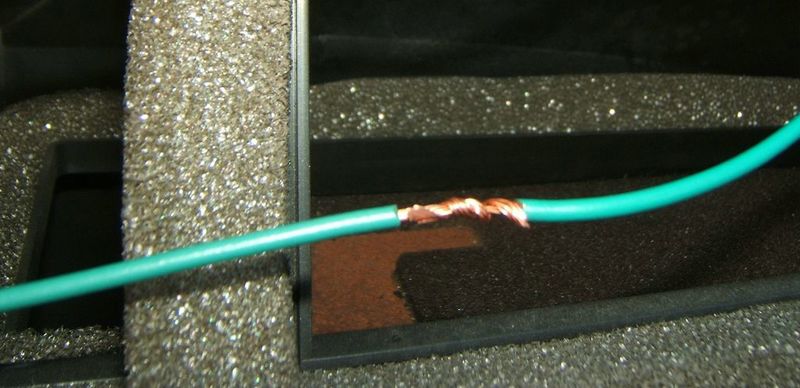
I know in the pics, it looks like I am doing it ghetto style, but that is far from what you see. Each wire is stripped clean, then using an AT&T style twist attached together, then heated with a pocket torch and soldered. Then shrink tube put around the solder joint and shrunk. Then after all that, I put a layer of black tape over the shrink tube to keep any chance of a sharp solder drop from breaking through the shrink tube and causing any issues later.
I am going to have to tear more of the harness apart, to find out what wires have been changed and why there are 3 black wires and 2 yellow wires and 2 gray wires coming through the harness.
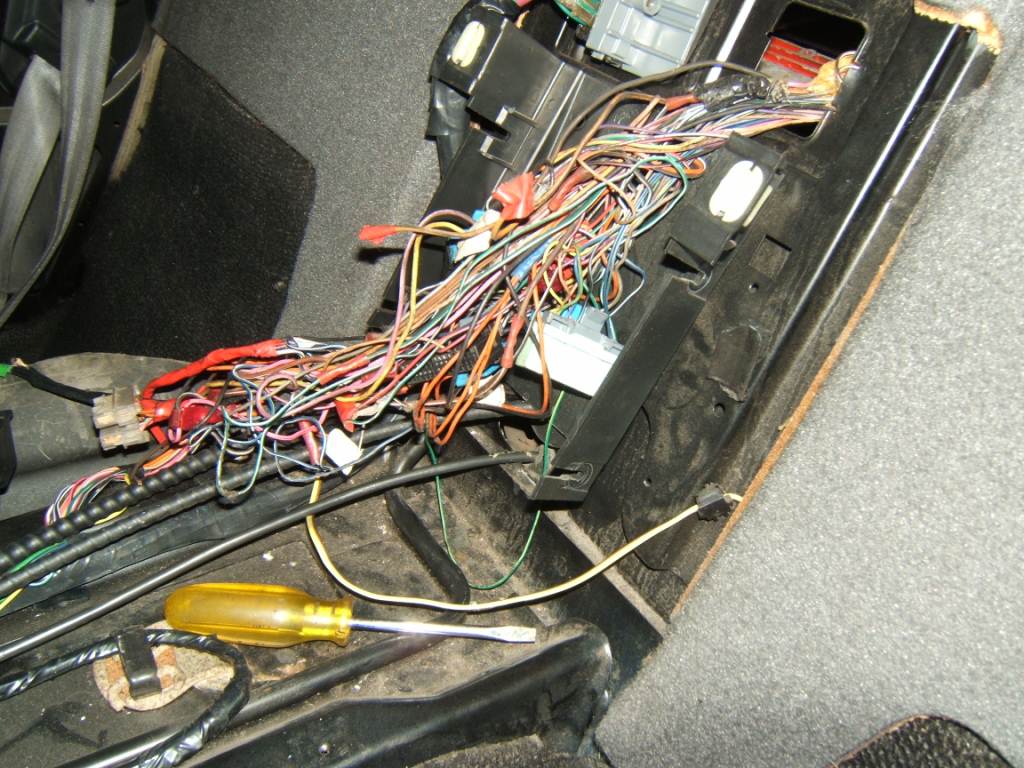
As crazy and nasty as this mess looks. All the wires are sorted and either marked or installed in in the ECM Plugs. I just unwrapped the loom to remove it from the 85 and transport it to the 87GT.
Never leave me alone with spray paint. I just couldn't keep in the mood to fight the wiring, I was irritated that I had spent the better part of the day working on crap that I shouldn't have to be fixing. I was kinda standing there is a burnt out stopper, and saw the ugly rear caliper and the can of left over red TremClad from the Trans painting. I decided ah what the hell, it can't look any worse than it was. From 20ft away or driving it'll look decent, just don't get too close or you'll see the fish eyes.
------------------ 85GT Soon to be 87GT,93 Eldorado 4.9, 5spd Dual O2 Custom Chip, Custom Exhaust. MSD Everything Capt Fiero --- My Over View Cadero Pics Yellow 88GT 5spd Full Poly Suspension, Lowered 1/2" in front, Corner Carver.
I have really enjoyed your posts. Thanks for all of the great pictures.
On the subject of the inner door panels. I put modified panels from a Bonneville on my 87 and wanted to have something to replace the vapor barrier. I looked into the sound deadening material from Cascade Audio, but did not want to put something on with adhesive, as I wanted to be able to get things apart if I needed to. In the end I used 40 mil PVC sheet material that is normally used for shower drain pans. I got it at Home Depot for about $5 per door.
I look forward to seeing your car. Will you be at the Jet City Fiero Club picnic in Arlington this June?
Jim
------------------ Jim 86 SE 355 Body Kit w/3.1 Auto (Sold) 87 T-Top Coupe 2.8/5 Speed new project
IP: Logged
08:32 AM
Capt Fiero Member
Posts: 7657 From: British Columbia, Canada Registered: Feb 2000
Thanks for the idea's. I never really thought about using anything but a Fiero door panel. That could be interesting.
As for Arlington, I will be there for sure. Kinda Ironic you asked as I am working on the Arlington sign up page as we speak. The dates need to be changed, but the sign up sheet that we used last year has been tweaked since we had to change things with new hosts.
Hey, great job there Capt. This has been a fun thread to read. But probably not as much fun doing the work?
Thanks for posting the link to the Arlington show. I don't visit Jet City Fieros forum that often. I was looking to go last year, but had engine failure. But all is up and running now. Anyhow, I sent the email for registration signup. I will definately be looking forward to this in June. Keep up the work.
IP: Logged
06:30 PM
Back On Holiday Member
Posts: 6238 From: Downingtown, PA Registered: Jul 2001
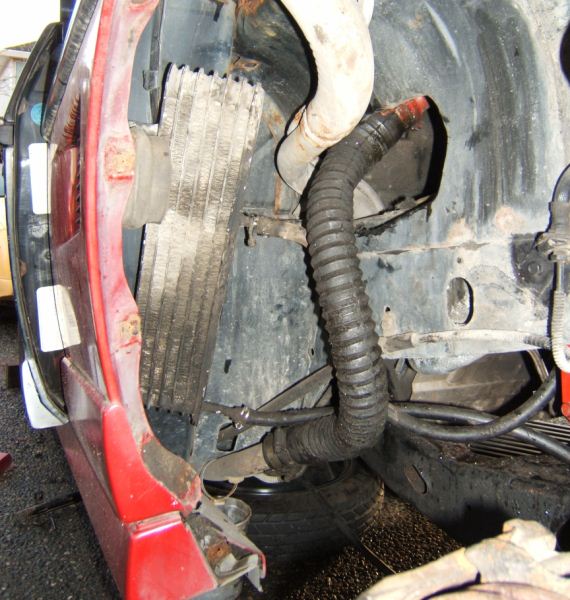
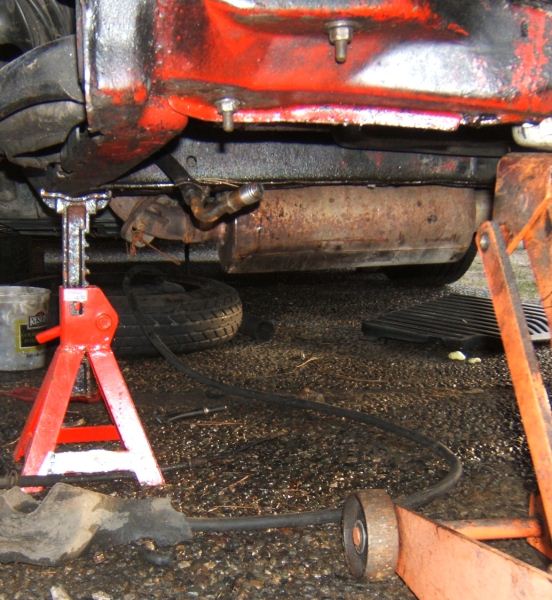
Lower passenger side rad hose re-routed and attached.
Loved reading this thread, just read through for the first time and have 2 questions, first pic looks like your lifting the car from the rear bumper? i've never seen that done, but if it holds would be a pretty good idea (and if you agree I might just use this option myself) 2nd pic, i've honestly never seen flexable coolant lines like that, is that stock 4.9 or can you get that somewhere? It would make a very handy Emergency hose on a road trip.
Andrew
IP: Logged
07:12 PM
Capt Fiero Member
Posts: 7657 From: British Columbia, Canada Registered: Feb 2000
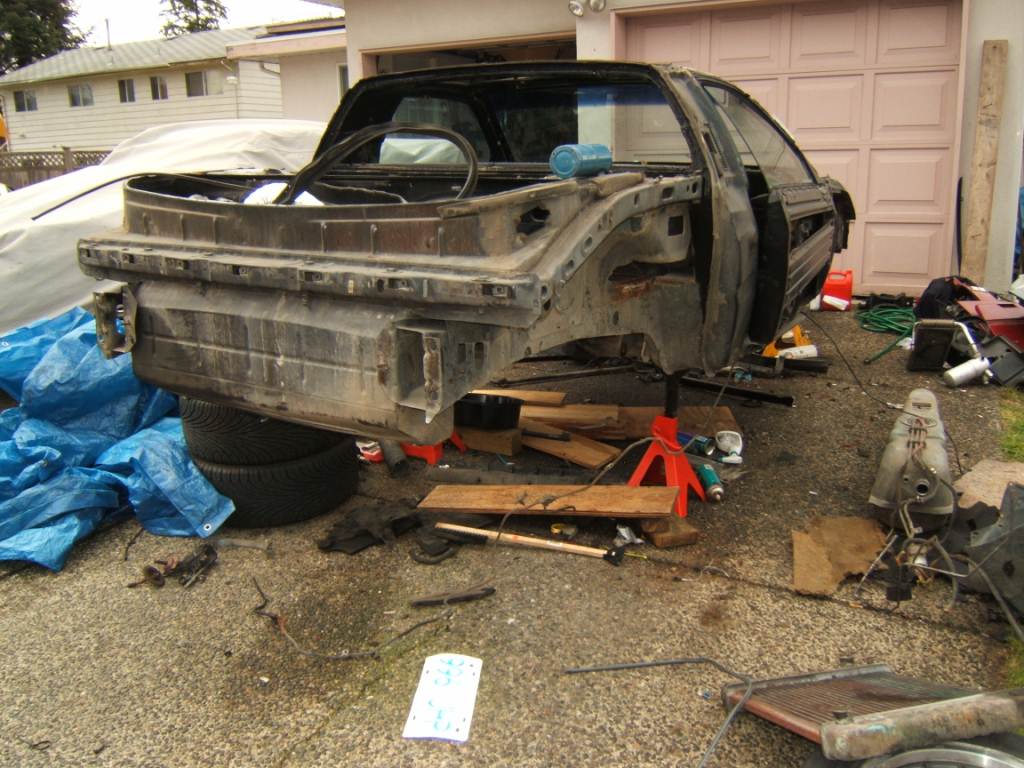
I find if a job is going to be a full engine/cradle removal, its much easier to remove the rear skin, and put the chain around the rear impact beam. If you tried doing that with the bumper skin attached at the very least you would destroy the skin. Once I get it to about 6ft off the ground, I set jack stands under the frame of the car and remove the hoist.
Those rad hoses are good and bad. They have a spring wound in them so they won't collapse and can be bent fairly tight without squeezing shut. However what ever size you buy, that's it, you can't change the length. Each end of the hose has a 2 inch space to put it onto the metal pipe, beyond that the way the spring is inside it you can't force it on further.
------------------ 85GT Soon to be 87GT,93 Eldorado 4.9, 5spd Dual O2 Custom Chip, Custom Exhaust. MSD Everything Capt Fiero --- My Over View Cadero Pics Yellow 88GT 5spd Full Poly Suspension, Lowered 1/2" in front, Corner Carver.
IP: Logged
10:51 PM
Mar 8th, 2009
Capt Fiero Member
Posts: 7657 From: British Columbia, Canada Registered: Feb 2000
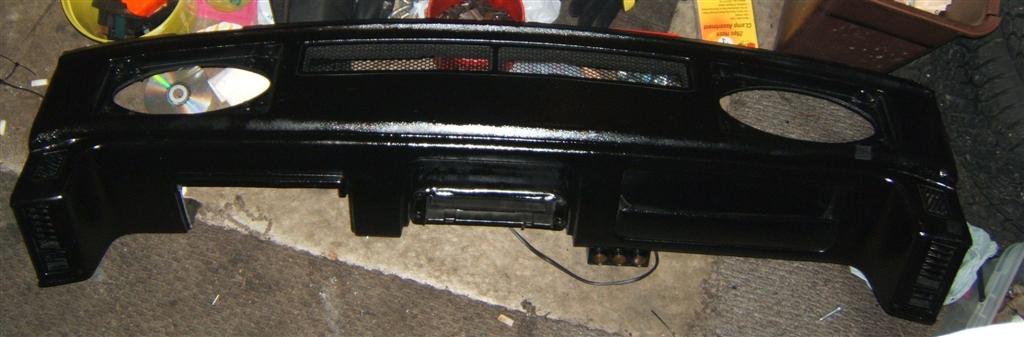
When you get done reading this post, make sure you read the last line. Its pretty important.
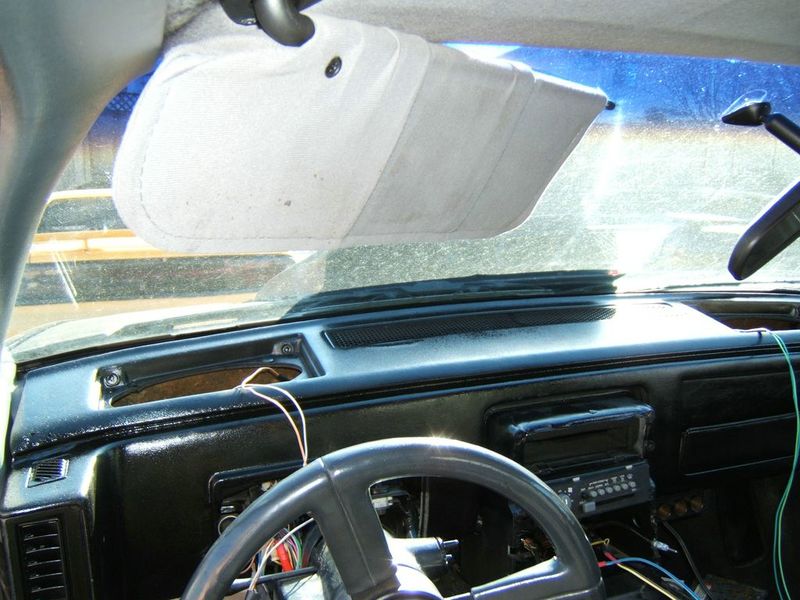
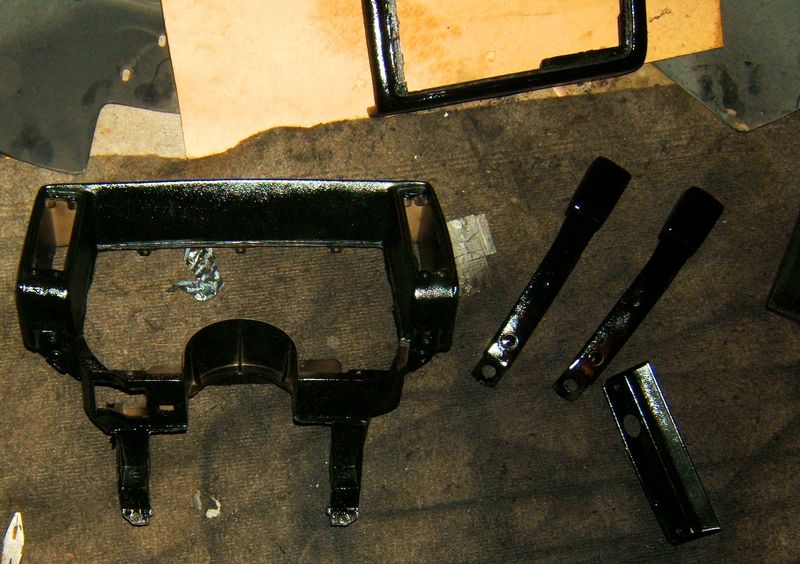
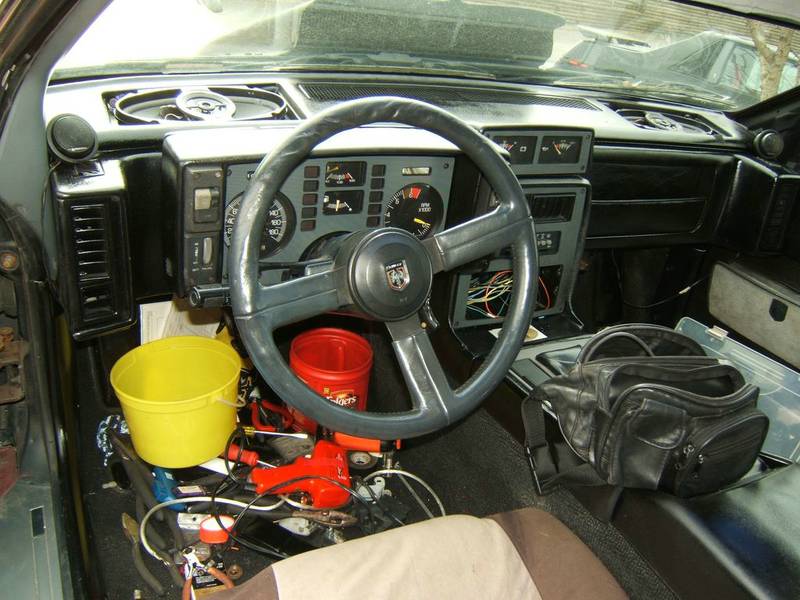
Ok the Dash is done, yaa. The cleaning and paint/dye turned out great, its a nice high gloss black finish.
The screws holding the dash must have been hammered in, as there was no way they got a standard socket to fit between the speaker frame and the plastic surround, so I took an old cheap junk 7mm socket ground it down on my bench grinder into a super thin wall socket and it worked perfect.
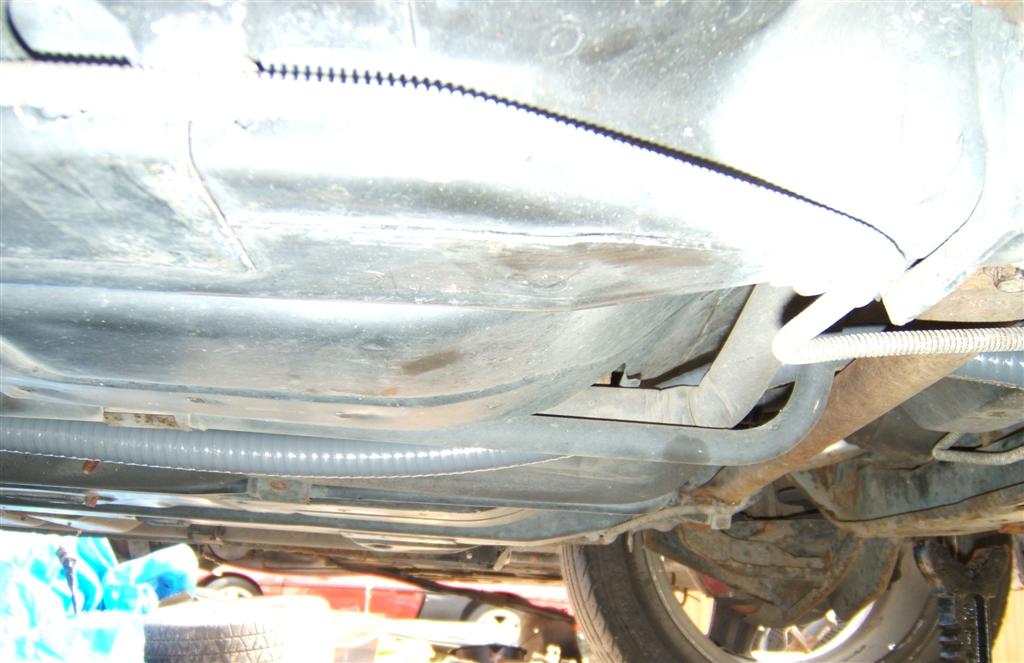
We went to the local Home Depot to scout out some sort of conduit for the battery cable. I looked at different metal pipes, soft rubber / PVC pipes and nothing really seemed like a good fit for under the car, then I found this stuff. I honestly don't remember what it was called. Its extremely hard stuff, and took a floor jack to make it flex enough to get the cross beam back into place. However its also got enough give that you can bend it past a 90 degree ark over an 8" span and with zero signs of damage. It has an outside diameter of 1" and an inside diameter of 3/4" My 3/0 cable is just a tic over 5/8 outside diameter so this 3/4" was almost perfect.
I have not added any clamps at all yet to keep it up, its almost perfect and the only thing holding it up at the moment is the fuel tank belly pan and the front round cross brace. I am going to add a clamp about every 1ft to keep it above the heater line. I have also taped off each end of the housing to keep moisture from getting in. I may even get some large shrink tube and put over the ends.
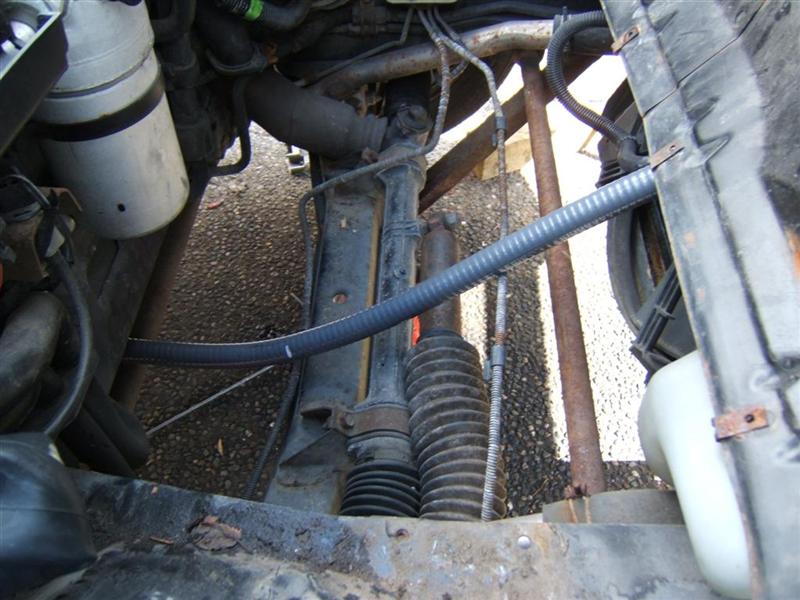
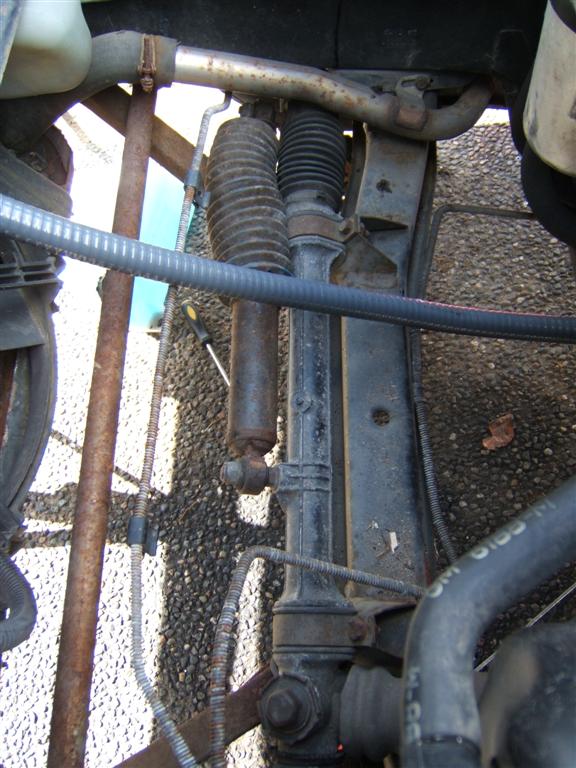
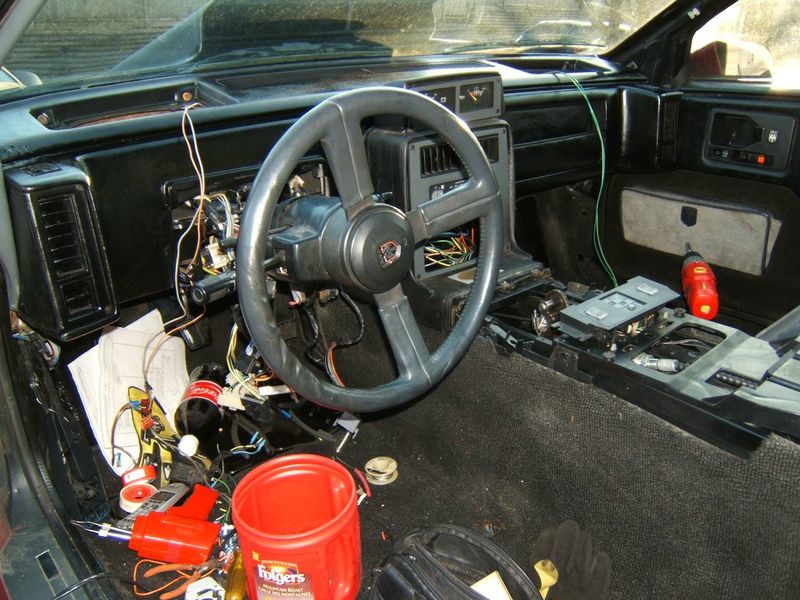
Now only a Die Hard Fiero Nut is going to look at this and go WHAT THE FU&(& The Steering Dampener is Bigger than the RACK.
Yep looks like they put a damn car shock absorber on the rack. I have seen it done on big jacked up trucks, but on a sports car? I may leave it on there just to see what it feels like. Probably going to make the steering really sluggish around tight corners.
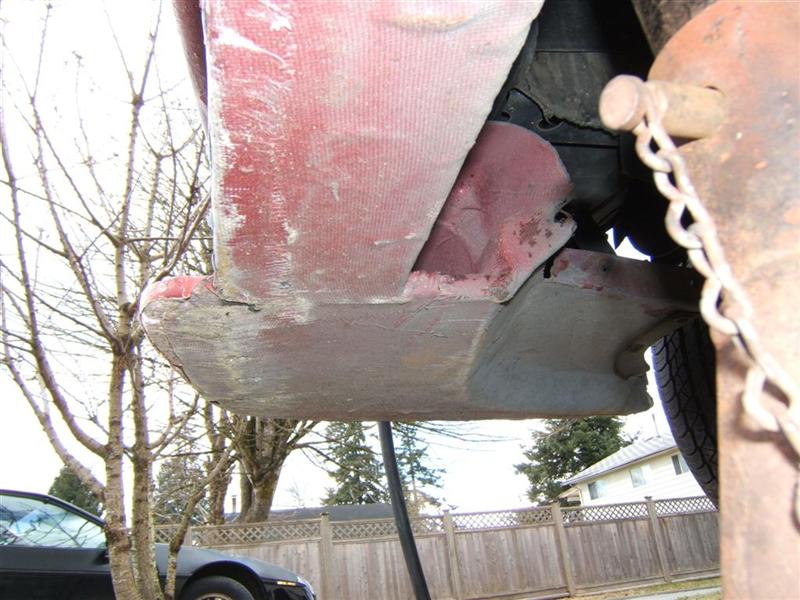
While I was under there today, I snapped a quick shot of the underside of the fiberglass work and the odd shape that the nose is from under the car. Really is not what I was expecting. It does kinda louver up towards the radiator nicely though. I'll bet it helps getting airflow to the rad.
Now sorry for the lack of updates guys. I got some really Eye Opening news. I'm Going To Be a Daddy. My Wife Lisa, aka FieroChick is going to have a baby. Our First, its defiantly putting a whole new perspective on things.
------------------ 85GT Soon to be 87GT,93 Eldorado 4.9, 5spd Dual O2 Custom Chip, Custom Exhaust. MSD Everything Capt Fiero --- My Over View Cadero Pics Yellow 88GT 5spd Full Poly Suspension, Lowered 1/2" in front, Corner Carver.
IP: Logged
09:47 PM
IXSLR8 Member
Posts: 673 From: Post Falls, ID, USA Registered: Sep 2004
I tried filling in the details on your website for the Arlington picnic, and I got this error:
" The website cannot display the page ".
Congratulations on going to be a daddy, my little boy now drives Fieros. He was at the 08 picnic with his 88GT/Finale. So maybe you will have 3 Fiero drivers in the house.
Jim
------------------ Jim 86 SE 355 Body Kit w/3.1 Auto (Sold) 87 T-Top Coupe 2.8/5 Speed new project
IP: Logged
10:01 AM
thismanyfieros Member
Posts: 3468 From: Red Deer, alberta,canada Registered: Dec 2002
Aprx Due Date is Nov 9th. LOL, the 3rd seat idea was something I was thinking about, A car seat could be bolted very solid between the 2 adult seats if you removed the center glove box and ECM. It would even put the baby at shoulder height with the adults. I couldn't think of a safer place in a car for a baby, then right in the middle. I wonder if it can even be made legal to change the occupancy limits on a vehicle?
quote
Originally posted by Khw:
Grats on the eye opening news!!
Thank You.
quote
Originally posted by bowrapennocks:
I tried filling in the details on your website for the Arlington picnic, and I got this error:
" The website cannot display the page ".
Congratulations on going to be a daddy, my little boy now drives Fieros. He was at the 08 picnic with his 88GT/Finale. So maybe you will have 3 Fiero drivers in the house.
Jim
I'll get out .asp wizard to take a look at the form and see if there is a glitch. I had to put the Arlington site on hold for a few days while I quickly wraped up some open projects on the 87 and did the whole doctor visits with the mom to be. I do remember the Finale, sure a nice car. As to Fiero Drivers, we actually have 4 people in our house at the moment that drive Fiero's with a total of 7 on the property. So another one will be welcome to our stable.
quote
Originally posted by thismanyfieros:
congrats dave....now which car is the kid gonna get to drive??? better decide soon...tim
Thanks Tim, well in 15-20 years if Gasoline cars are still around, He or She will get something like a 4.9 Auto, or an equal Electric car with similar torque.
quote
Originally posted by Tony Kania:
Yes congrats on the upcoming new addition. Always nice to know that the plumbing works.
LOL, we have been trying for nearly a year, so we were beginning to question it. However I guess it just took time.
It still has not totally sunk in, "I am going to be a Dad" I still have the maturity level of a early 20 something kid. (I am actually 32) I guess I am going to have to grow up.
Just not right NOW.
OK enough about the possible new arrival, I'll go and start a thread on O/T to continue this thread, I am sure the people reading this build thread would prefer to read about a Fiero than a baby.
I have not been able to touch the car today as we were out picking up some baby stuff. (oh jeez, there I go starting with the baby stuff when I was the one that said to stop talking about it) OK, lets rephrase that, I did not have any time to work on the car today as I had some business to do for an up coming transaction.
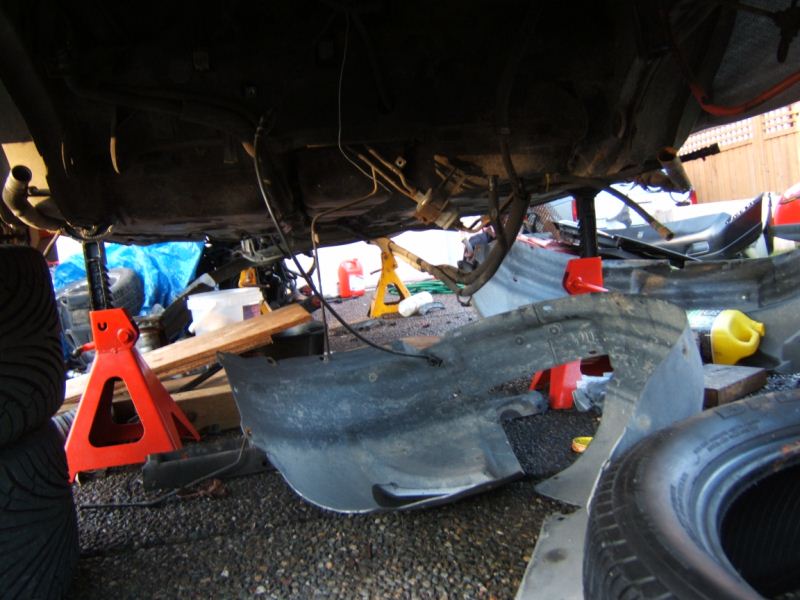
I plan to get back to work on it Tuesday morning and see what I can get done. Right now the car is sitting on 4 jack stands right next to the 85GT which is sitting on 4 jack stands. Its kinda weird seeing a Fiero sitting Level however 24" higher than normal.
I have arranged for a friend to come over and take care of the alarm wiring for me while the interior is all gutted. The alarm I have decided to go with is a 2 Way FM Transmitter/Pager Alarm. Its only got a 1/2 mile range on it, but that should be good enough for most situations. It has a remote start option, but I think being a Stick Car and No E-Brake, I'll leave that option un-hooked.
------------------ 85GT Soon to be 87GT,93 Eldorado 4.9, 5spd Dual O2 Custom Chip, Custom Exhaust. MSD Everything Capt Fiero --- My Over View Cadero Pics Yellow 88GT 5spd Full Poly Suspension, Lowered 1/2" in front, Corner Carver.
IP: Logged
06:59 PM
Mickey_Moose Member
Posts: 7497 From: Edmonton, AB, Canada Registered: May 2001
Originally posted by Capt Fiero: I know in the pics, it looks like I am doing it ghetto style, but that is far from what you see. Each wire is stripped clean, then using an AT&T style twist attached together, then heated with a pocket torch and soldered. Then shrink tube put around the solder joint and shrunk. Then after all that, I put a layer of black tape over the shrink tube to keep any chance of a sharp solder drop from breaking through the shrink tube and causing any issues later.
Before installing the shrink tube, you can using a set of plyers, squeeze the solder joint to remove any sharp edges - that being said, if you have sharp edges in the solder - you used too much solder. You only need enough to flow into and around the wire strands, that is to say you should still see each strand of wire clearly after being coated with solder.
Save you having to add 'bulk' to the wire with black tape.
IP: Logged
11:03 PM
Mar 11th, 2009
Capt Fiero Member
Posts: 7657 From: British Columbia, Canada Registered: Feb 2000
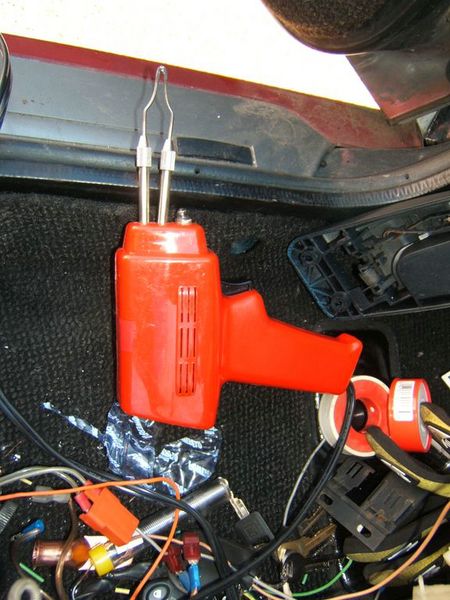
Ya know I was working on it thinking "damn I use to be better at this, 15 years ago (high school) I was able to solder cap's onto a PCB. I even knew the colour code for resistors. So I put down my butane torch, grabbed a proper soldering gun and gave myself a quick refresher on the AT&T style wire connector.
So here is my feeble, feeble way of soldering.
1st start with nice clean bare shiny wire.
The Fancy Twist. This way you have no bent over wire to deal with, in the end the solder joint is virtually no bigger than the raw wire with housing.
Using a Gun rather than an Iron, or a Torch.
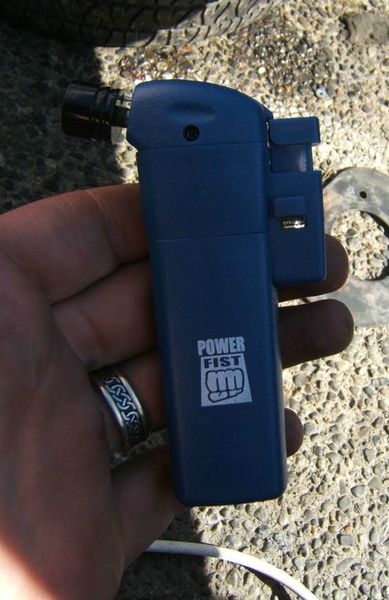
My Handy Butane Power Fist Pocket Torch
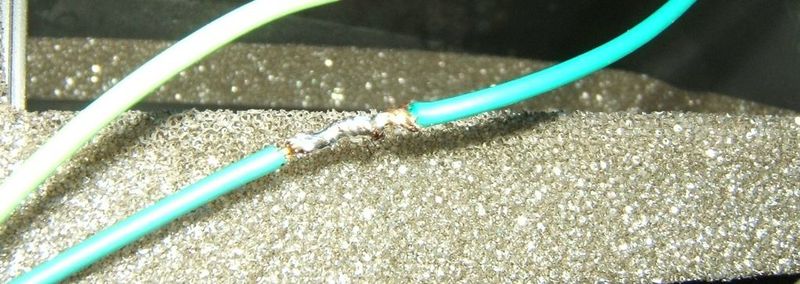
Soldered
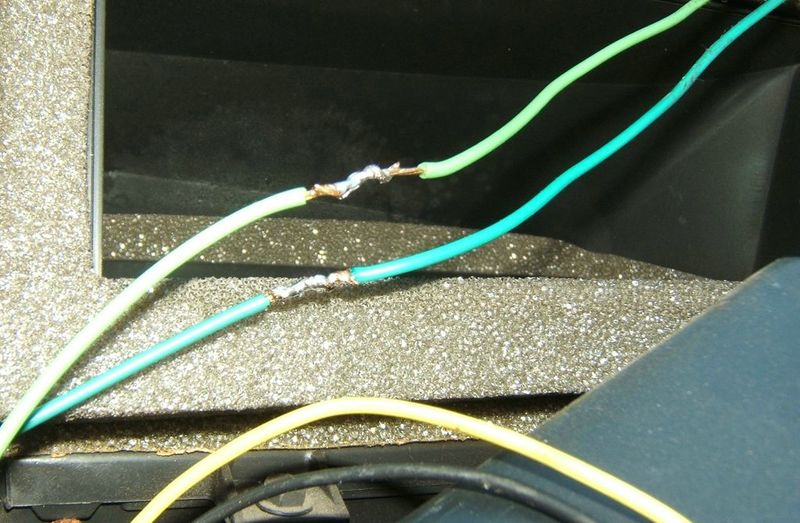
First 2 pieces of shrink tube installed
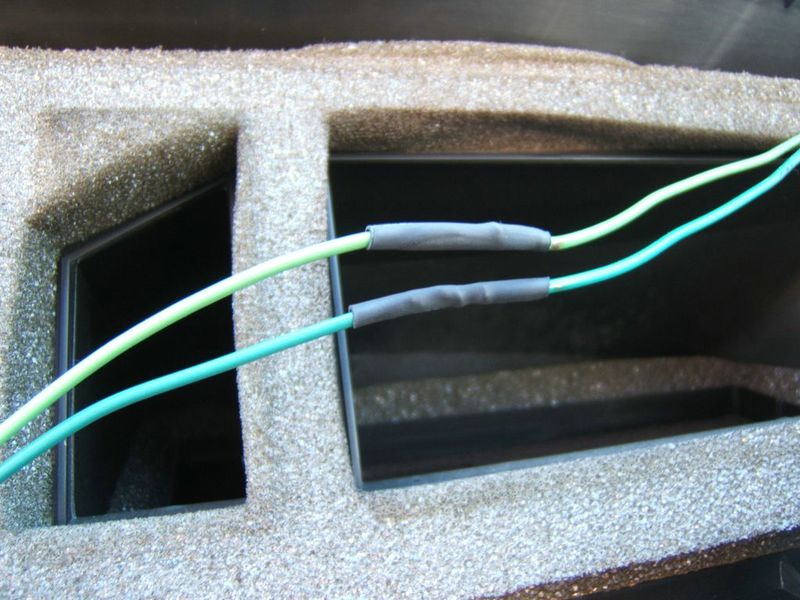
Larger piece of tube over the small tube, to make the entire thing a nice tight dry package.
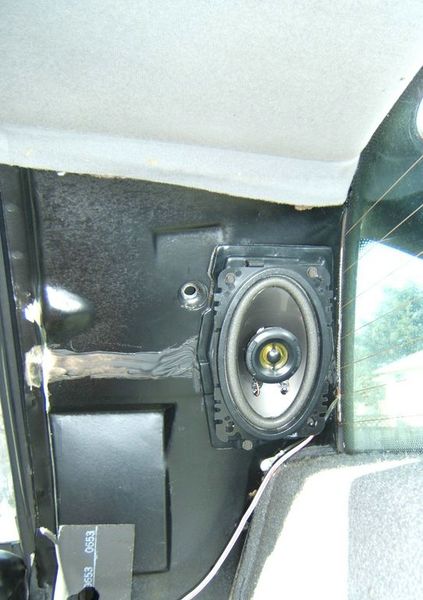
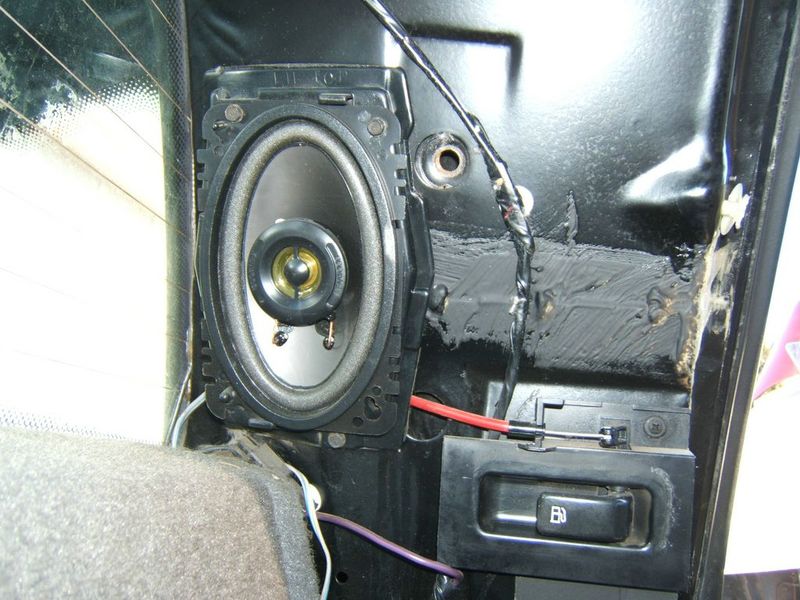
Kenwood Sail Speakers
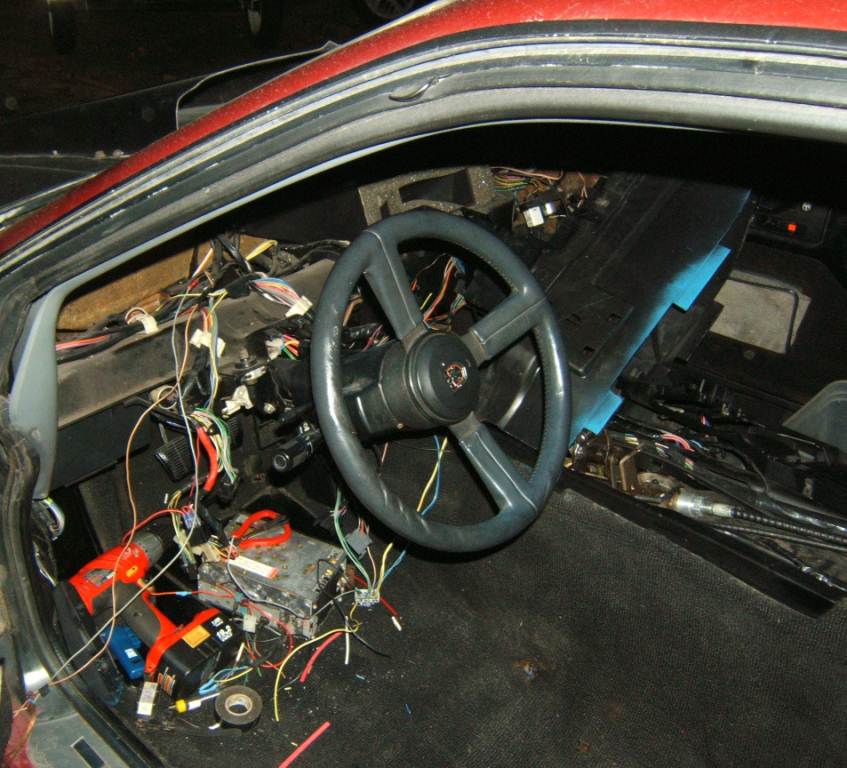
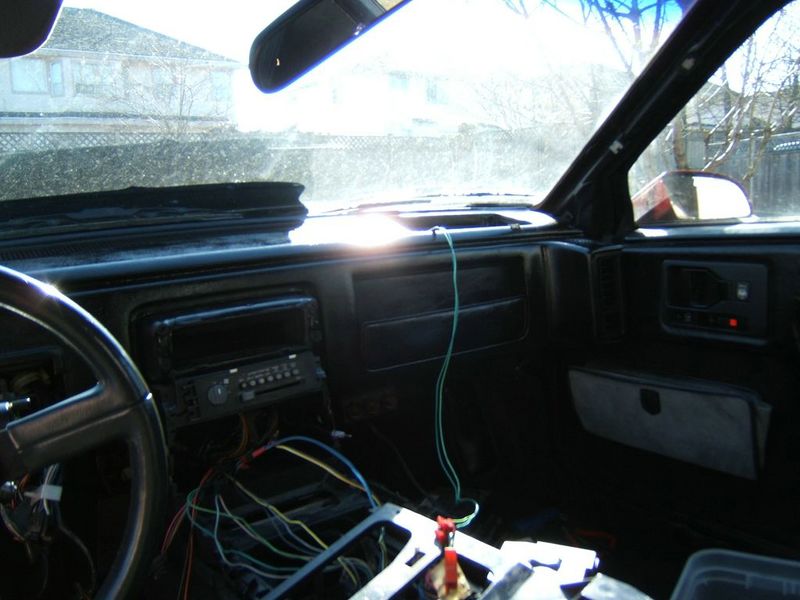
Something that just makes the car seem real, A Dashboard. It actually seems more like a car today than a major project.
Then I look back at the steering wheel and see, all the wires that still have to be attached. With any luck, all that will be back together tomorrow.
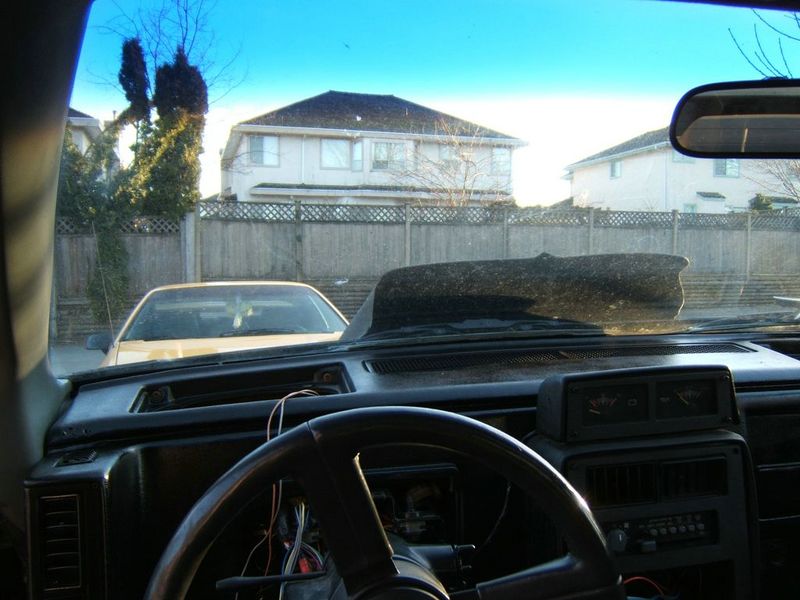
View from the Drivers Seat showing tha massive cowl hood.
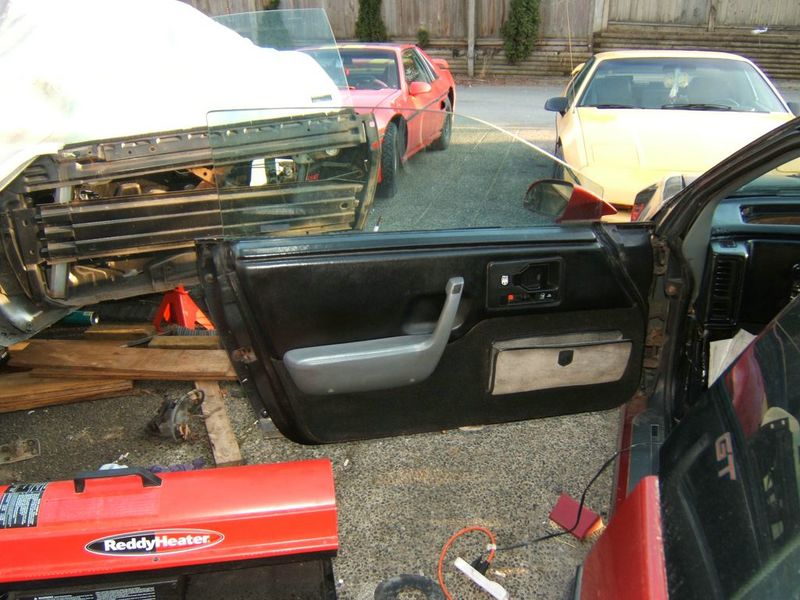
I know the doors are stock design and not some WILD CRAZY Custom door. But the Grey on Black just looks so good to me. I really think GM should have offered this stock.
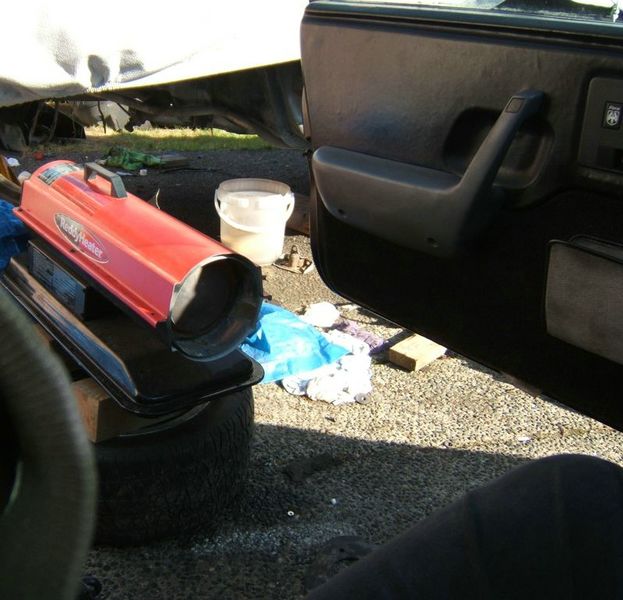
Heat, I gotta have heat. It was -2 Below this morning here, and was +3C (about 38F) most of the day, but the windchill dropped that number a lot. When I had the heater, on the ground pointing at the door, the wind would catch the exhaust and not much of the heat was making it into the car. If I pointed it straight at the side of the car and then moved it close enough, it go the lower ground skirts way too hot. So I put it on a spare Lace Wheel, then put 2 4x4 blocks on top of the wheel. This put the heater right at waist level of me sitting in the car. I kept the passenger door closed and it worked perfect. It kept the cabin a nice steady +25C (75-80F)
This is how the car sits as it is now. It has 5 Jack Stands. 2 under the rear cradle, 2 under the front cross member and a 5th for safety under the front impact beam. (no its not under the nose), I put it on a nice sold steal beam.
------------------ 85GT Soon to be 87GT,93 Eldorado 4.9, 5spd Dual O2 Custom Chip, Custom Exhaust. MSD Everything Capt Fiero --- My Over View Cadero Pics Yellow 88GT 5spd Full Poly Suspension, Lowered 1/2" in front, Corner Carver.
IP: Logged
12:17 AM
Fieroseverywhere Member
Posts: 4242 From: Gresham, Oregon USA Registered: Mar 2006
They stopped selling the Mt Dew Energy drinks in the 600ml bottles up here and the Can's are not the same drink. Not sure what they changed, but I have been drinking a lot of those 8hr energy shots along with 910ml Power Aids / Gator Aids.
------------------ 85GT Soon to be 87GT,93 Eldorado 4.9, 5spd Dual O2 Custom Chip, Custom Exhaust. MSD Everything Capt Fiero --- My Over View Cadero Pics Yellow 88GT 5spd Full Poly Suspension, Lowered 1/2" in front, Corner Carver.
IP: Logged
03:02 PM
Fieroseverywhere Member
Posts: 4242 From: Gresham, Oregon USA Registered: Mar 2006
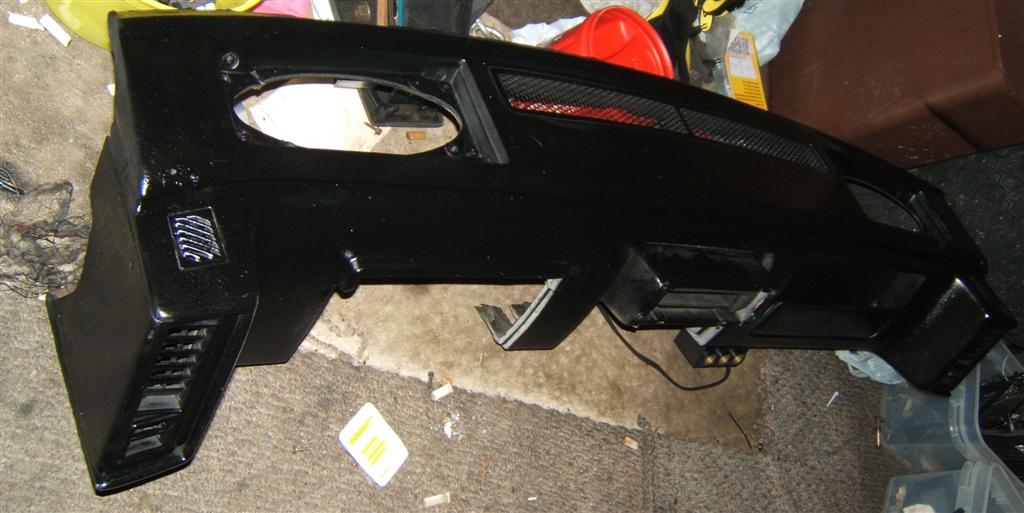
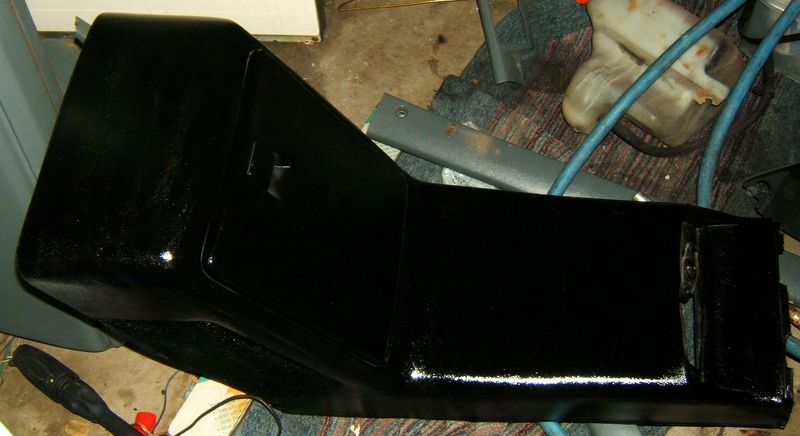
The dash came out great, so I didn't think I would have any problems with the rest of the panels. I sprayed with grease and paint remover. Wiped them all down, gave em a light scuff and proceeded to shoot them.
So here is after the stripping and cleaning its a Urethane / Plastic safe paint and grease remover.
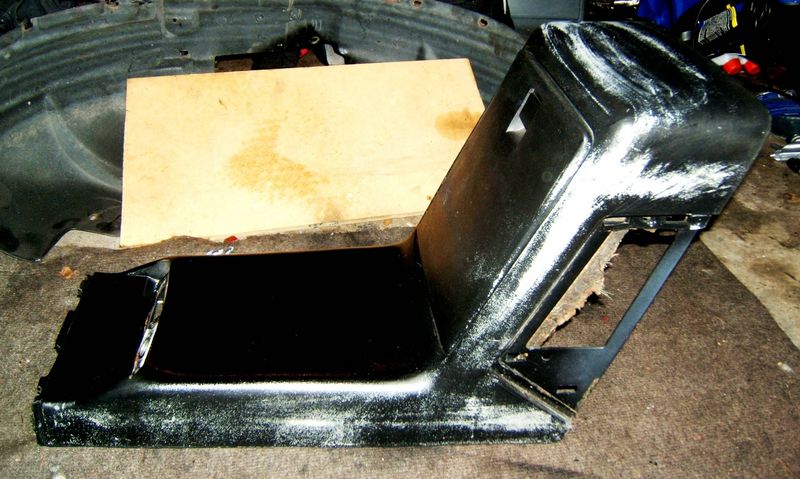
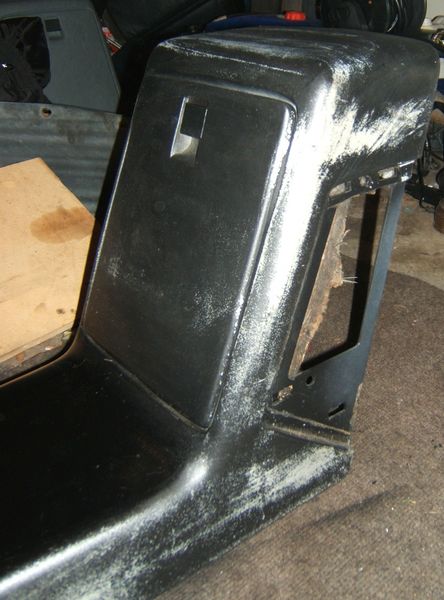
Everything got cleaned the same way as the center console.
I might as well have just dipped these in paint, as that is what it looks like. Finish is crap, texture is horrid. I am going to let it dry over night, and maybe scuff it again and add another coat. If I can't get it to look like I want, I might just say to hell with it and wrap it in a nice fabric. Something like a nice diamond pattern black velvet. Would be nice to have a cloth center to rest my elbow in when I am in the car.
Honestly it looks like I put it in a dip tank, I had to shoot, clean and shoot again, I tried heating the paint, heating the parts, I tried different cleaners and no matter what I did, none of the interior panels would come out with a decent finish. The only part that I got a good finish on was an un-touched stock plastic panel from under the instrument panel.
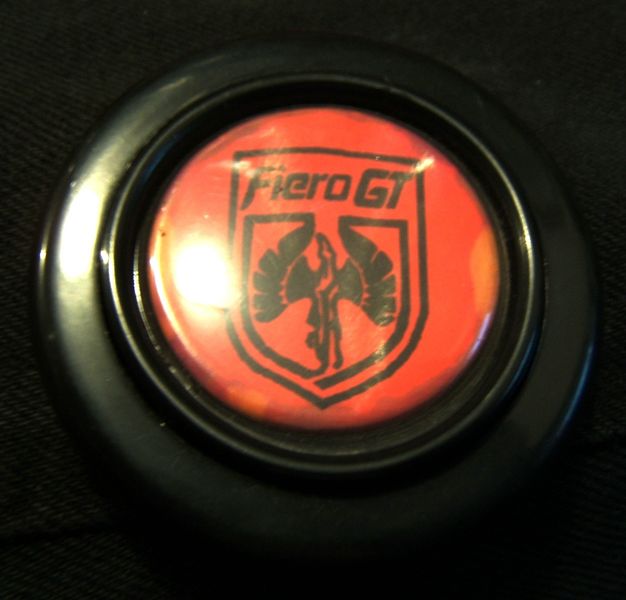
About the only thing that came out positive today was, I think I found the steering wheel horn button. It was buried in the front of the center console where the throttle cable attach's to the frame then to the gas pedal. It looks like they took a piece of paper that was the same colour as the steering wheel and printed the Fiero Logo on it. I'll probably remove it and change it to a better looking Fiero logo. Something closer to the stock Fiero GT emblem.
------------------ 85GT Soon to be 87GT,93 Eldorado 4.9, 5spd Dual O2 Custom Chip, Custom Exhaust. MSD Everything Capt Fiero --- My Over View Cadero Pics Yellow 88GT 5spd Full Poly Suspension, Lowered 1/2" in front, Corner Carver.
[This message has been edited by Capt Fiero (edited 03-12-2009).]
IP: Logged
01:17 AM
Mar 13th, 2009
Capt Fiero Member
Posts: 7657 From: British Columbia, Canada Registered: Feb 2000
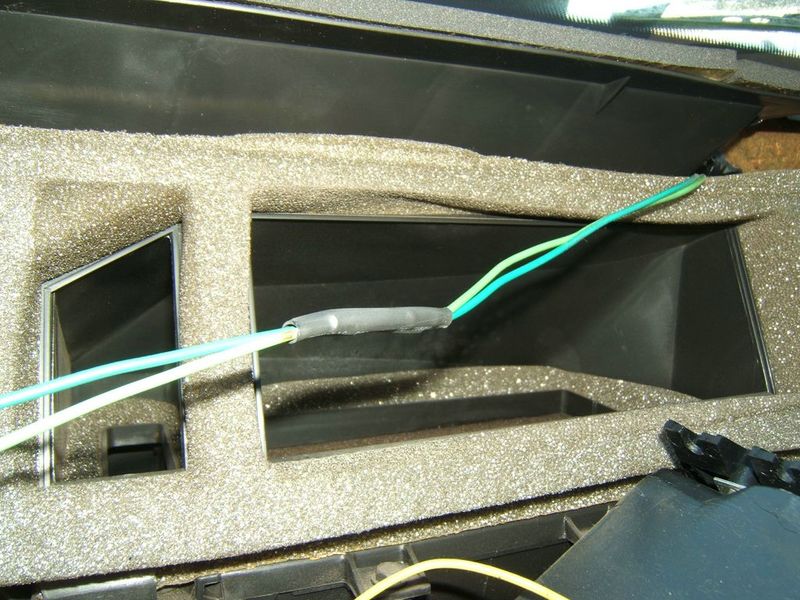
WooHoo, we have Interior. I spent the better part of yesterday and today running all the wiring for all the speakers. It sounds like a lot when you first say it, but its really not that many. There will be 11 speakers total in the car. 2 4x10's in the dash 2 4x6's in the pillars behind the seats 4 speakers in the seats. (2 per side) 2 Directional Dome tweeters in the dash pointed at the driver and passenger 1 sub in the passenger foot well.
I was able to remove the entire seat speaker harness from the 85 and trans plant it into the 87 so I was able to even keep all the factory plugs and loom.
I spent literally hours soldering and shrink wrapping all the wires that the previous owner had cut.
This is the current state of the 85 Interior. there is nothing left in there aside from the main cabin harness which I will be removing Saturday.
We gutted the entire front compartment on the 85 today as well.
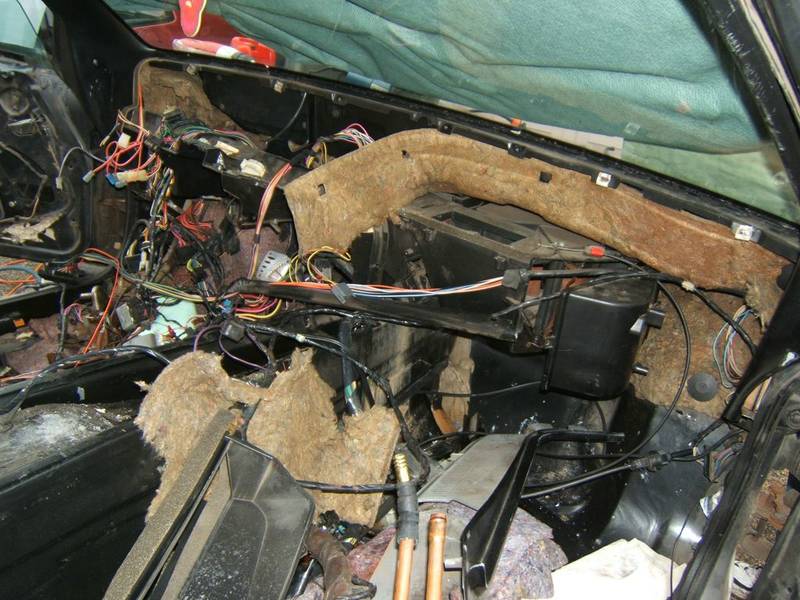
Even found a crazy mess in the A/C area. More on that later.
Lots of coolant pipes, heater pipes, A/C lines.
Gas Tank
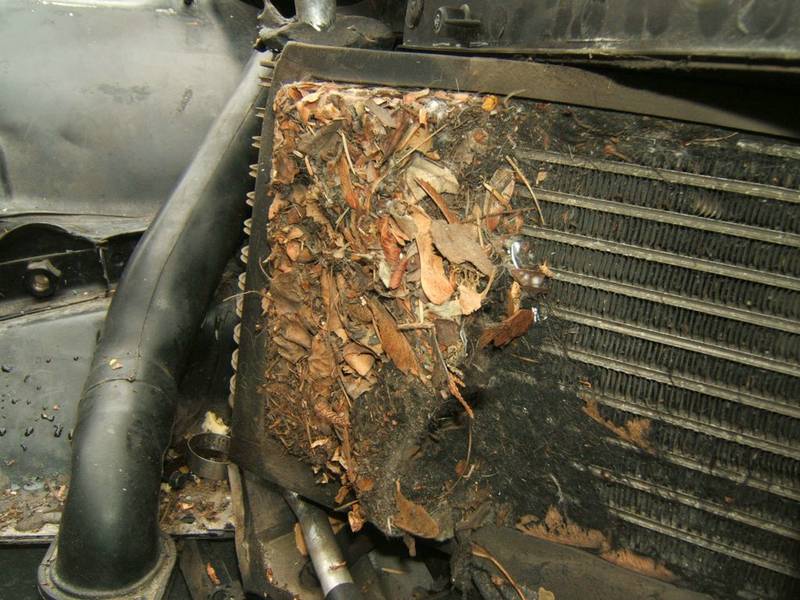
To be honest, I have never ever pulled a Fiero A/C system out. The core was OEM so it has not been out in 25 years. For the record that is NOT the heater core. It was over 2 inches thick in leaves, and what looked like fine hair of some sort.
------------------ 85GT Soon to be 87GT,93 Eldorado 4.9, 5spd Dual O2 Custom Chip, Custom Exhaust. MSD Everything Capt Fiero --- My Over View Cadero Pics Yellow 88GT 5spd Full Poly Suspension, Lowered 1/2" in front, Corner Carver.
I pulled apart my car to upgrade to AC and put in intermittent wipers. This car had been sitting outside, unused for 13 years. The mice had a field day, and clogged the heater ducts, the area where the wiper pivot arms (or what you call them) are and the rubber drain pipes with material they pulled out of the passenger compartment. As long as you have things apart, it is worth checking all areas that the little critters can get to.
BTW, I did find the little fella, nicely dried out behind the ECM. Only the tail was sticking out and when I pulled, I got a whole mouse.
------------------ Jim 86 SE 355 Body Kit w/3.1 Auto (Sold) 87 T-Top Coupe 2.8/5 Speed new project
IP: Logged
09:36 AM
Mar 15th, 2009
Capt Fiero Member
Posts: 7657 From: British Columbia, Canada Registered: Feb 2000
Yep I may pull apart a small section on my 87GT to find out if there is any buildup in there.
Ok todays pics.
It was near freezing cold and raining, they are forecasting 4-8 cms of snow over night, So we took the day off and went shopping. I picked up a really nice degreasing gun. Think paint gun but for solvent. Hooks to my air compressor and has a 2nd feed like that it pulls solvent through to clean parts. Sorry I did not think about getting pics of that until just now. I'll try to snap some pics when I am down in the garage tomorrow.
Well here are the little things that I have picked up over the years and never put on a car as they just didn't seem to fit the style of my car.
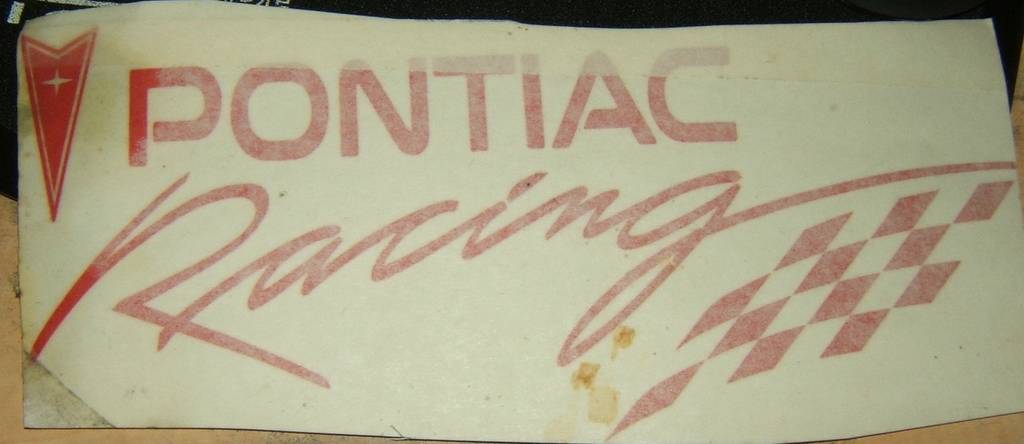
First is a sick on chrome V8 this will go either on the Deck lid or on the Trunk Skin next to the GT emblem on the rear skin.
I bought this years ago and never installed it on my V8 as it just didn't suit the "Rat Rod" style of the car. With the semi Bling Bling of the car. It will be put on it.
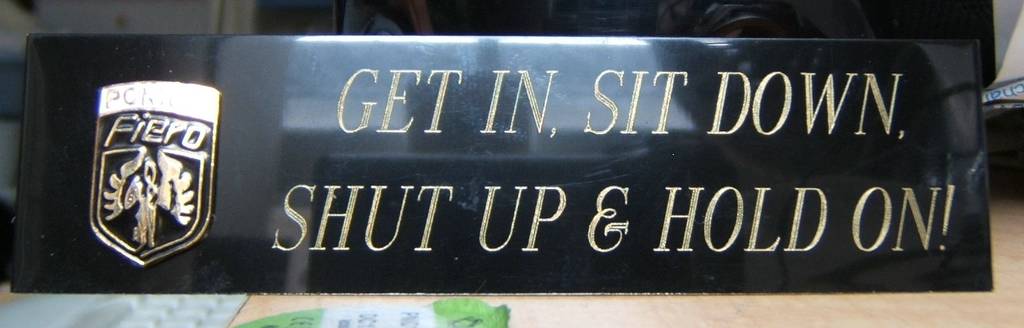
Lisa bought this for me for one of out anniversary's, it really does fit my driving style.
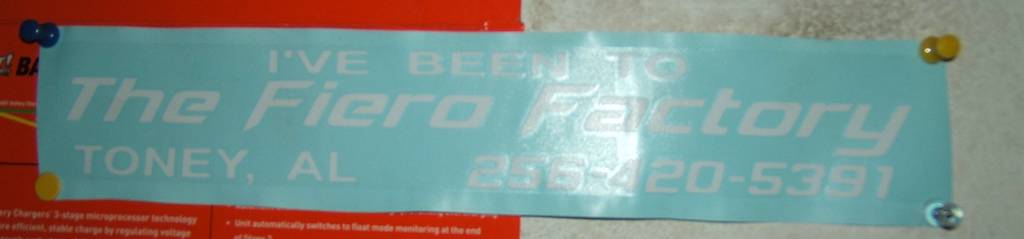
This is the Replace the Fiero Factory decal that has been on my 85 for over 10 years. Its not the exact same one, but Ed has helped with so many questions, I almost feel like I have been there.
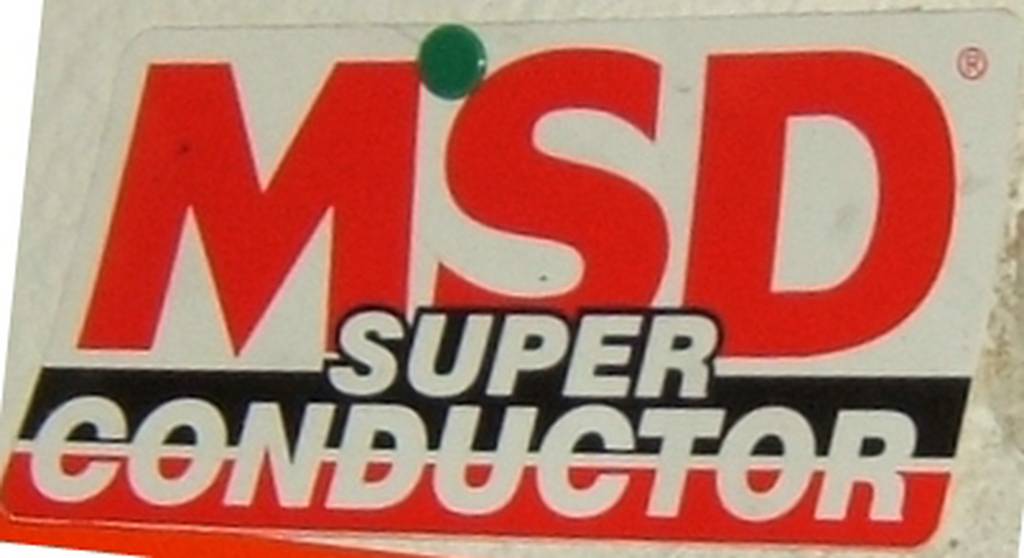
MSD Superconductor wires. I have used them on every build on every engine and to this day, never had a failure. When I damaged one , (wire caught lowering the cradle) I was able to go to the parts store, buy a new end for 5 bucks. re-crimp it on and I was good to go.
One of our Club cards will go on the dash over the Vin Plate. Not that it really matters, but I'd just prefer to not have strangers able to see the vin on my car. However I do want, Fiero enthusiasts to see the card and join the local club.
Another thing Lisa bought me. I normally buy the little Tree shaped ones that hang from my mirror, but this was kinda car guy ish, so it'll end up in the car.
I need to find a current club decal and post up what that looks like. I also need to find out whoever is selling the PFF Window decals as I want to pick up one of those.
------------------ 85GT Soon to be 87GT,93 Eldorado 4.9, 5spd Dual O2 Custom Chip, Custom Exhaust. MSD Everything Capt Fiero --- My Over View Cadero Pics Yellow 88GT 5spd Full Poly Suspension, Lowered 1/2" in front, Corner Carver. From this << to this >>
[This message has been edited by Capt Fiero (edited 03-15-2009).]
IP: Logged
02:13 AM
Mar 16th, 2009
Fieroseverywhere Member
Posts: 4242 From: Gresham, Oregon USA Registered: Mar 2006
Deffinately pull the heater core parts apart in the 87. My 84 caught fire there before I knew to clean in out. Luckily it had been raining and someone had a bucket of water in their yard when I stopped to find out what the problem was. I only needed to replace the outside cover since it was the only thing to melt.
IP: Logged
02:07 PM
Mar 17th, 2009
Capt Fiero Member
Posts: 7657 From: British Columbia, Canada Registered: Feb 2000
Thanks for the heads up, I'll defiantly pull that part and clean it. I don't plan to ever install A/C back in the car, I wonder if I can or should remove that core in there. Well everything on the 87 will have to wait at least 3 weeks before I get back to it. Lisa and I are going on our final Fiero road trip starting Wednesday March 18th and won't return till around April 6th.
------------------ 85GT Soon to be 87GT,93 Eldorado 4.9, 5spd Dual O2 Custom Chip, Custom Exhaust. MSD Everything Capt Fiero --- My Over View Cadero Pics Yellow 88GT 5spd Full Poly Suspension, Lowered 1/2" in front, Corner Carver.
IP: Logged
03:47 AM
Capt Fiero Member
Posts: 7657 From: British Columbia, Canada Registered: Feb 2000
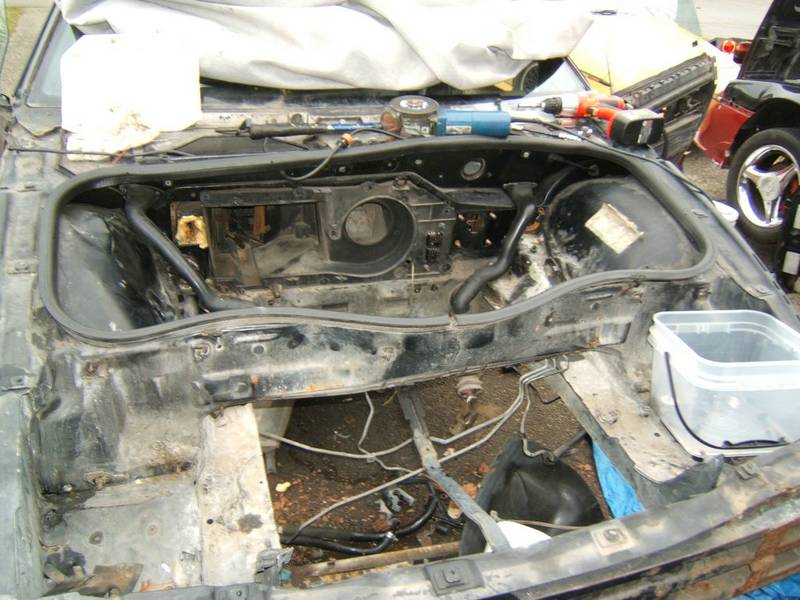
Well in between running bags and tools out to the 88 and loading the trailer and even taking the time to do some quick anti rust touch up paint to the trailer a friend of mine helped to strip the 85 today. There are still a few more things to come off. But the one big one that I really really really wanted to save. (I plan to have it framed and hang it in my garage) The rear window. We were able to get it out in one piece. Between using the fuel tank popper cable, and the Hood Popper cable and lots of work and using a torch to heat the glue, and several gentle pulls with a pry bar. It all finally came out.
The doors still need to come off, and the windshield has been offered up to any in the local group for $25. Doors complete with power windows and glass $10 each. The nominal fee was just to keep the "Freebie" hunter's from grabbing it just because its free and not because they really need it.
Well here are the pics. It'll be the last pics of the projects until we get back from Vacation in 2 or 3 weeks.
Window Out
Hmm not much left
Really not much left
The entire cabin wiring harness and hell the entire everything harness, was removed. The only wire still left in the car is the power lead for the AMP and I'll be taking that too.
------------------ 85GT Soon to be 87GT,93 Eldorado 4.9, 5spd Dual O2 Custom Chip, Custom Exhaust. MSD Everything Capt Fiero --- My Over View Cadero Pics Yellow 88GT 5spd Full Poly Suspension, Lowered 1/2" in front, Corner Carver.
IP: Logged
08:40 PM
Mar 20th, 2009
Capt Fiero Member
Posts: 7657 From: British Columbia, Canada Registered: Feb 2000
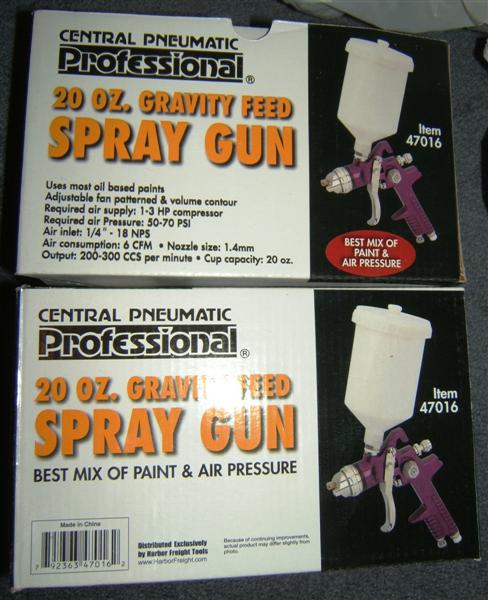
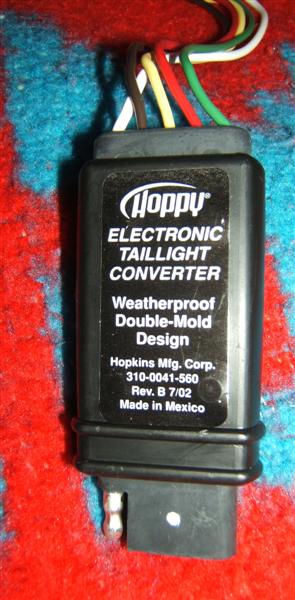
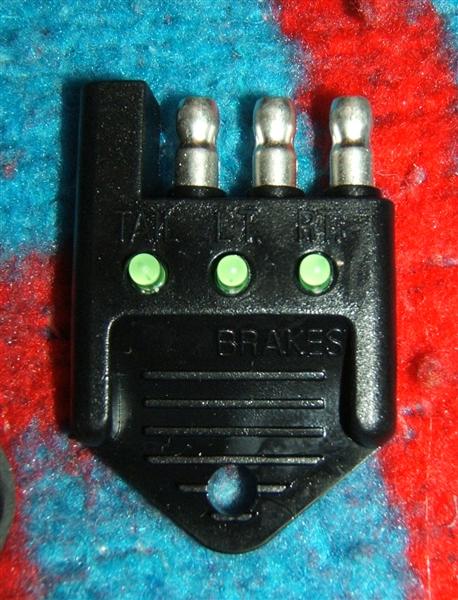
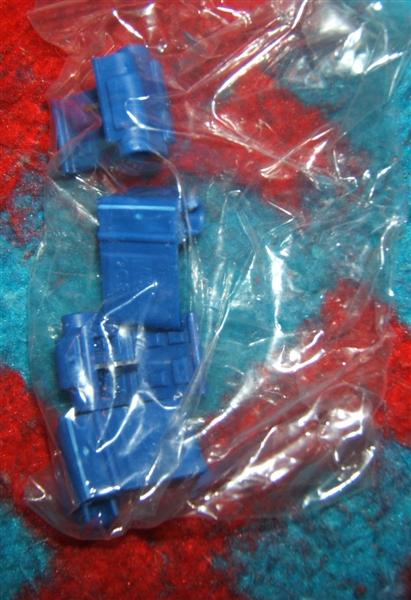
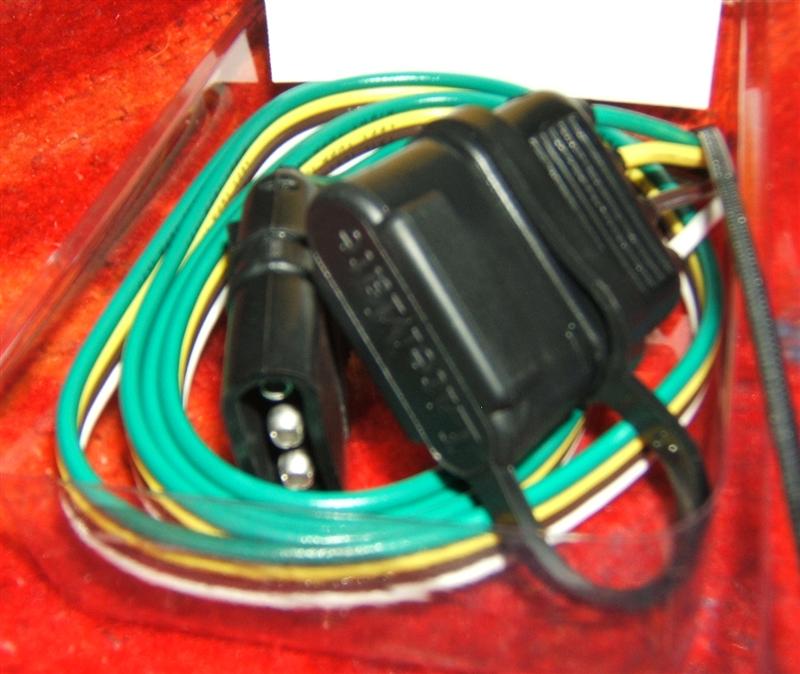
So we made our first trip to Harbor Freight yesterday and GI Joes. First important buy was 2 Paint guns. I was recommended to stay from HVLP as they are less forgiving for a newbie. These only need 6cfm at a low 50 psi. One gun will be used for Black Paint and the other for White Paint. I was also able to finally find a 5 wire controller for the trailer lights. That adapter was between $40 and $60 back in BC. We found it at GI Joes here for a whopping 17.99. I actually had an issue with the brake lights on the trip down that I did not even know until yesterday, I had no brake lights, something was back feeding voltage and actually popped the brake light fuse.
Paint Guns 14.99, I am going to have to take them to an experienced painter and have him explain what all the adjustments do.
5 wire to 4 wire electronic Trailer light controller
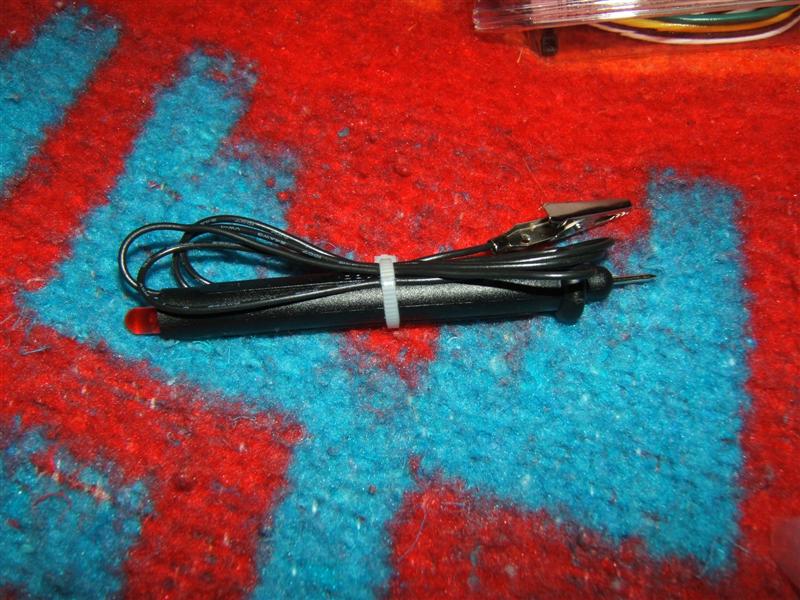
Neat plug in Trailer light tester
Kit even included Wire Taps,
Nice weather pack extension cable
Even a test light included in the kit. I couldn't believe the entire kit was only 17.99 I am tempted to grab a 2nd kit and bring it back to BC with me.
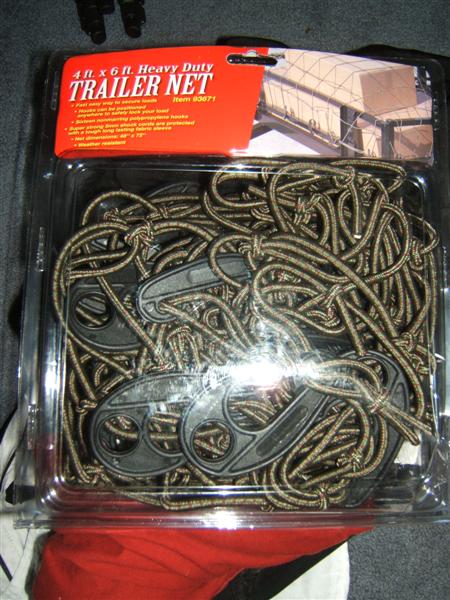
Looks to be the perfect cargo net to go on the deck of the trailer to hold all the luggage down. I'll still probably put on a couple straps to keep things from shuffling around,
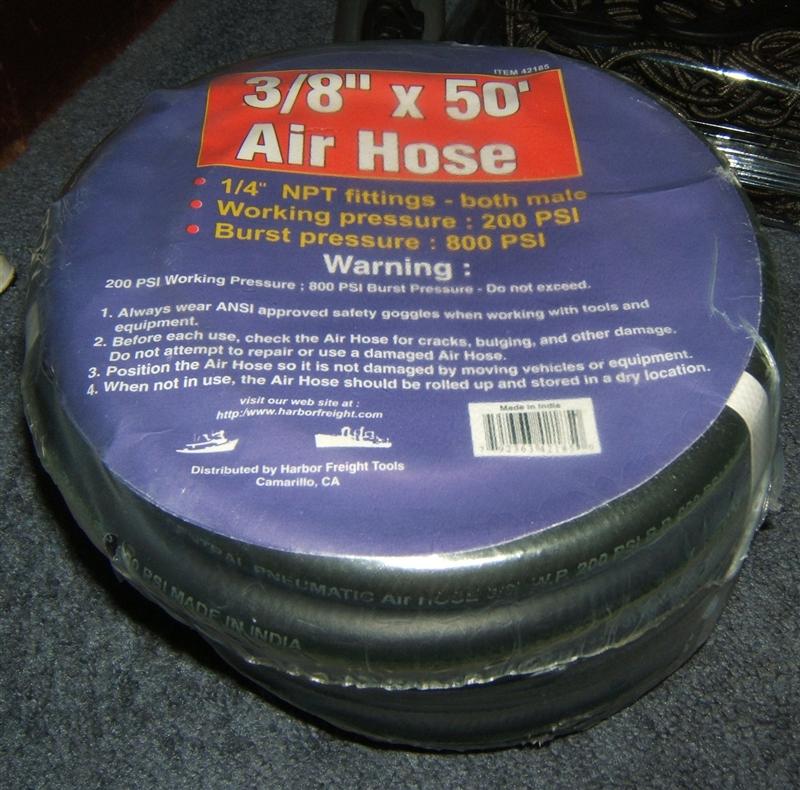
New 50ft air line. 200psi working pressure with 800psi burst pressure. On sale for 9.99
IP: Logged
08:25 AM
Mar 24th, 2009
Capt Fiero Member
Posts: 7657 From: British Columbia, Canada Registered: Feb 2000
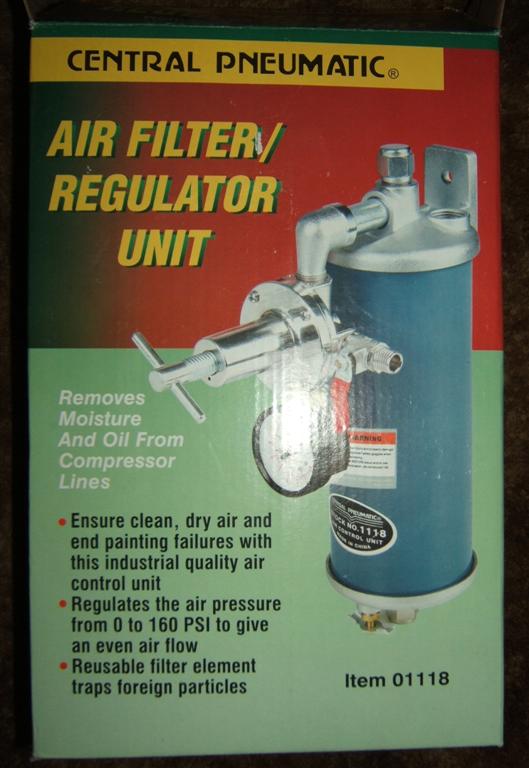
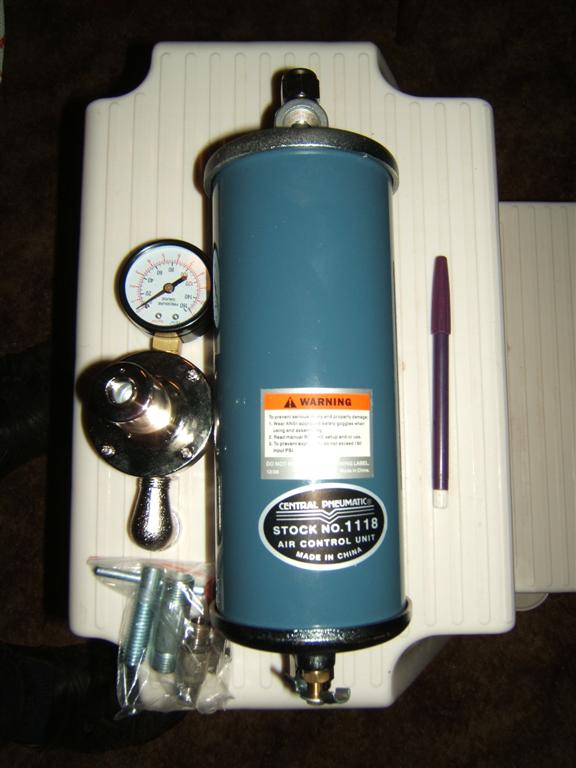
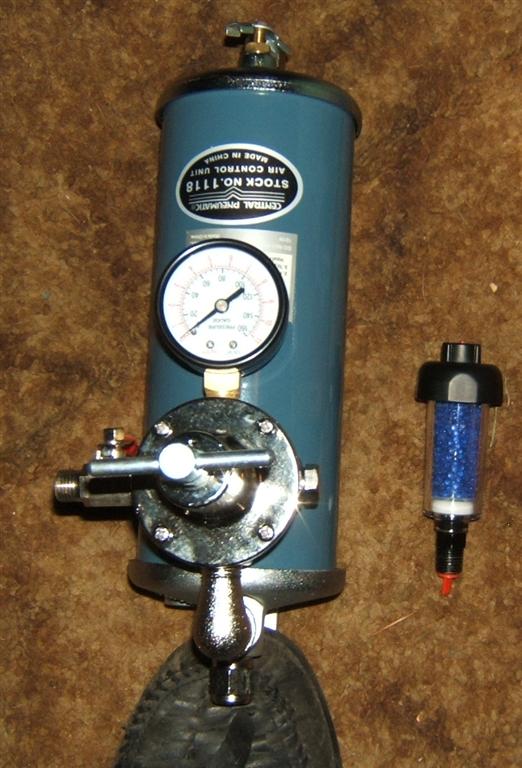
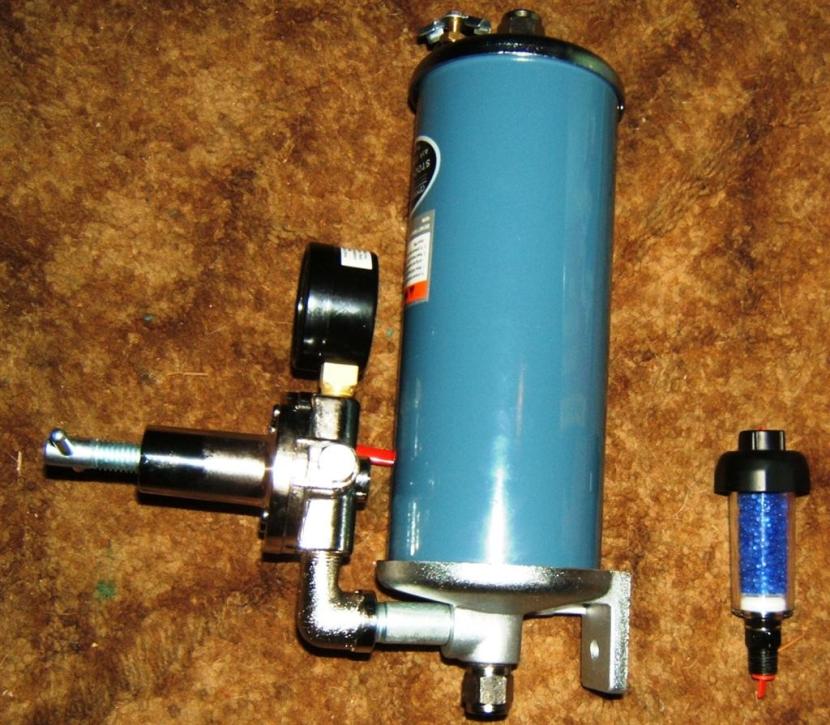
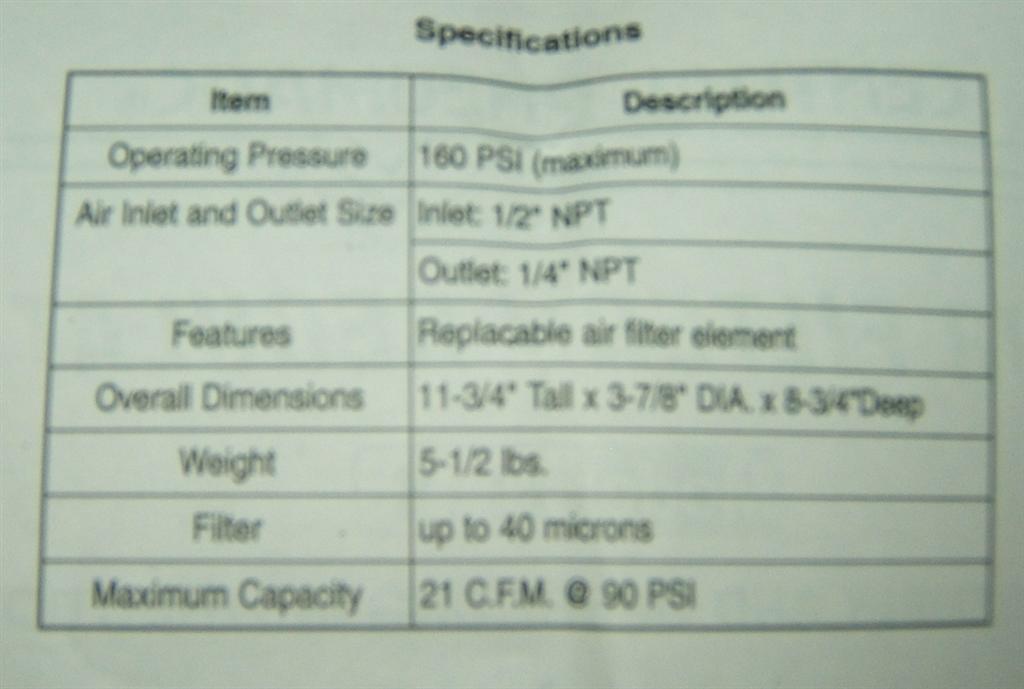
So I went out and bought a little in-line drier. Its the blue thing beside the big thing in the photo. I had posted the pics and received a message that, that dryer is pretty much junk and should only be used as a secondary cleaner after a much larger dryer, as well as the regulator I bought was not going to work. So Today we went back out to Harbor Freight and picked up a few things.
The Box
Note the pen beside it as a size reference
Assembled and showing the dryer I thought was big enough
Side View
Specs, sorry for the blurry
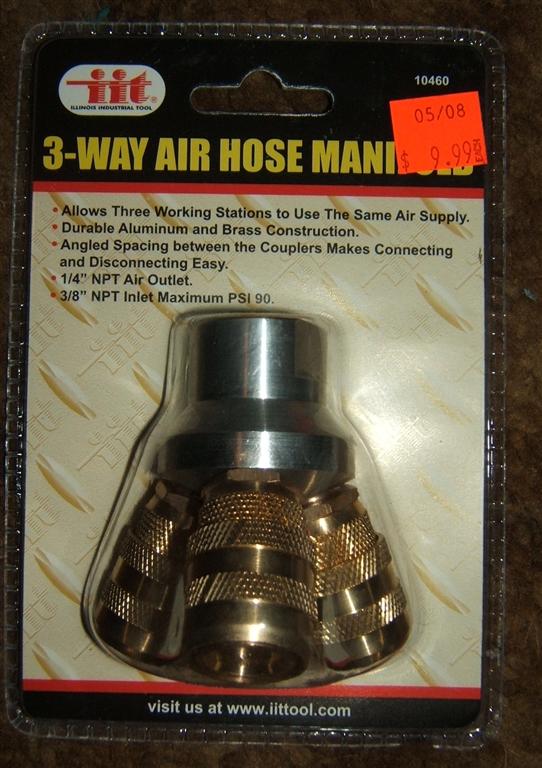
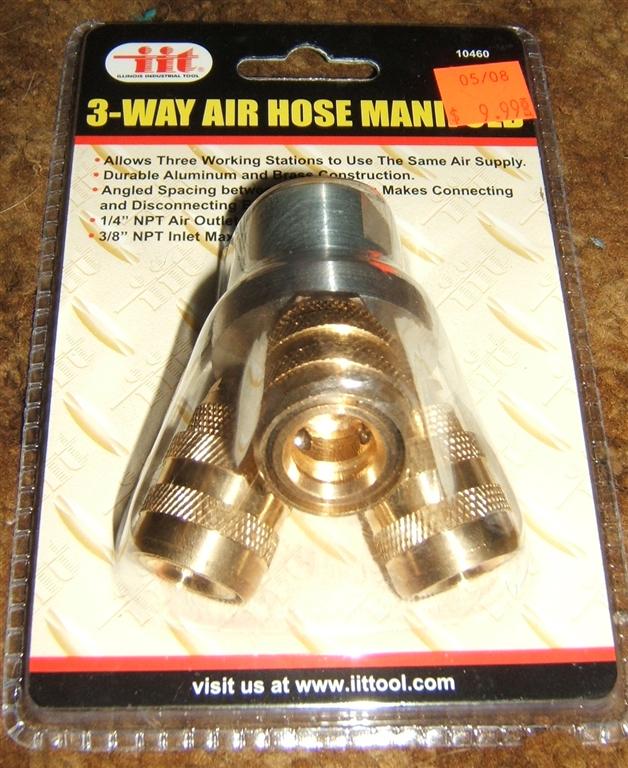
3 head manifold. This way I can have a dedicated line and parts from the tank to the paint gun and worry a little bit less about running the other power tools on the lines. I figured for 10 bucks it was cheap insurance.