There are Mr. Mike's Seats and now there's Bro's LED Headliner.
Time involved: 4 hours. Skill level: Medium skill required if you purchase "ready-made" LED strand. If not, the skill level jumps to "Over My Head".
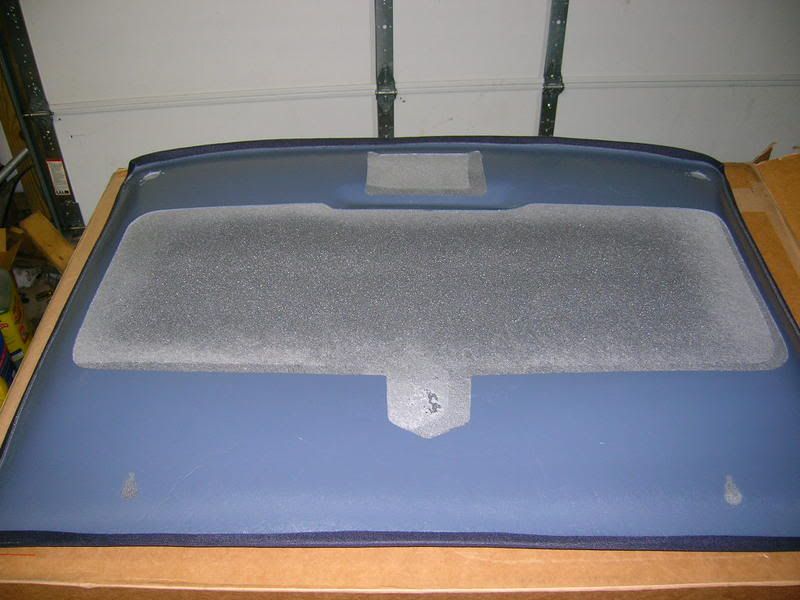
As I mentioned in a previous thread, I took advantage of The Fiero Store's 20% off sale and purchased an ABS headliner, with sunroof, without 3rd brake light, with black cloth. It took almost two weeks to get it, but I was told it could be that long since the 20% off sale had depleted TFS's inventory of headliners. FedEx dropped it off at 11:25 am today and at 11:28, I was already gathering the needed tools and prepping the car for the install.
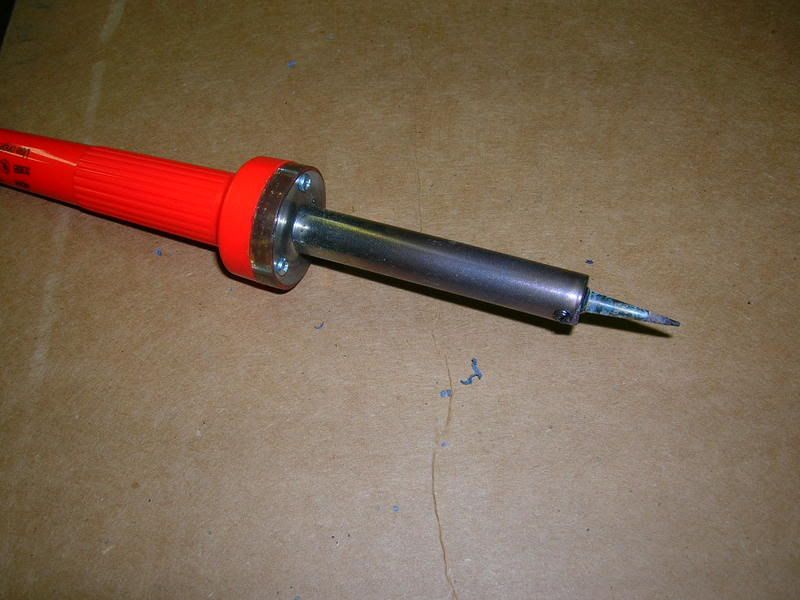
Okie, first off, tools and needed supplies. In addition to the thing listed below, I robbed the kitchen of every chip clip I could find and picked a broken hacksaw blade outta the trash. I also used an 1/8" and a 1/4" drill bit. Yes... a soldering iron... No, you're not crazy. That's a tire inflation tool, but not today. Today, I'm using the end I'm pointing at. $15 at Advance Auto Parts, but good stuff and somewhat forgiving.
The next thing I did was turn on the radio. Today it was a mix of NPR, '80's hair bands and classic rock.
The box that the headliner came in made a very handy working surface, so I balanced it on top of my biggest trash can. The plastic this thing is made of was quite flexible, but was still rigid enough to hold its shape. At no time did the corners sag under the weight of the headliner when I placed it face down. It was so flexible that maybe... just maybe ...
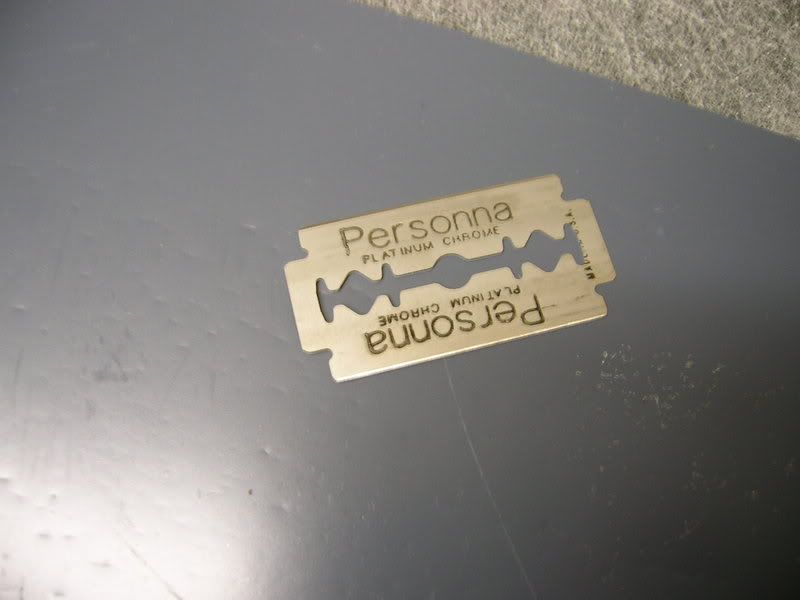
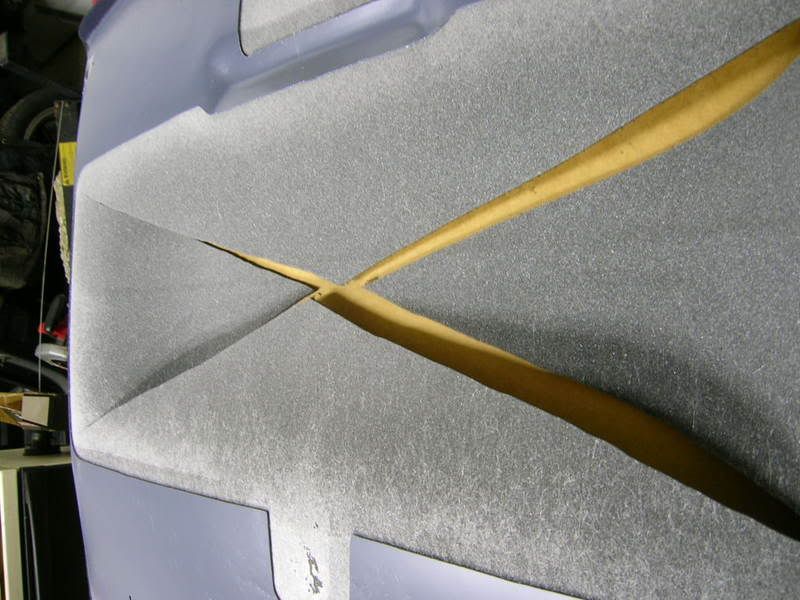
The first thing I did was to slice a big "X" right in the middle of the whole works.
I am a noob and furthermore a complete retard. Do NOT do what you see in the next series of pictures. The fabric must be left unglued because it gets crammed into the shiny chrome piece around the sunroof and held in place by the rubber sunroof trim.
I wanted to start small to "feel it out", so I did one of the sides. I sliced the fabric to within 3/8" of the plastic. Any closer than this and your incision will show after you get it installed. Unless it will be covered by a trim piece, do not cut any closer to the plastic than 3/8". I learned that from a thread I read here. Don't remember the guy's name, but I'm going to learn from his mistake.
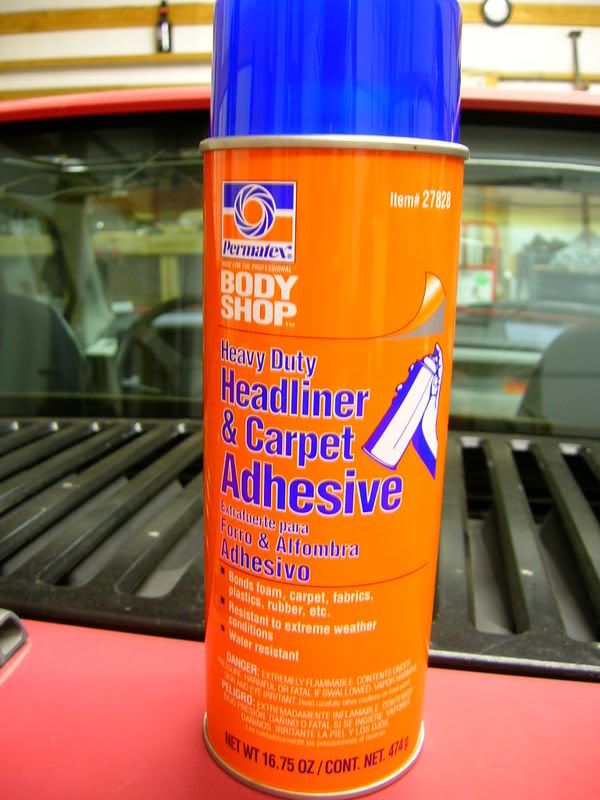
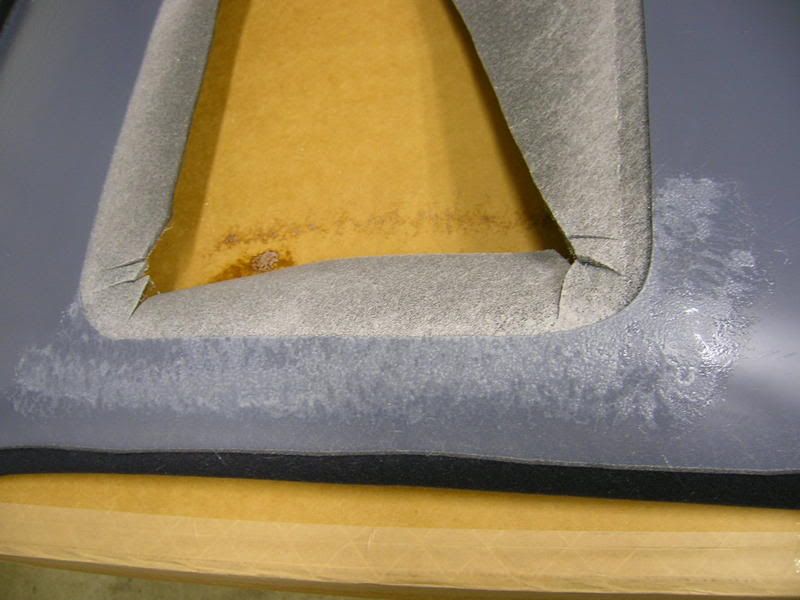
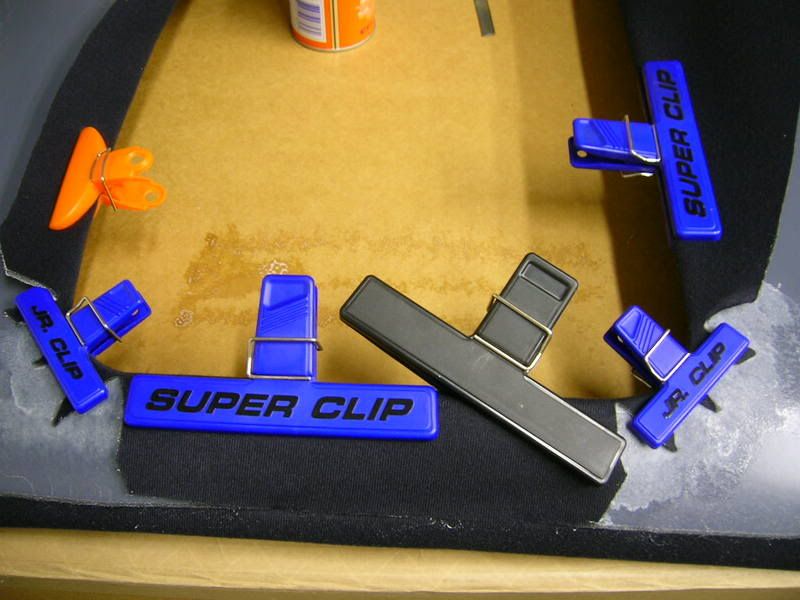
After cutting away the excess and making sure I had everything set, I sprayed the glue, folded the fabric over and chip-clipped it in place. I opted for the chip clips becaused they're clamping force is barely enough to hold a bag of chips closed. I new they wouldn't crush the fabric.
I did the above all the way around until the sunroof hole was finished. I then started on the visor and interior light holes. I don't have any pics of the hole for the light but aside from being smaller, it's really no different than the sunroof hole. edit: except that you're SUPPOSED to glue it to the back of the headliner, unlike the sunroof material....[i]
From this point forward, it's ok to resume following instructions as I actually did this part right. I'm STILL trying to figure out how I'm going to undo what I've done and make it look nice..... Can I get someone to pimp slap me for being a complete moron?
The headliner is finished. Now for the friggin' awesome part.
My wife's Honda CRV is to blame for this next bit. Her Honda has ONE interior light and it sucks. People from the Dark Ages would see this light and say, "Damn, that's dark." I conjured up the idea of installing LEDs in her headliner as a way of improving the lighting in her truck. But it takes some mondo-huge huevos to take a perfectly good headliner out of a Honda and bust out a drill on it. For one, the damn thing runs the entire length of the truck and were it to crack during removal, modification or installation, boy would I look like a complete idiot. So I experimented with some LEDs in my "headliner-less" car. They were bright and durable and seemed to be perfect for the task. But since it was MY idea, I was determined to have them in my car first.
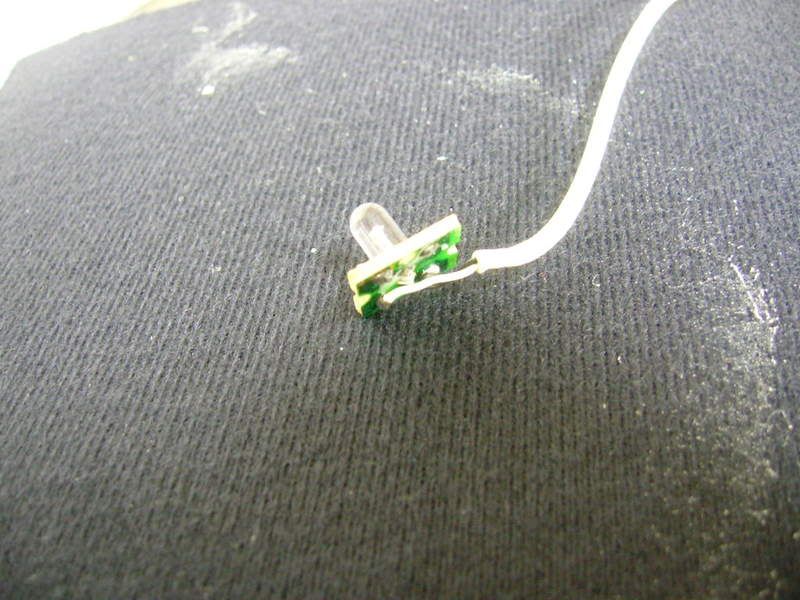
The chosen LEDs. $15 at Advance Auto Parts. Available in Blue, Green, Red, and White. I installed the White ones directly into my car with the sticky-pads that came with the set. They're a direct "wire-in", too. No resisitors or anything to mess with.
For permanent installation into my headliner via the LED holders, I removed the acrylic housing. I set a pair of Vise Grips to slightly smaller than the O.D. of the housing and clamped them down, cracking the housing. Had I used pliers, I might have squeezed too hard and crushed the LED. This is what was left.
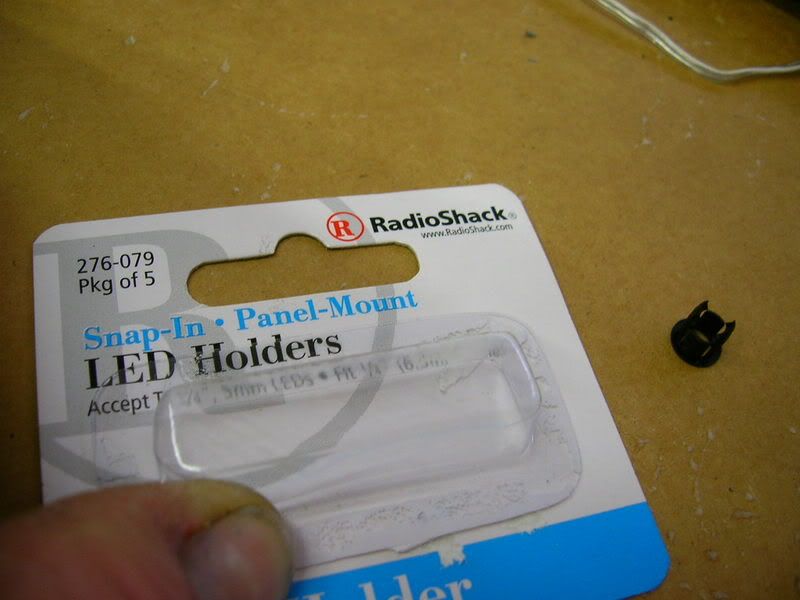
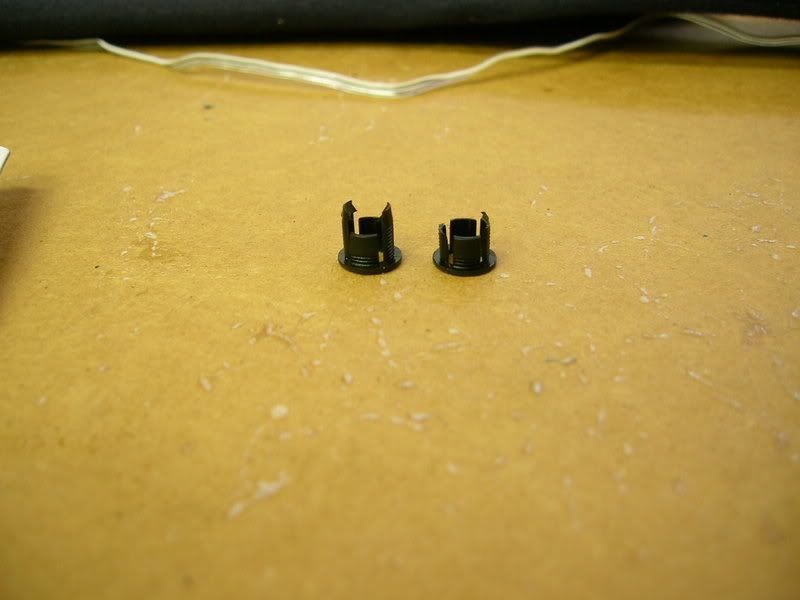
LED holders. Maybe $3 for two 5-packs at Radio Shack.
The construction of the "ready-made" LEDs that I used made it impossible to use the holders "as-is", so I cut off the longer legs that would have interferred with the base of the LED.
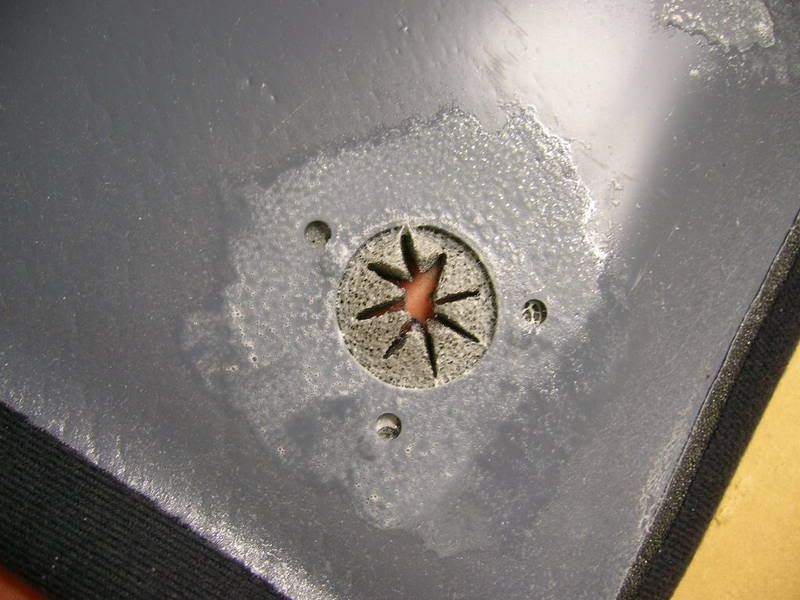
I marked out the locations for the LEDs and drilled my holes being extremely careful not to let the drill bit go through the fabric. If it does go through the fabric, there's a chance it could "catch" the fabric and start winding it around the drill bit. Dumb, I know, but I used my own bare finger as a stop for the drill bit. I used very light pressure and a slower bit speed to prevent going through too much material at once. The bit crawled slowly through the ABS and it was easy to tell when it was about to come through.
I used the broken hacksaw blade to scrape the excess plastic shavings from around the hole.
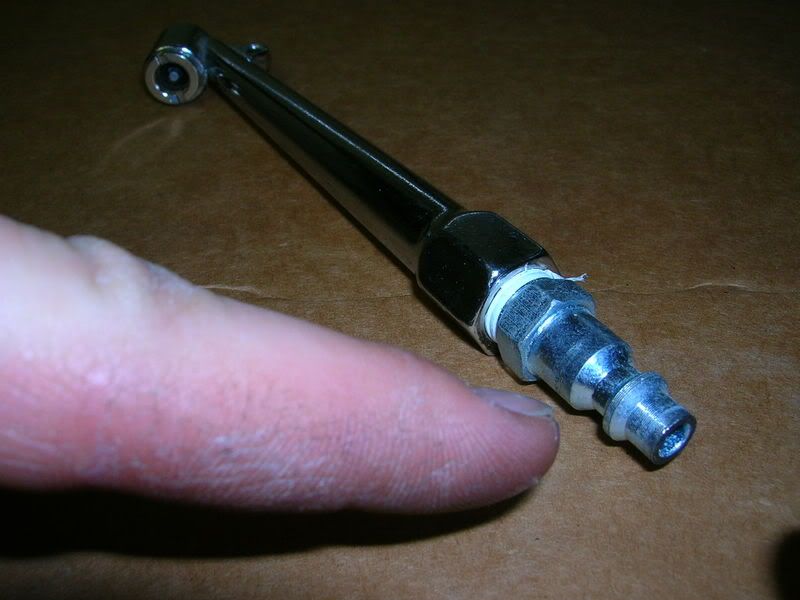
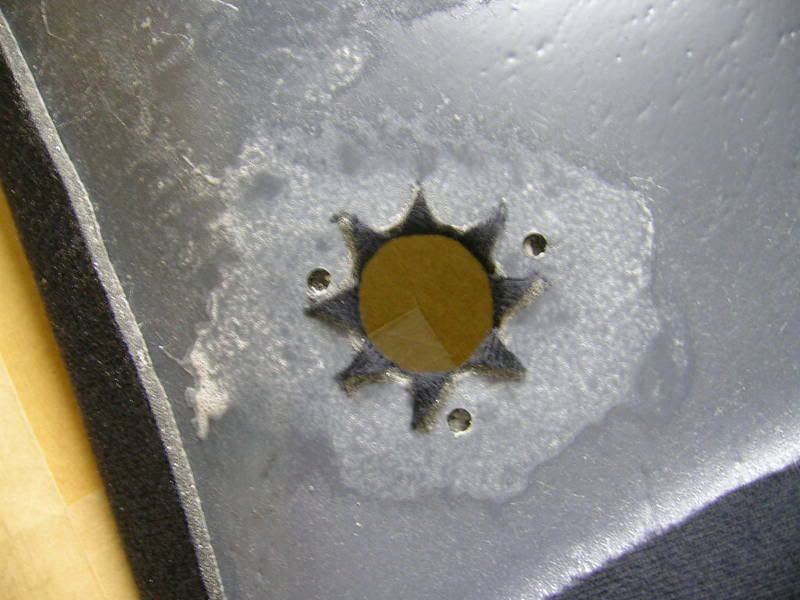
Once the holes were in the plastic headliner, I set about making holes in the fabric. It was easily done with a soldering iron with a sharply pointed tip. I made the holes in the fabric slightly smaller than the 1/4" holes in the plastic. This makes for a tight fit around the holders. I gently worked the holders through the fabric and plastic. I then inserted the LED assembly from the back and used the wrong end of my "tire inflation tool" to steady the holder as I forced the LED into it. The fit could not have been more perfect and I shouldn't have to worry about anyone poking an LED back into the roof.
Got two done and it's looking better with every LED!
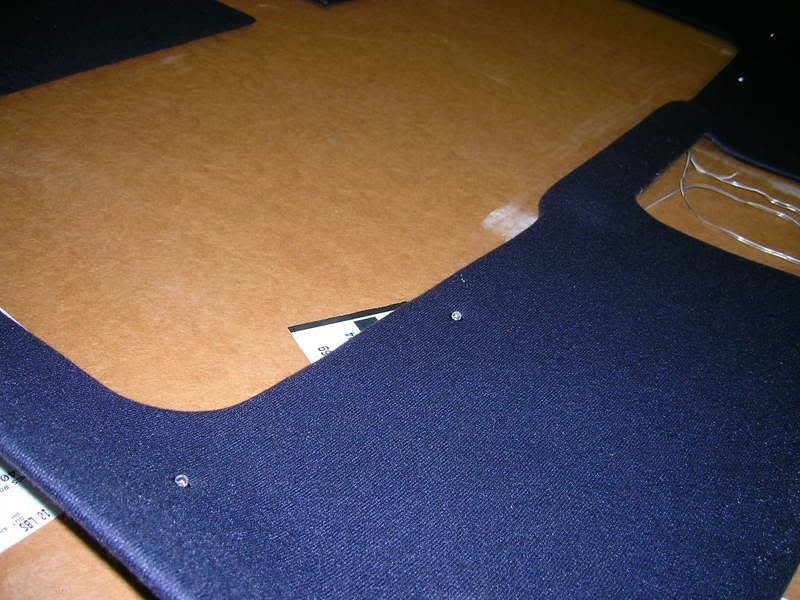
Got 'em all done and the headliner is installed. Remember me mentioning how the headliner was really flexible? Well...I cheated on the install. With the exception of the obvious, like the interior light and the sunroof latch, I removed no interior trim pieces to install this headliner. That's right. No A-pillar, B-pillar, seal belt bolt, no nothing. The headliner just gave in the middle and let me slide it into the voids between the roof and the trim pieces. When it slid home, it popped right back into shape. Three annoyingly loud cheers for The Fiero Store for stocking such an awesome product.
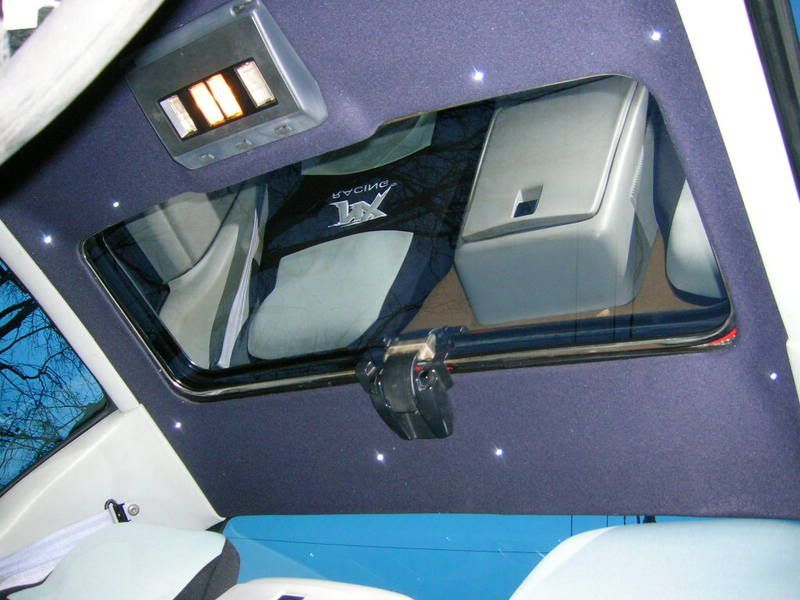
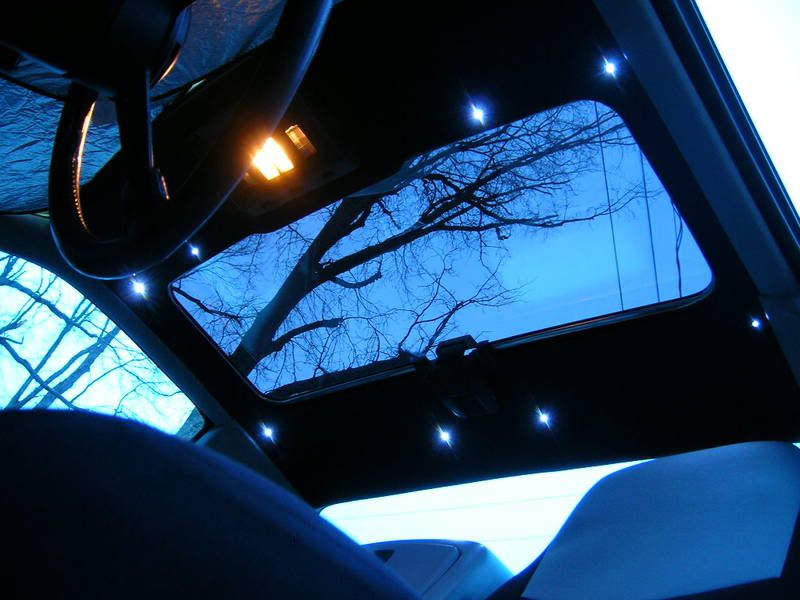
Here's Bro's Headliner, all buttoned up and lookin' dead sexy. (With flash)
Without flash.
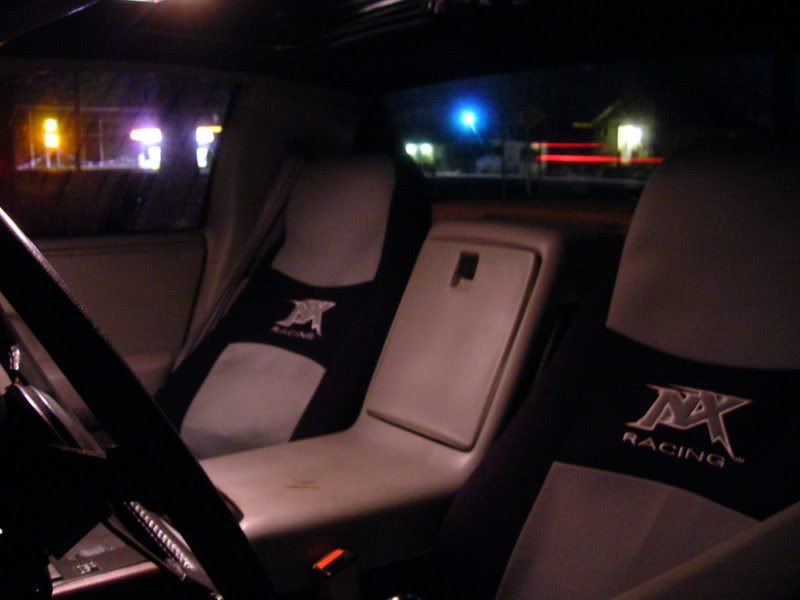
These shots show the improved lighting over stock. Without LEDs.
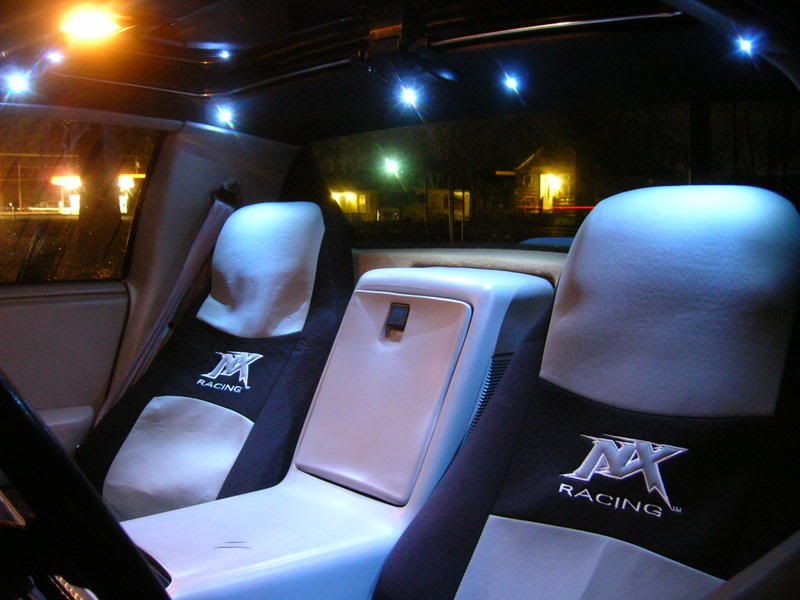
After installing Bro's Headliner.
[i]edit to add: The Fiero has two center "courtesy" lights that come on when the doors is opened, as well as left and right, "map" lights that only come on when their respective switches are pushed. This mod does retain that functionality as the LEDs only come on when the door is opened or the dash switch is rotated to turn on the interior lights. This prevents your wife from lighting up the entire car if she wants to read a book on a long trip.
My next step will be to get some of these to install in my engine compartment!
------------------
My Fiero ate an import. No, seriously.
[This message has been edited by Brocephus (edited 03-29-2009).]
IP: Logged
09:33 PM
PFF
System Bot
Carver1 Member
Posts: 2843 From: Edgewood, New Mexico Registered: Nov 2000
Dude, In the words of Peter Griffin, "That is Freakin' Awesome." I've thought about doing something similar ever since I rented a Chrysler minivan on a business trip. It had two green LEDs in the dome light housing that were pointed at the dash. They were only on when you had the headlights on, they were dark enough that they didn't interfere with your night vision, but you could totally make out the knobs on the radio and everything. I was planning on doing something very similar to this on the dome light of the T-top, now I'm going out to buy parts now... That is again, freakin' awesome. ~John
IP: Logged
11:37 PM
Tony Kania Member
Posts: 20794 From: The Inland Northwest Registered: Dec 2008
Seeing as that is one impressive install, you get a plus also! I looked at the first pic with the stock lights thinking that was it. Then i panned down to the next pic with the LED's. Wow! I will say it backwards, wow!
------------------
IP: Logged
11:45 PM
Mar 8th, 2009
Brocephus Member
Posts: 617 From: Franklin, NY, USA Registered: Mar 2006
I'm glad you guys like it and I really appreciate the (+)'s!
I ordered the headliner knowing it needed to be done. I did not order it because I wanted to do it. These things are usually a huge PITA and I was not looking forward to pulling off half of the interior to accomplish it. When I saw that it was able to bend a little, I immediately thought about whether or not it would bend enough to just slip in there without removing the interior.
The cutting and gluing of the fabric wasn't realley hard, but it dragged on due to drying times. I was really not looking forward to laying out the holes for the LEDs and even thought about skipping it. It's not everyday I take a drill to $200 worth of brand new parts, so I was a little leery. But then I got to thinking about how sexy it'd look if I pulled it off and I couldn't turn back. Once I figured out how I was going to do it, it was not only smooth sailing, it was just plain fun and I had a blast doing it.
IP: Logged
01:07 AM
MordacP Member
Posts: 1300 From: Clovis, California, US Registered: Sep 2007
Hey, that's a good idea! I have been disappointed from time to time with the dome lights in the fiero, I just might do this. Hope this finds it's way to the construction zone
IP: Logged
02:23 AM
Brocephus Member
Posts: 617 From: Franklin, NY, USA Registered: Mar 2006
I do have one request. Could someone with a sunroof please post a pic of where the headliner meets the sunroof? I seem to remember my headliner fitting better than this one does. Around the sunroof, I can actually pull the headliner down and see the metal frame of the roof. It almost seems as though I'm missing a piece of trim or something. I'll post pics of what I'm talking about in a few minutes.
IP: Logged
12:59 PM
PFF
System Bot
Brocephus Member
Posts: 617 From: Franklin, NY, USA Registered: Mar 2006
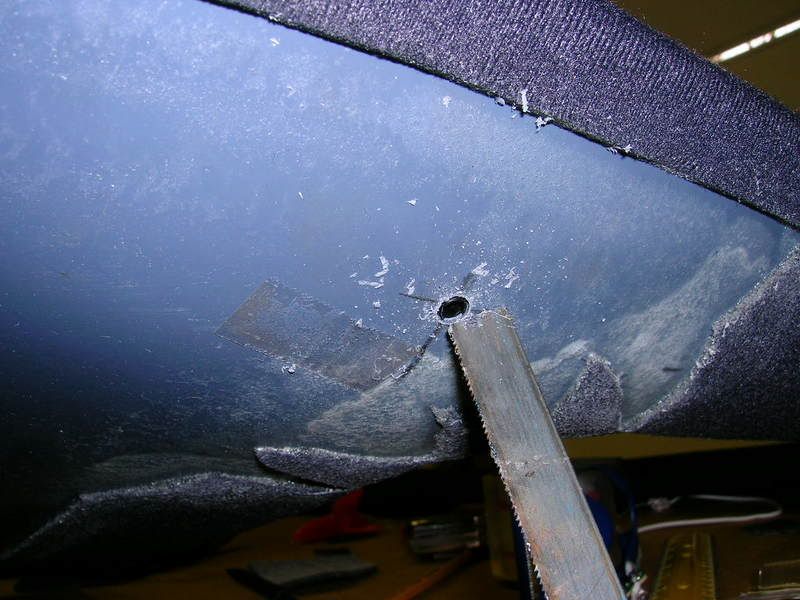
Never mind.... boy did I just screw up in a big way.
In the OP, you saw me cut the X in the sun roof hole, fold and glue the material to the back of the headliner. Do NOT do this. That extra material goes into the chrome track that surrounds the sunroof and is held in place with the rubber sunroof trim. I now have a 1/4"-1/2" gap between my headliner and the roof, with no way to take up that space. I may be able to fabricate some kind of trim piece for it, but with the move to New York taking place on this Tuesday, it may be many moons before I can actually get to it.
Oh well, live and learn.
IP: Logged
01:06 PM
jscott1 Member
Posts: 21676 From: Houston, TX , USA Registered: Dec 2001
Never mind.... boy did I just screw up in a big way.
In the OP, you saw me cut the X in the sun roof hole, fold and glue the material to the back of the headliner. Do NOT do this. That extra material goes into the chrome track that surrounds the sunroof and is held in place with the rubber sunroof trim.
Oh well, live and learn.
Awesome LED install. I gave you props for that.
As for the headliner install...yeah you screwed up.. I don't even do headliners since I found a guy that will do one for me for $20, including the material. I bring him a limpy soggy mess and I come back with a perfectly done headliner, but yeah you have to leave the flaps around the sunroof hole.
IP: Logged
01:23 PM
MordacP Member
Posts: 1300 From: Clovis, California, US Registered: Sep 2007
As for the headliner install...yeah you screwed up.. I don't even do headliners since I found a guy that will do one for me for $20, including the material. I bring him a limpy soggy mess and I come back with a perfectly done headliner, but yeah you have to leave the flaps around the sunroof hole.
WHO is this magical wizard of headliners and WHY doesn't he live by me!??!??!?
IP: Logged
03:34 PM
Mar 9th, 2009
jscott1 Member
Posts: 21676 From: Houston, TX , USA Registered: Dec 2001
WHO is this magical wizard of headliners and WHY doesn't he live by me!??!??!?
He's done two for me and I try not to smile too much and let him know how crazy cheap this is... last time I called he hadn't even started it, but said come by anyway. 15 minutes later I got there and it was done perfectly. He is a wizard.
IP: Logged
10:31 AM
Austrian Import Member
Posts: 3919 From: Monterey, CA Registered: Feb 2007
Brocephus, I love your tagline, "My Fiero ate an import. No, seriously."
Hehehe, I can actually take credit for coming up with that. I'll be the first to give someone credit if I use their stuff, but that one's all mine!
My grandfather worked at the Corvette Plant in St. Louis, MO and then in Bowling Green, KY for almost 30 years. On every vehicle he ever owned there were always two bumper stickers: "Right-to-work is a rip-off" and "Go eat your import!" It's easy to see where I got the idea.
What does the lolcat caption in your avatar say? Have a larger pic you can post?
IP: Logged
07:34 PM
Jun 11th, 2009
americasfuture2k Member
Posts: 7131 From: Edmond, Oklahoma Registered: Jan 2006
me likey. very nice! after riding in my friends 06/07(?) civic, i got an idea sorta like this. the civic has a dimly lit blue tiny surface mount looking LED that sheds a tiny bit of light onto the center console. not a bad idea.
me likey. very nice! after riding in my friends 06/07(?) civic, i got an idea sorta like this. the civic has a dimly lit blue tiny surface mount looking LED that sheds a tiny bit of light onto the center console. not a bad idea.
Must be a Honda thing. My friend's TSX has the same feature.