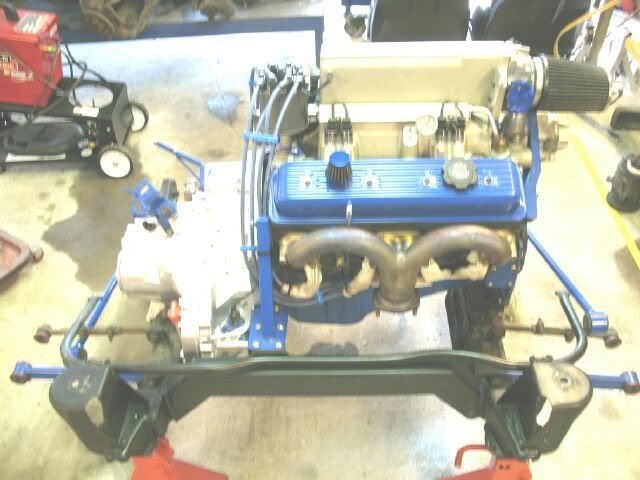
I pulled the engine/tranny out to replace the rear main seal, install a new clutch and a rebuilt getrag, so it was an opportune time to do more to clean up the firewall.
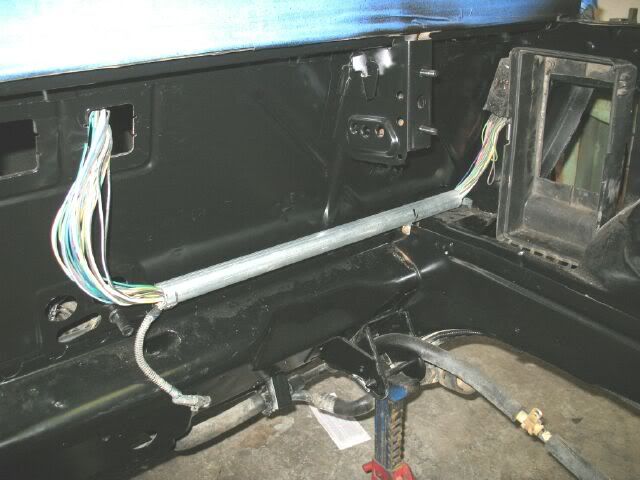
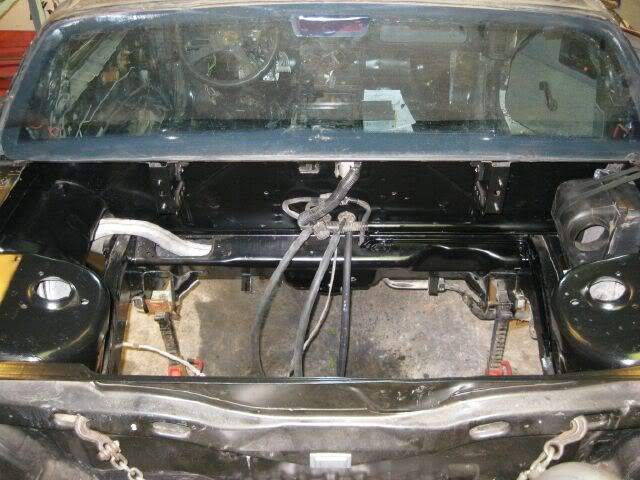
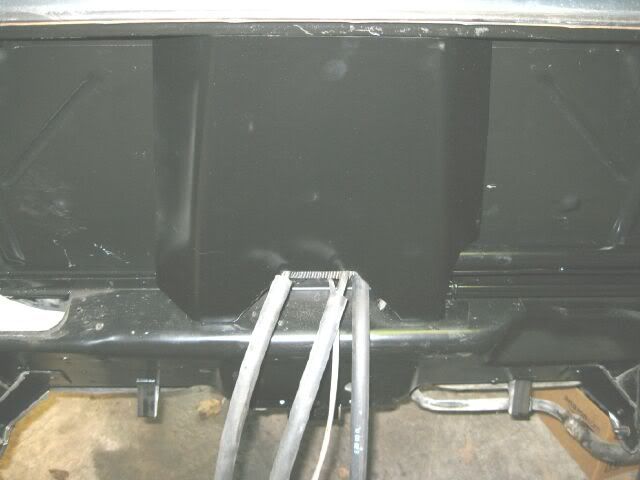
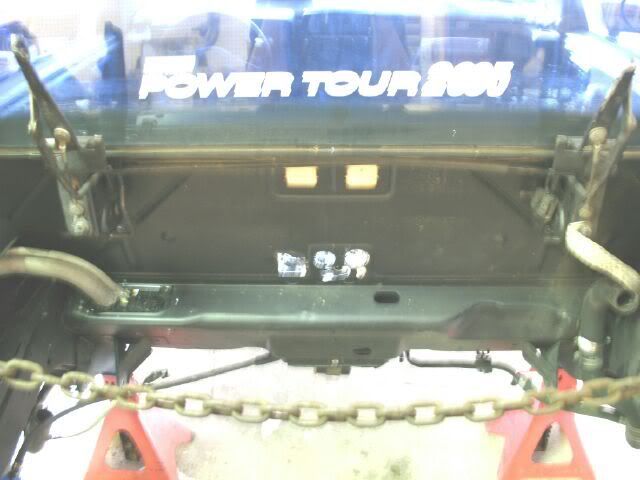
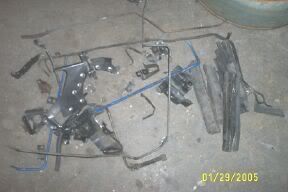
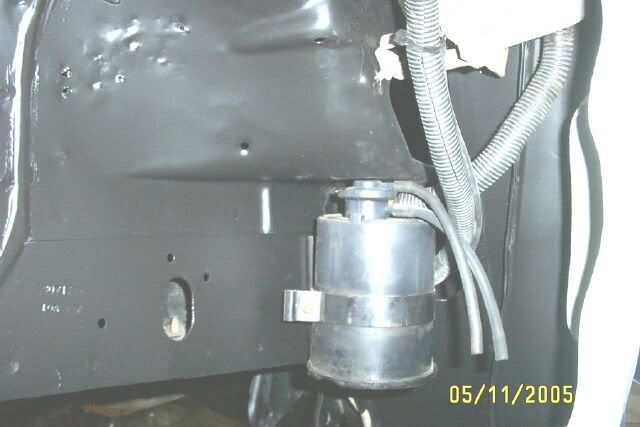
I had already removed all non-essential items, relocated the 500 connector to the center console area and ran all non-engine wires through the frame. This is what it looked line once I pulled the engine for the work:
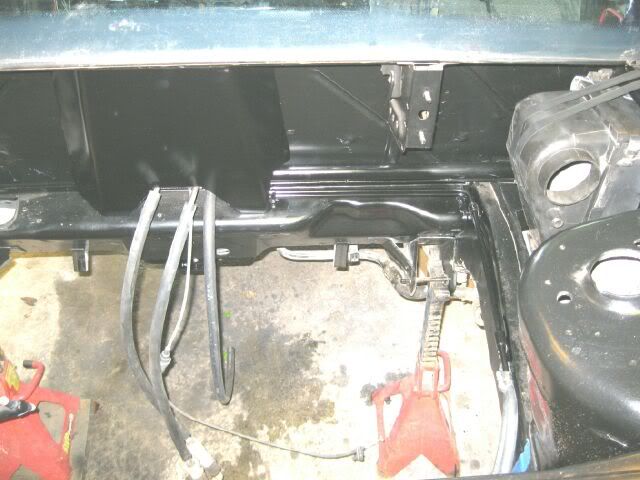
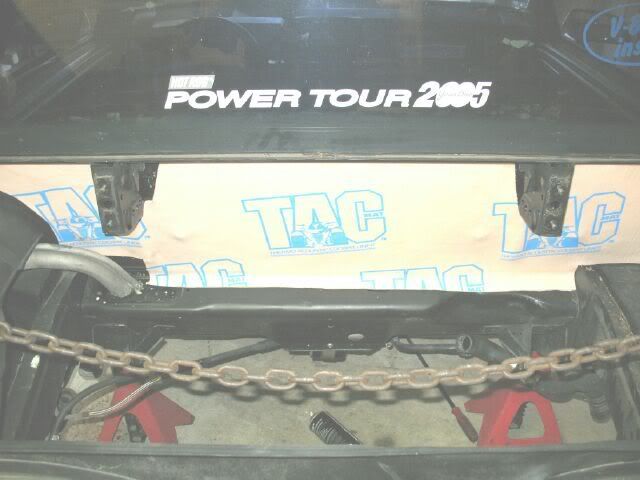
It did not look bad, but the holes from where the bulkhead connectors used to be annoyed me. The goal was to improve the overall appearance and reduce the noise/heat transmitted to the passenger compartment. First step was to clean and apply some sound reducing material (Tac Mat) that I had left over from a couple years ago:
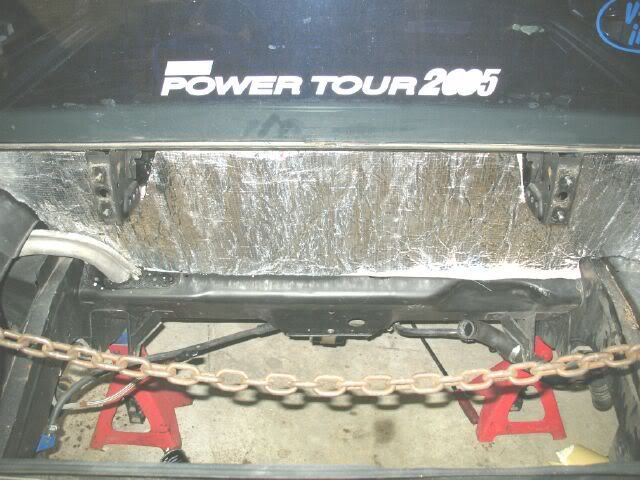
Next step was to install some hot water heater insulation (again left over from 2 years ago, but costs about $10):
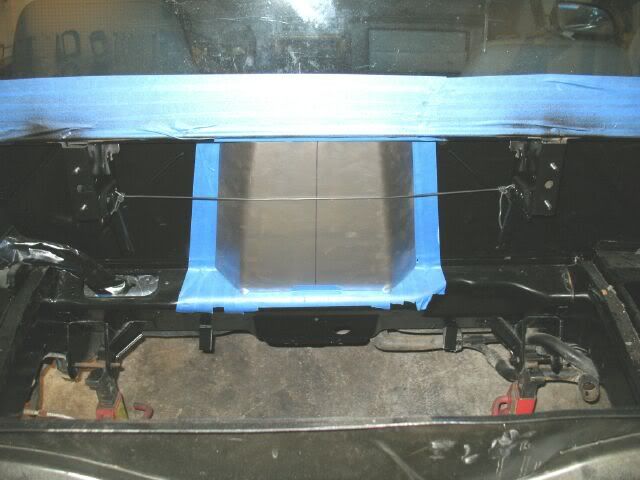
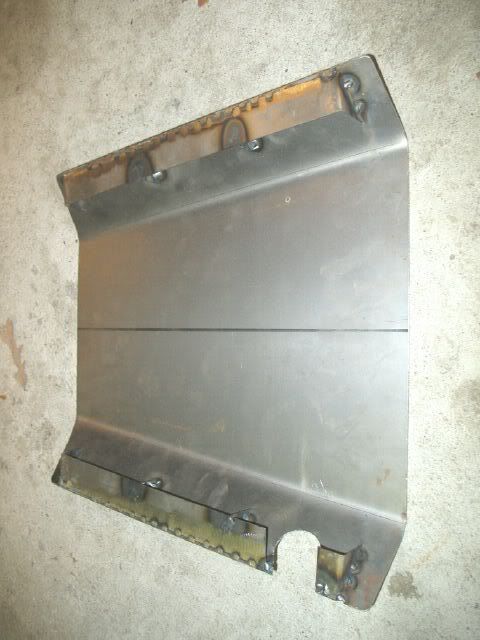
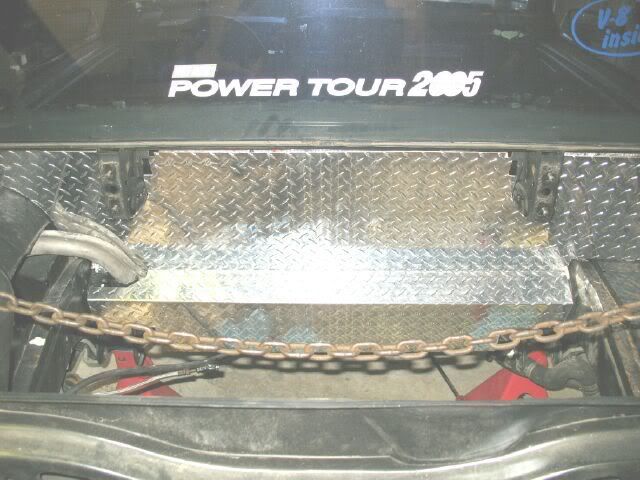
This took care of all the sound/heat issues, but I also wanted a durable surface that I will not have to replace again... 16ga aluminum tread plate should work just fine.
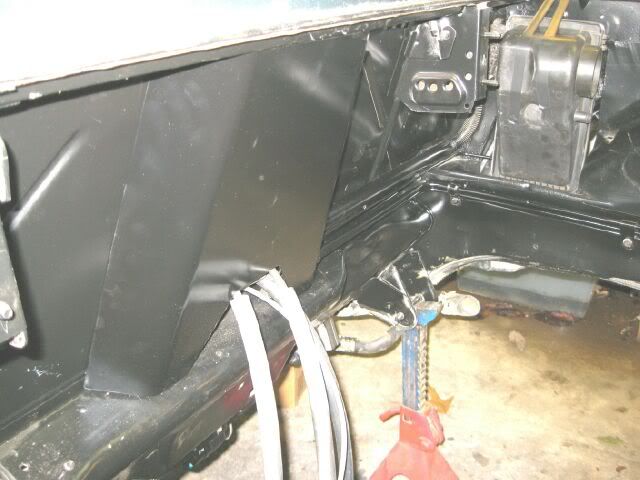
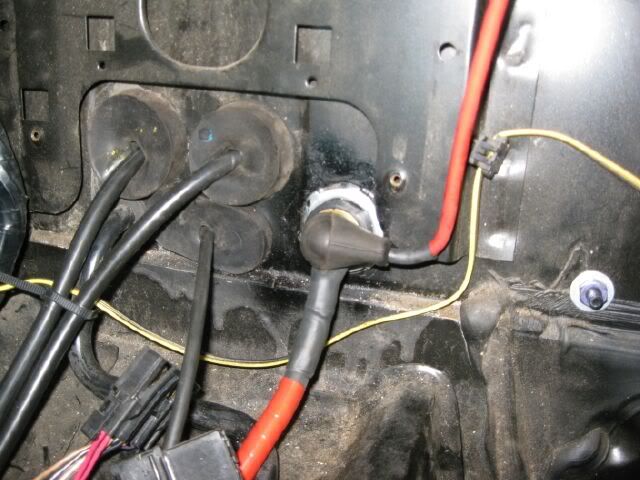
I still need to bolt it to the original firewall and make the cutouts for the needed items: 1 engine harness connector with vacuum hose in with the wires. 2 shifter cables 1 throttle cable Battery firewall connector (runs through center colsole)
BTW, it was a major pain to get this thing in the car as a single piece, but its in there now
All the engine work is complete and I hope to have it back in this weekend.
IP: Logged
04:11 PM
PFF
System Bot
fieroguru Member
Posts: 12640 From: Champaign, IL Registered: Aug 2003
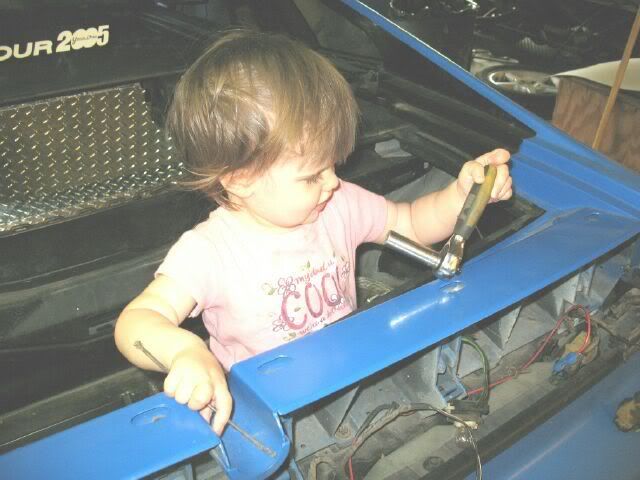
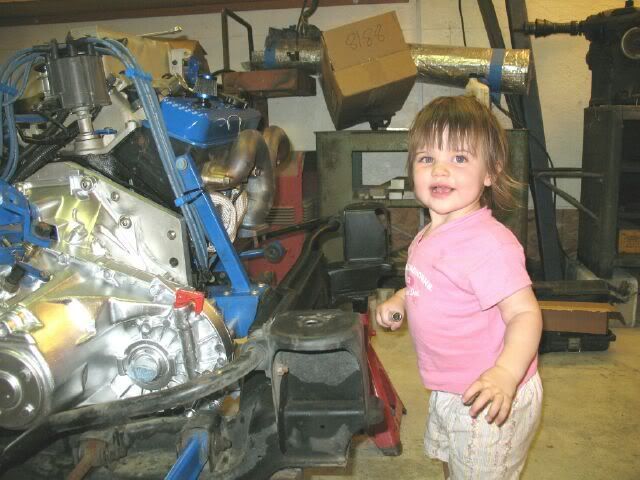
It's so much fun to teach little girls how to work on cars. I have a picture of my youngest daughter laying in the space between my Camaro's back seat and the trunk (convertible top pocket) taking the nuts out of the frame that holds the top to body at the trunk line. She was 7 then. Even if the firewall looked like crap I'd say it was worth it from the look on her face (helping Daddy). But it actually does look good!
[This message has been edited by 2002z28ssconv (edited 05-25-2007).]
IP: Logged
04:40 PM
Fierofreak00 Member
Posts: 4221 From: Martville, NY USA Registered: Jun 2001
That looks great! Did you make a template of it? If I be interested in dropping you a few buck for a copy. Keep up the great work. -Jason
Fiero Sails sells a template. http://www.fierosails.com/heatshield.html Fiero Sails--Heat Shield Looks way diferent than what fieroguru's doing. I'm pretty sure the fiero sails template wouldn't be posible in sheet metal, but I could be wrong. I do like the cleaned up look, I'm just wondering what happened to all the 'stuff' that missing from fieroguru's firewall?
------------------ Ol' Paint, 88 Base coupe auto. Turning white on top, like owner. Leaks a little, like owner. Doesn't smoke, unlike owner
IP: Logged
11:54 AM
fieroguru Member
Posts: 12640 From: Champaign, IL Registered: Aug 2003
Thanks for all the compliments. I hope to have some more pictures this afternoon. It is all bolted in place and I am making the cuts for the wiring connector and the cables.
quote
Originally posted by Fierofreak00: That looks great! Did you make a template of it? If I be interested in dropping you a few buck for a copy. Keep up the great work. -Jason
I made a template of the upper half in posterboard and then card board. It takes some time to make one, but doing so will allow you to determine how much clearance you want around everything. I started with 1/8" clearance, but during the install some of them needed to be opened up to 1/4" to allow installation. It has already been mentioned that Fiero Sails sells a template and it has all the needed cutouts for brackets (and the battery tray).
quote
Originally posted by ccfiero350: I noticed your subframe is modified, what did you do to it?
Yes, both front and rear cross members are 2x3x1/8" steel tube. The rear was raised close to 5" to allow a standard camaro 3" in with dual 2 1/2" outs to fit and left the trunk unmodified.
quote
Originally posted by DtheC: I'm pretty sure the fiero sails template wouldn't be posible in sheet metal, but I could be wrong. I do like the cleaned up look, I'm just wondering what happened to all the 'stuff' that missing from fieroguru's firewall?
I do not know why it could not be used as a starting point, but like I mentioned earlier I do not know how close the clearances are, some will need to be 1/4". Also when done in metal you lose a lot of "flexibility" and some opportunity to slide it behind some items, so installation will require you need to make a slightly larger cutout in some areas just to install it (like in the decklid hinge area around the brackets that hold the torsion spings)
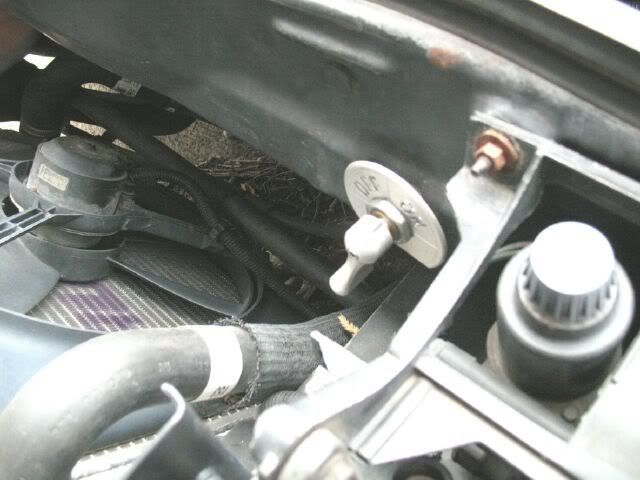
Here is all the stuff removed:
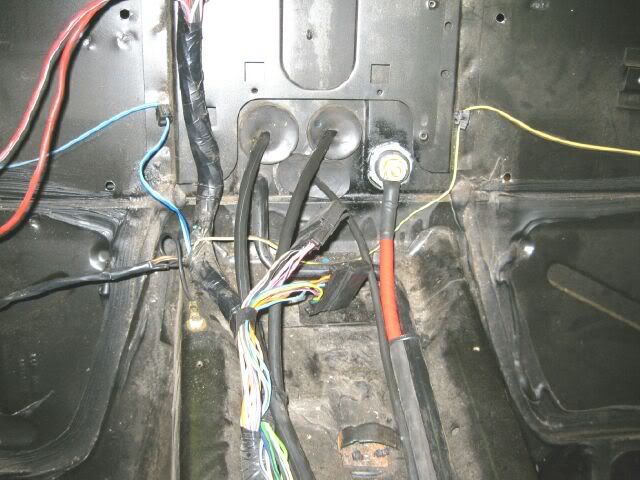
The vacuum check valve was moved to the center console with the hose from the engine coexisting with the wiring in the main blukhead connector. The 500 connector is also in the center console area with the chassis wiring going through the frame to the rear of the car. The wiring for cruise is in the drivers wheel well just waiting for that upgrade.
The charcal canister resides in the passenger wheel well: The lines to the expansion chamber in the wheel well were also ran in the frame rails to get them off the firewall.
The AC lines were modified to end along side the gas tank and not go all the way to the driver side just to go back to the passenger side. I have not hooked the AC back up, but that is a future mod.
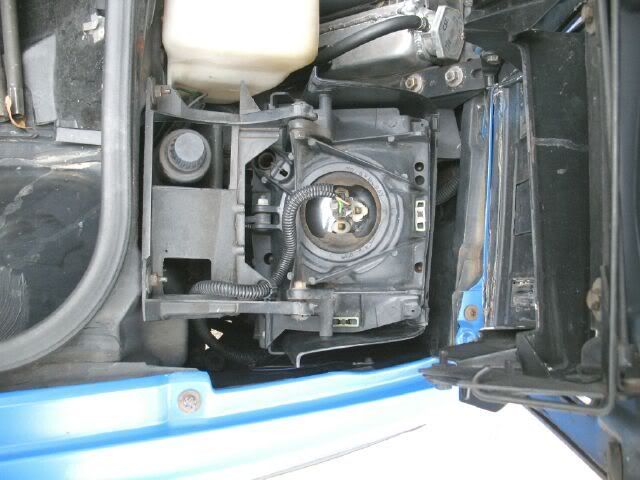
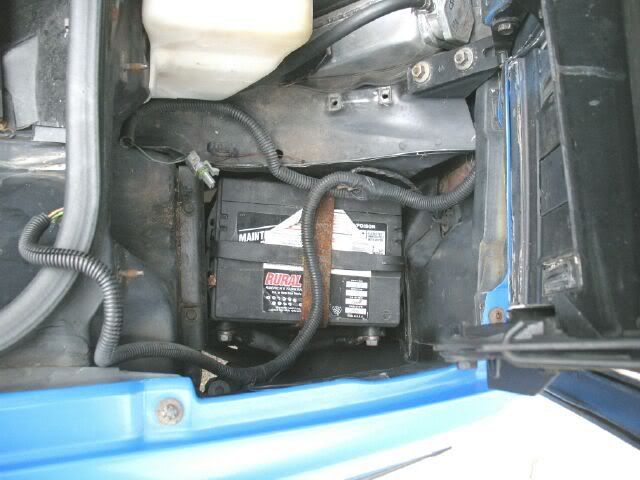
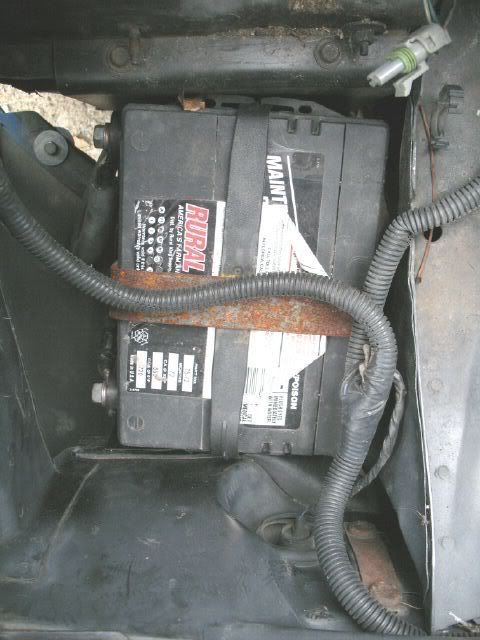
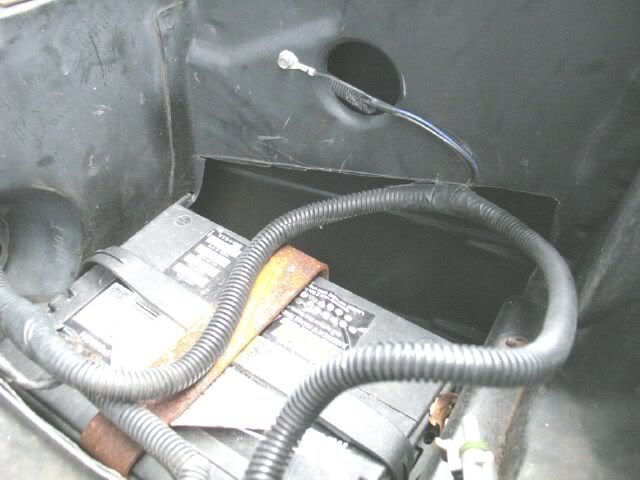
The battery is now under the front passenger head light.
I do not believe I compromised any mechanical/electrical function for my quest of a clean firewall.
[This message has been edited by fieroguru (edited 05-26-2007).]
IP: Logged
12:27 PM
Unsafe At Any Speed Member
Posts: 2299 From: Cheyenne, WY Registered: Feb 2003
Wire tuck jobs are awesome. Perhaps the best I've ever seen is this one: Non-Fiero and the car may have less items to deal with, but it still gives an example of a really clean look to strive for.
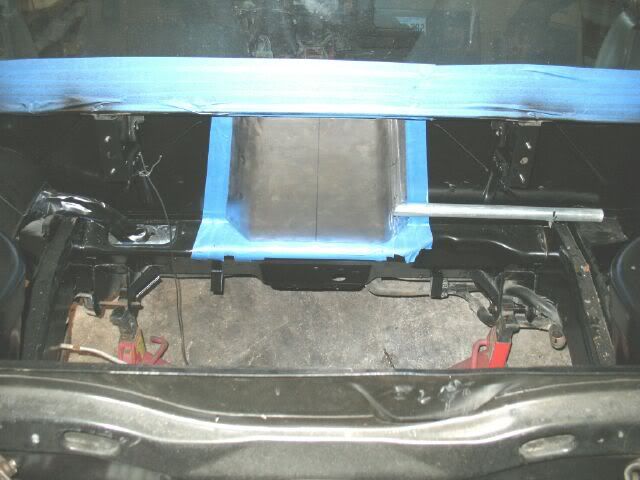
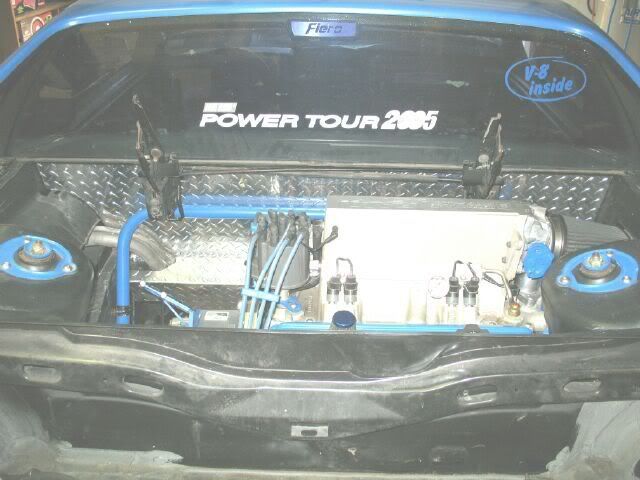
More progress today. The firewall in bolted in place with a bunch of stainless steel buttonhead bolts (matches the bolts on the engine). The decklid torsion springs and the coolant crossover pipe were reinstalled. The holes for the wire harness, shift/throttle cables and the battery connector were cut.
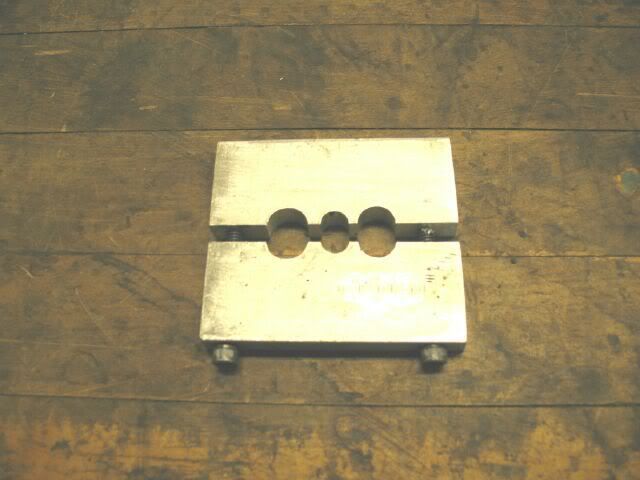
Here is what I made to seal off the firewall around the shift/throttle cables: It still needs to be drilled and tapped for the 4 stainless button head bolts that will bolt it to the firewall. The shift cables and throttle cables are wrapped with 3/8" fuel line to protect the cables and help seal everything off.
Carrera says that the Sunday the engine goes back in so we can see what it will look like with the new firewall (psst... don't lose daddy's socket)!
[This message has been edited by fieroguru (edited 05-27-2007).]
TThe charcal canister resides in the passenger wheel well: The lines to the expansion chamber in the wheel well were also ran in the frame rails to get them off the firewall.
NICE! I heard you have to keep it above the fuel filler or somthing, but I don't know where or why. Let us know how this works out it's a great idea.
Cory
------------------ 88 Coupe 4cyl 5 speed (Carl) 88 GT built 3.2 5 speed (Bianca)
Someone told me that my engine was taking up my trunk space.. I quickly responded with "NO, my trunk is taking up my engine space" hahaha.
IP: Logged
08:45 PM
fieroguru Member
Posts: 12640 From: Champaign, IL Registered: Aug 2003
Originally posted by CoryFiero: NICE! I heard you have to keep it above the fuel filler or somthing, but I don't know where or why. Let us know how this works out it's a great idea.
Cory
I have had it there for two years without any issues.. so I don't think there is a height requirement since it works with vaccum. The stock setup still had the lines coming down from the expansion chamber, across the engine compartment and then up to the charcol canister.
Do you have any pics of your battery relocation since I was considering doing the same thing. Seems a better, or at least neater solution that putting it in the spare wheel tub area.
I have had it there for two years without any issues.. so I don't think there is a height requirement since it works with vaccum. The stock setup still had the lines coming down from the expansion chamber, across the engine compartment and then up to the charcol canister.
It needs to be at the minimum completely above the level of the gas tank. The charcoal canister works with fuel vapors and return the fuel that evaporates back to the engine rather than letting it escape into the air - but if liquid gasoline ever enters the canister it'll kill it. A fuel soaked charcoal canister can't be repaired or recovered, only replaced. Best to mount it in such a way that liquid fuel will never enter it.
Plenty of room for a turbo and intercooler now J/k
Will the engine vents still go on the strut towers? Of course there really isn't going to be anything under them you really need to get to except the air filter on the right one.
It looks great, probably the cleanest job I've seen done on a Fiero.
Cory
IP: Logged
10:22 PM
May 28th, 2007
fieroguru Member
Posts: 12640 From: Champaign, IL Registered: Aug 2003
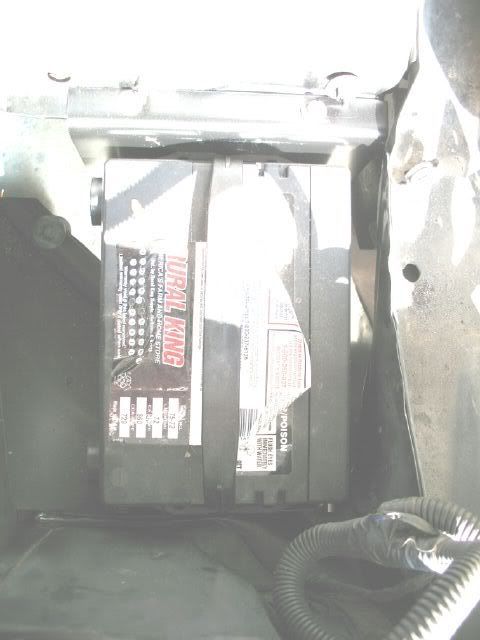
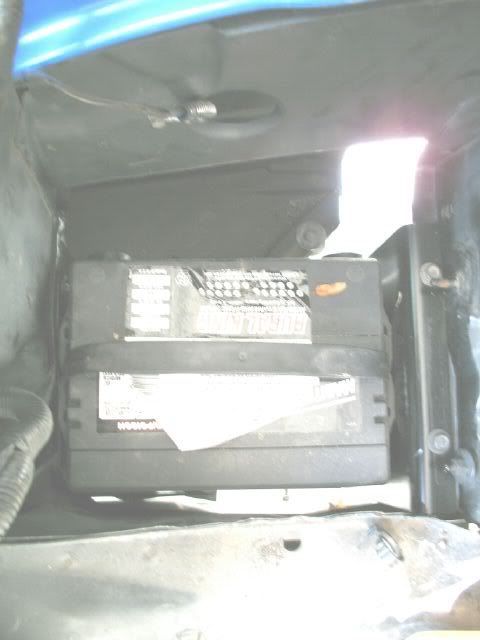
Do you have any pics of your battery relocation since I was considering doing the same thing. Seems a better, or at least neater solution that putting it in the spare wheel tub area.
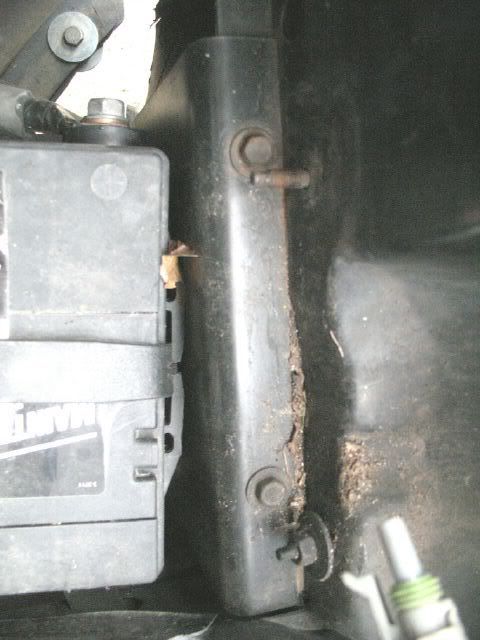
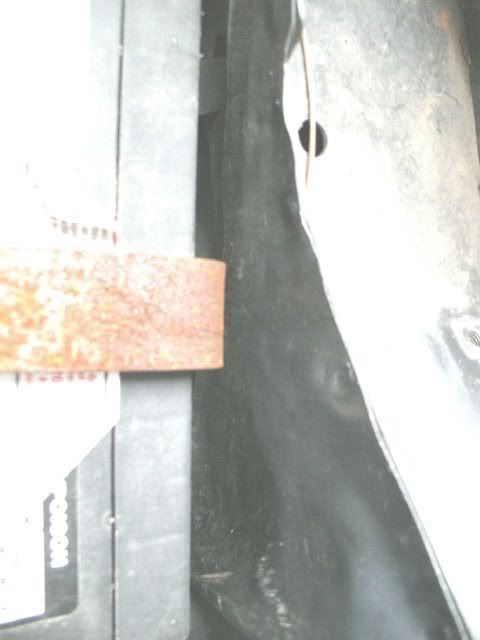
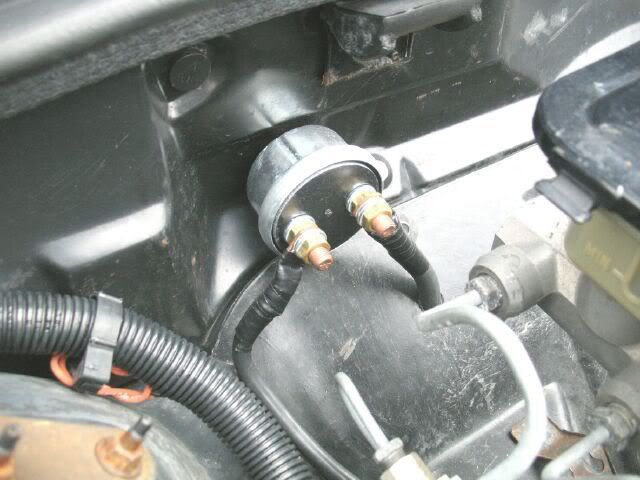
I used to have the battery mounted on the crossmember up front, but I like to used that space for tool storage on trips (no spare), so I wanted the space back. Here are a couple of pics with it under the wheel well. I used a 24" x 8" x 16ga piece of metal and put in the needed bends. I still have to put the holddown strap on it, route the wires and install the master power shut off
IP: Logged
08:30 AM
fieroguru Member
Posts: 12640 From: Champaign, IL Registered: Aug 2003
Originally posted by Whuffo: It needs to be at the minimum completely above the level of the gas tank. The charcoal canister works with fuel vapors and return the fuel that evaporates back to the engine rather than letting it escape into the air - but if liquid gasoline ever enters the canister it'll kill it. A fuel soaked charcoal canister can't be repaired or recovered, only replaced. Best to mount it in such a way that liquid fuel will never enter it.
I don't disagree that liquid fuel must not be allowed to reach the charcol canister. With the expansion chamber, the lines from the tank to chamber go about 3 feet high, so there should be sufficient elevation in this section of the system to allow mounting the downstream charcol canister in a variety of elevations without allowing liquid fuel to enter.
IP: Logged
08:36 AM
fieroguru Member
Posts: 12640 From: Champaign, IL Registered: Aug 2003
Originally posted by CoryFiero: Plenty of room for a turbo and intercooler now J/k
Will the engine vents still go on the strut towers? Of course there really isn't going to be anything under them you really need to get to except the air filter on the right one.
It looks great, probably the cleanest job I've seen done on a Fiero. Cory
I have looked into a few turbo options, but the next significant upgrade with be to a 6.0L LS series engine... still several years away.
I modified the strut rings and removed all the brackets that "hold" the deck lid vents down (as well as convering to bolts vs. studs). There are tabs on the under side of the vents that push up againts the bottom of the decklid to keep them flush with the decklid. The risk is if someone would want to walk on them, they would bend down. I have ran this car without the brackets supporting the vents since 2001ish.
IP: Logged
08:43 AM
PFF
System Bot
Jun 7th, 2007
ltlfrari Member
Posts: 5356 From: Wake Forest,NC,USA Registered: Jan 2002
Where/how exactly did you move the C500 connector to. You mentioned the center console, do you mean inside the car ? How did you get the wires from inside the car to the rear, did yoy have to drill holes anywhere?
How does that TacMac stand up to being in the engine bay, is it water proof ? Just wondering since I am looking at using it and some heat shield instead of Cool-it thermo tec
I used to have the battery mounted on the crossmember up front, but I like to used that space for tool storage on trips (no spare), so I wanted the space back. Here are a couple of pics with it under the wheel well. I used a 24" x 8" x 16ga piece of metal and put in the needed bends. I still have to put the holddown strap on it, route the wires and install the master power shut off
can you get some "not so close" shots for me...? That seems NICE but i am having trouble picturing where the crap it is... Also how did you run the bulkheads throught the firewall? I am VERY interested in seeing that! Did you have to add length? and messing with the wires at all for that matter?
Cleaning up the firewall is one of my sicknesses....
Working on a swap for a friend and wanted to clean up the firewall w/o going completely over the top like what was done above. So The 500 remained in the engine bay, but moved under the rear glass and hidden behind a 92 Bravada air filter assy, this provided excess slack in the 500 harness to run it down low across the engine bay inside some steel conduit. The new fuel lines and vent line were bent to follow the 500 conduit. Then a small cover was made with an opening down low for all the goodies to enter, but keeps everything out of sight from above.
Here everything was painted satin black to help everything blend into the firewall:
The engine harness will enter from below and then travel up behind the cover to the stock bulkhead connector. The +12V junction was moved to the center console and gets its 12+ feed from the firewall pass through battery terminal. The two +12 wires within the 500 harness were pulled back into the console area and shortened to conntect to the relocated +12 terminal. The fuel pump relay is also in the center console area as well.


 (Same sort of project)


 J/k
J/k