I have been running the battery under the headlight for over a year and decided to redo my battery box and document this conversion.
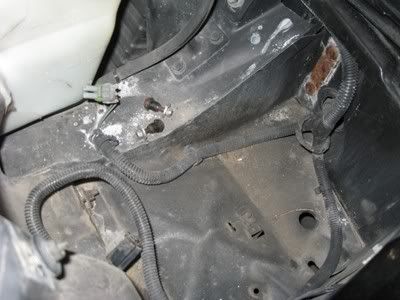
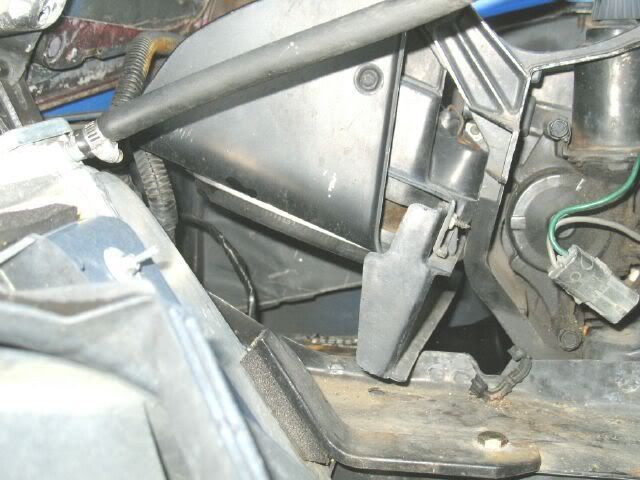
Here is what the passenger headlight area looks like stock (from DrCPU headlight rebuild thread):
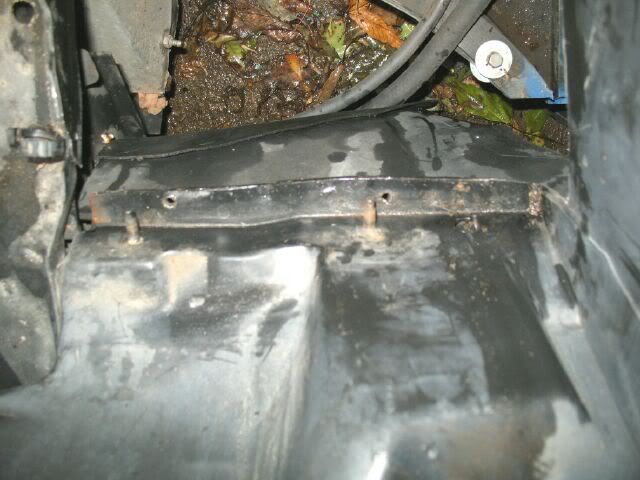
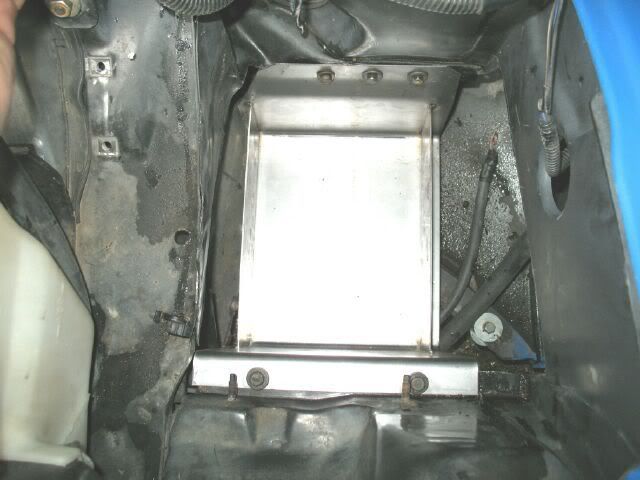
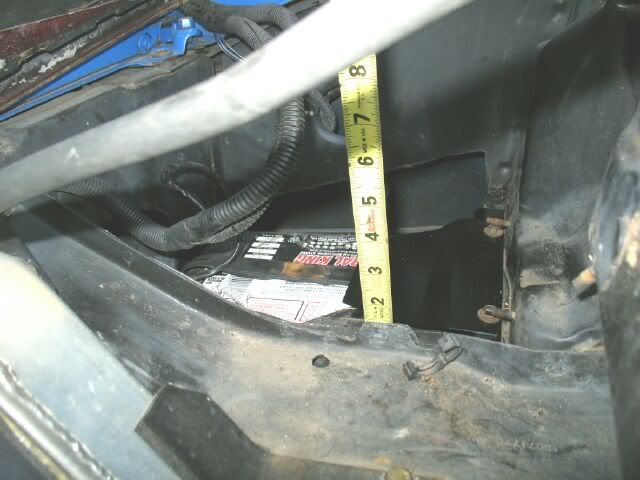
To make room for the battery, you need to cut along the rear seam and then along the other bends in the sheetmetal until you have an opening like this:
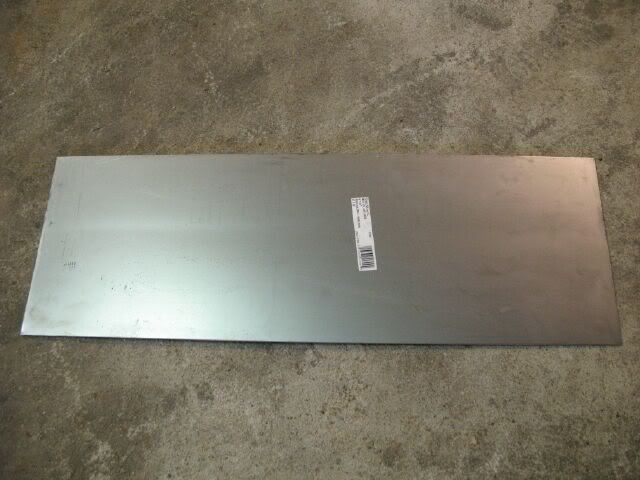
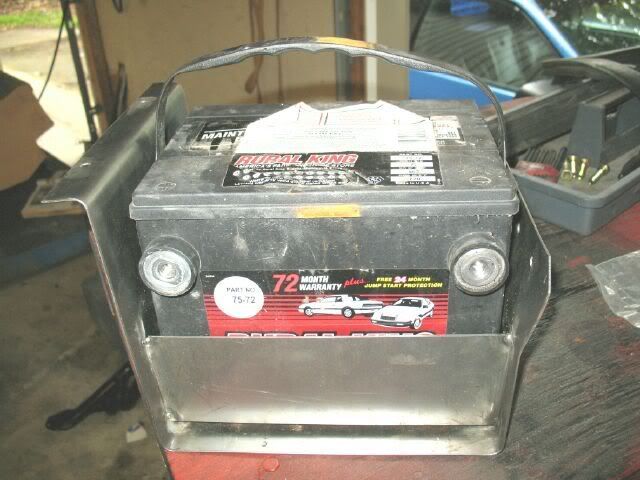
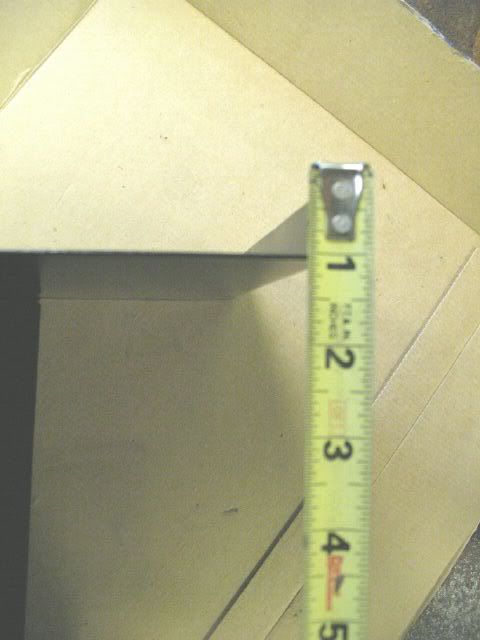
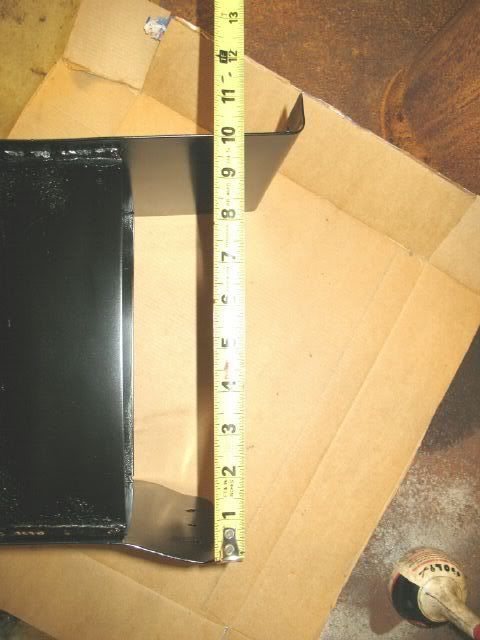
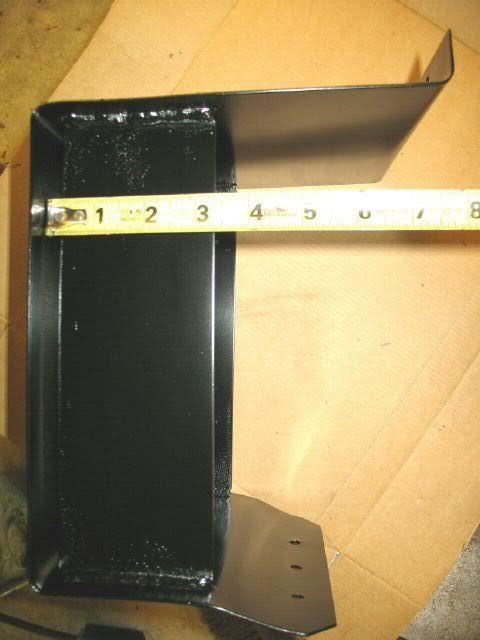
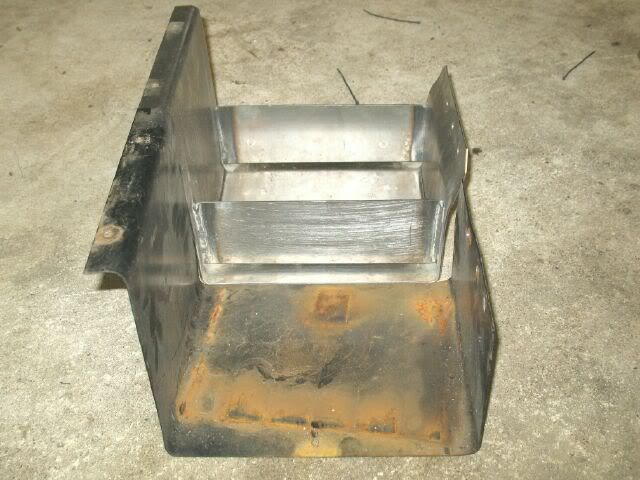
The material for the new battery tray is an 8"x24" and a 6"x24" sheet of 16ga steel ($10.78 and $9.24). These can be picked up at Lowes or other hardware store. Here is the 8"x24":
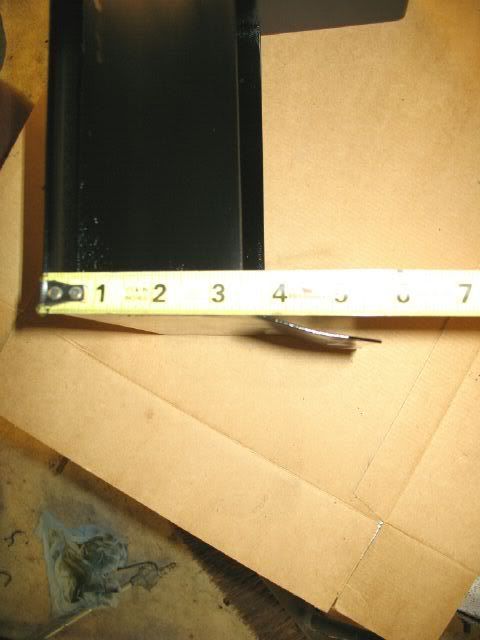
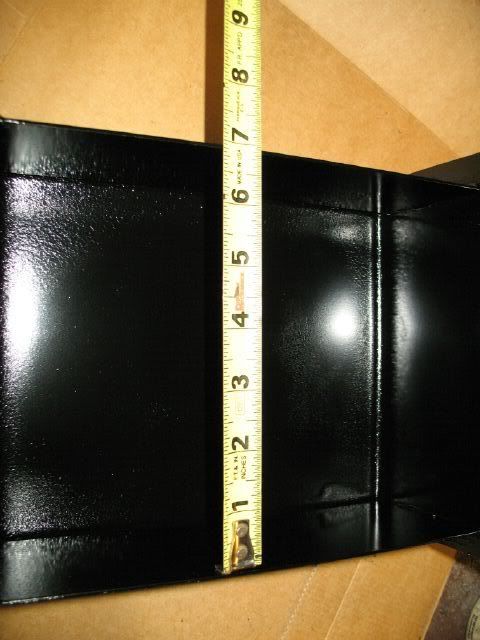
Next the battery tray needs to be bent from the 8" x 24". The first 90 degree bend needs to be about 3/4" from the edge to make the rear lip that will rest on the rear seam in the headlight area. The 2nd bend needs to be about 1/4" more than the height of your battery. The 3rd should be the lenght of the battery from the 2nd bend. I used the 6x24 to make some 3" tall sides mounted about 1/4" from the bottom and left about 1/8" of combined clearance to the battery between the sides.
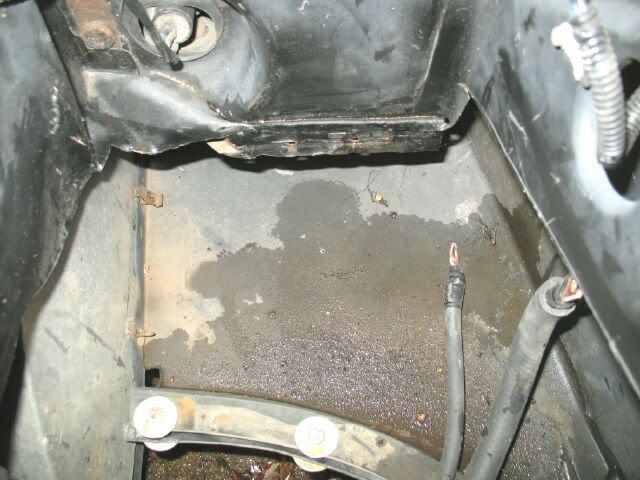
Once the tray is set in place, drill the holes to bolt it to the chassis:
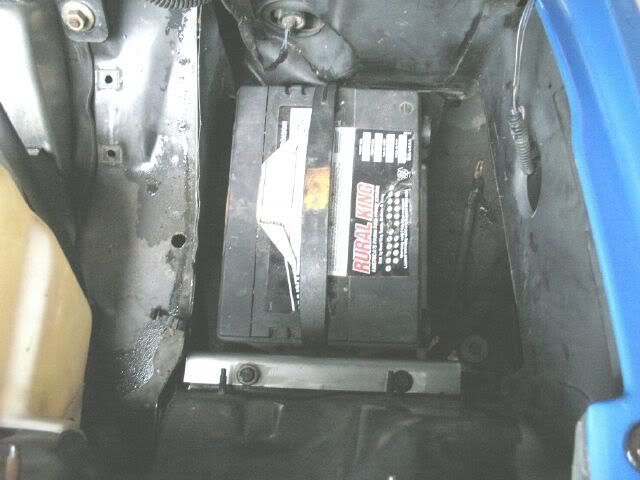
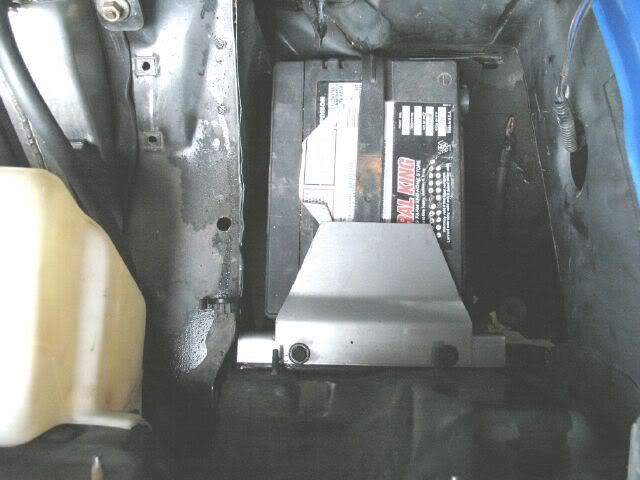
The battery hold down is another piece of 16ga from the 6"x24" sheet. It is bent to press down on the top of the battery and is attached in place with the rear bolts that hold the tray in place.
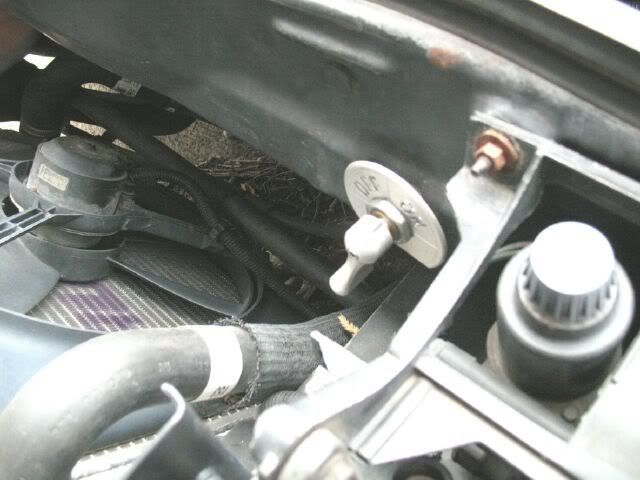
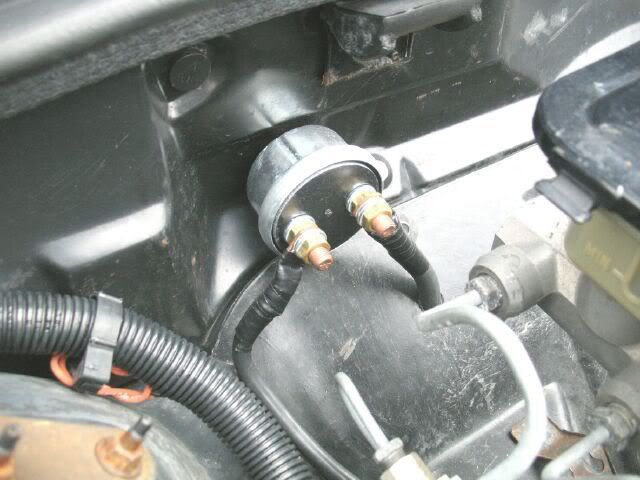
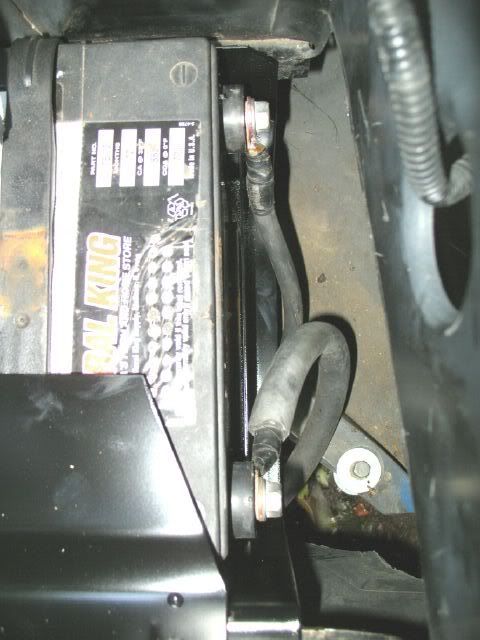
The negative cable grounds to a front cradle bolt and then continues under the fuel tank to the engine. The positive cable crosses to the driver side along the sway bar to the master disconnect behind the driver side headlight. This provides a good point to jumpstart from if needed (I have used it a couple of times):
From there is passed through the firewall and travels down the center console to a firewall terminal and then to the engine bay.
I am waiting for the paint to dry. It probably will not go back in until Sunday, so if you want a pic of something just ask and I will do my best to get it before I put it all back together.
IP: Logged
04:51 PM
PFF
System Bot
CowsPatoot Member
Posts: 2792 From: Skidway Lake, MI Registered: May 2007
Very nice. I tried to give you a +, but apparently it isn't the first time I have seen reason to do that. I have known I wanted to do this with mine during my restoration....but have been putting off doing the research on it. If I had realized you had it under there, I would have taken a closer look at it in Alabama.
Couple questions: How much clearance is there between the battery and the headlight (would I be asking for trouble with a top mount battery)? For comparison reasons, how tall is your battery?
IP: Logged
06:44 PM
tvelarde Member
Posts: 173 From: Washington State Registered: Feb 2004
A few years ago I changed to fixed headlights rather than popups. At the same time I put the battery under the passenger side. The battery is right underneath the headlight tray. If you want to see what I did, take a look here http://www.v8-fiero.us/fier...es/battery_moved.htm
IP: Logged
09:53 PM
Fierology Member
Posts: 1209 From: Eastern Tennessee Registered: Dec 2006
I'm curious how it handles before and after the mod. Any different? I would guess a heavy weight on one side would be noticable, or perhaps it offsets a lone driver. Looks real good!
-Michael
------------------ "A guy know's he's in love when he loses interest in his car for a few days." -Tim Allen
I'm curious how it handles before and after the mod. Any different? I would guess a heavy weight on one side would be noticable, or perhaps it offsets a lone driver. Looks real good!
-Michael
But the weight was on that side to begin with....he is just moving it forward and lower.
IP: Logged
02:21 AM
fieroguru Member
Posts: 12599 From: Champaign, IL Registered: Aug 2003
Here are a bunch more pictures to show rough dimensions:
Here is a shot of the battery installed and a depth measurement from the frame rail flange. The headlight will come down in the left side notch in the flange, so the battery must be lower than that notch (or use non-flipup lights).
Cables hooked up. Call me paranoid, but I always run the positive cable through hose as a 2nd level of protection...
IP: Logged
07:50 PM
fieroguru Member
Posts: 12599 From: Champaign, IL Registered: Aug 2003
I'm curious how it handles before and after the mod. Any different? I would guess a heavy weight on one side would be noticable, or perhaps it offsets a lone driver. Looks real good!
-Michael
I do not notice the battery up front at all - and the battery has been up there over a year. I never run with a spare (doesn't fit over the 12" vette rotors) and spend 95% of the time running solo so the battery on the right front and the SBC in the rear helps balance out my 225 lbs on the driver side. The car also has poly bushings, slightly stiffer springs front/rear while retaining the stock rate balance and 245/45/16 tires in all 4 corners, so it sticks real well.
IP: Logged
07:57 PM
fieroguru Member
Posts: 12599 From: Champaign, IL Registered: Aug 2003
Here is my old box compared to the new one. The new one is much tighter to the battery and supports the sides. The old one I had a strap around the battery and it was bolted to the box, but was allowed to rotate slightly.
IP: Logged
08:00 PM
Fierology Member
Posts: 1209 From: Eastern Tennessee Registered: Dec 2006
Of all the ways to relocate the battery this is the way the factory should have done it from the start, I think this will be my next mod. Bump, because this is too good of an idea to get buried.
IP: Logged
03:55 AM
Jul 9th, 2008
blackrams Member
Posts: 33216 From: Covington, TN, USA Registered: Feb 2003
Of all the ways to relocate the battery this is the way the factory should have done it from the start, I think this will be my next mod. Bump, because this is too good of an idea to get buried.
IP: Logged
03:16 PM
PFF
System Bot
ltlfrari Member
Posts: 5356 From: Wake Forest,NC,USA Registered: Jan 2002
I looked into doing this with my bumperpad 85 but the lower facia (or whatever that part is called) is too shallow. There's no way this will work with a standard size battery on our cars with the shallow nose. The GTs and aeros etc are fine.
Originally posted by Fierology: very cool. Do you think this is better than putting it below the plastic spare tire container? I've seen that kit on the Fiero Store
-Michael
I ran the battery in front mounted to the front crossmember for 3 years before moving it under the headlight. I rarely travel with a spare, but I use the front area for storage and the battery just took up too much of it. The space under the headlight is not used for anything else, so it makes perfect sense to put the battery there.
IP: Logged
05:23 PM
fieroguru Member
Posts: 12599 From: Champaign, IL Registered: Aug 2003
I looked into doing this with my bumperpad 85 but the lower facia (or whatever that part is called) is too shallow. There's no way this will work with a standard size battery on our cars with the shallow nose. The GTs and aeros etc are fine.
If you go with flush mount head lights you can gain several inches. Also you could run an Optima battery on its side, then it might work. I will figure this out someday when I relocate the battery on my 4.3 car since it is an 88 coupe.
This is potentially a BAD place to put it because if your coolant reserve overflows or your rad bursts, it will be all over your battery.
------------------ 1986 GT Fiero Owner & Enthusiast For Fiero updates, visit my site and don't forget to click on the ads! http://educatorstop15.we.bs/fieropage.htm