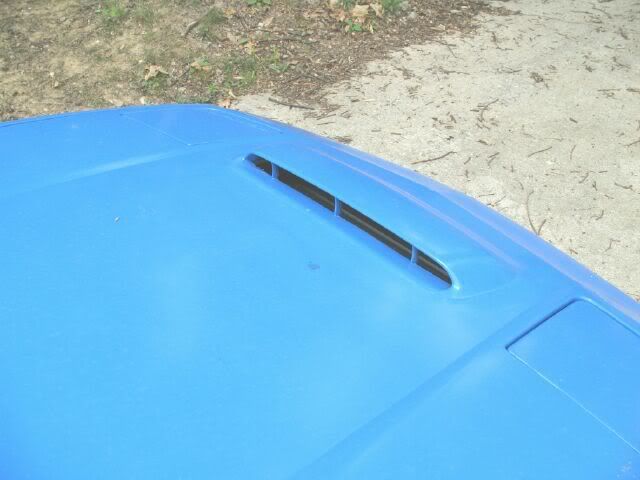
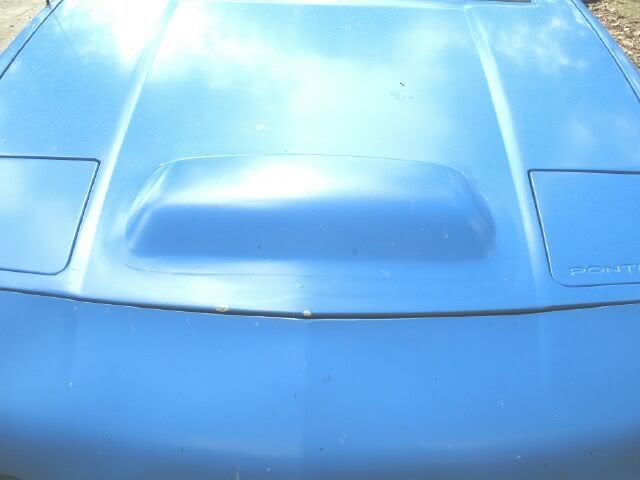
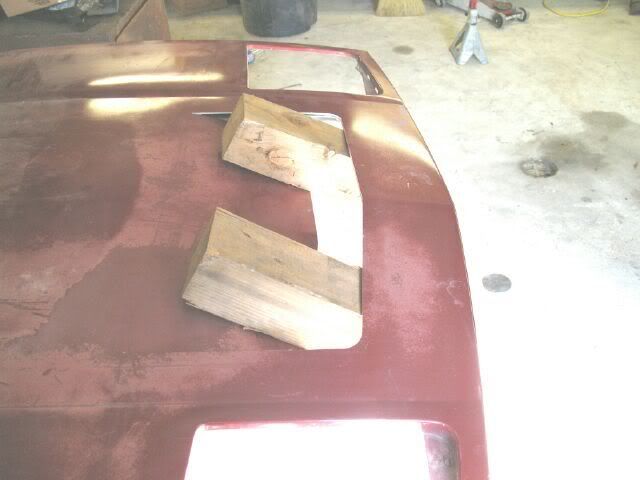
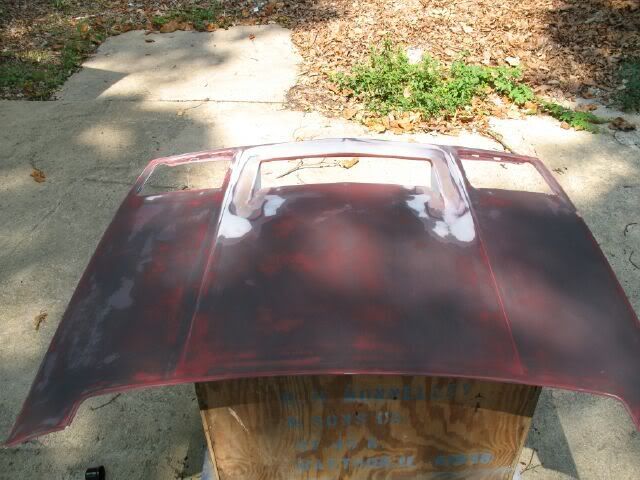
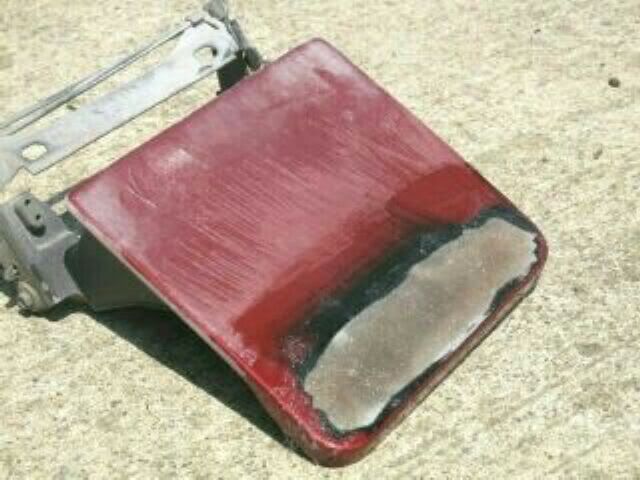
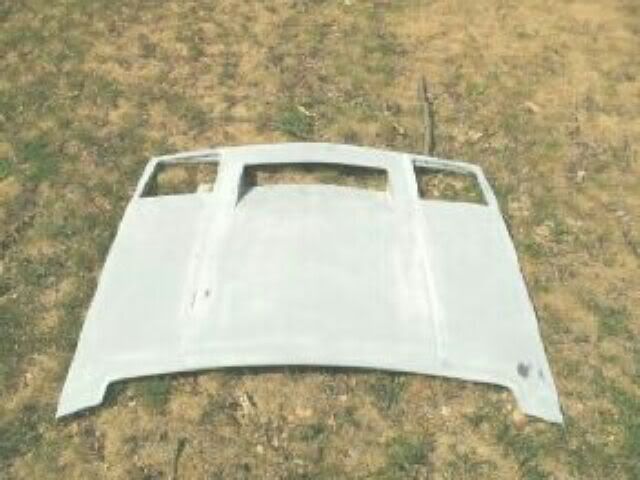
I have grown tired of the WRX hood scoop (facing rearward) on my 88 SBC car, so I got a spare hood to build another. Here are a couple of shots of the old hood:
The hood scoop was not glassed in, so after 2 years it has started to crack around the edges. Also... I could hove done a better job sanding and blending the scoop in. The underside also looks like crap with just a rectangular cutout.
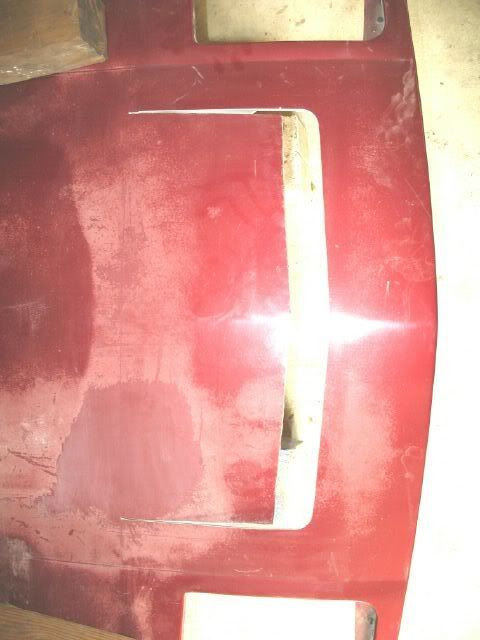
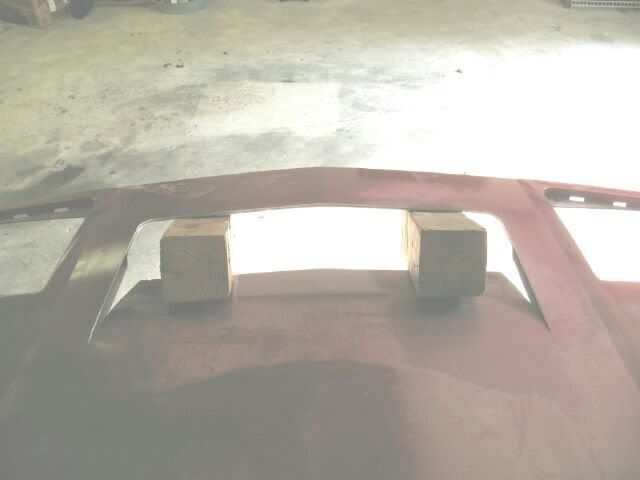
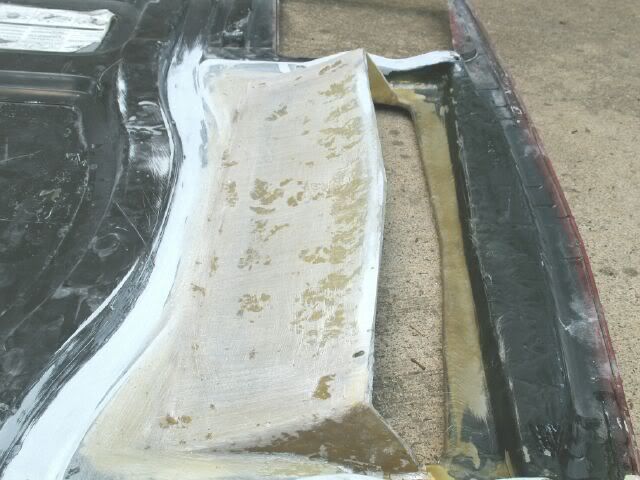
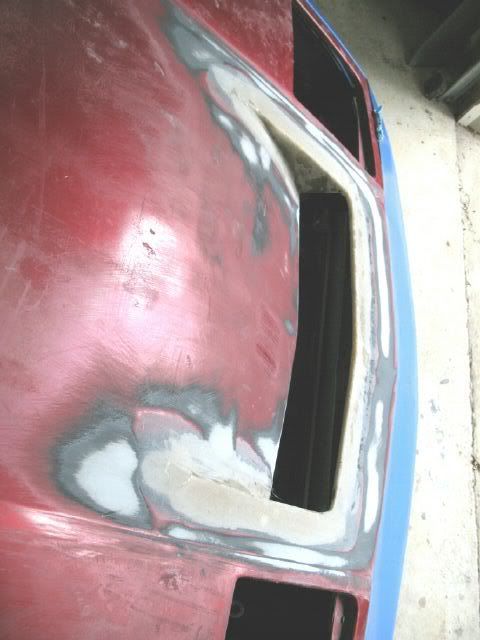
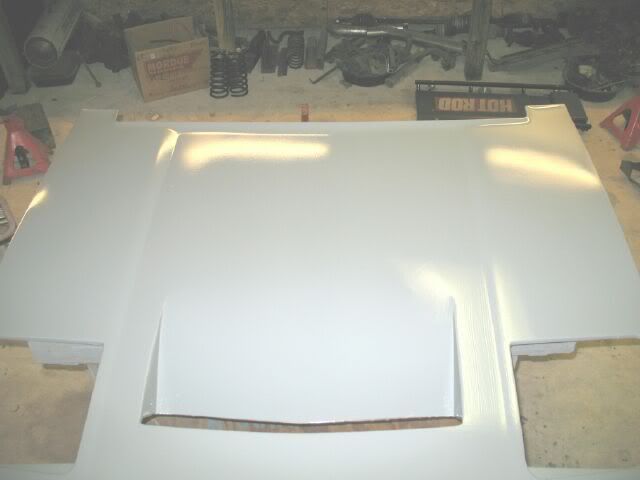
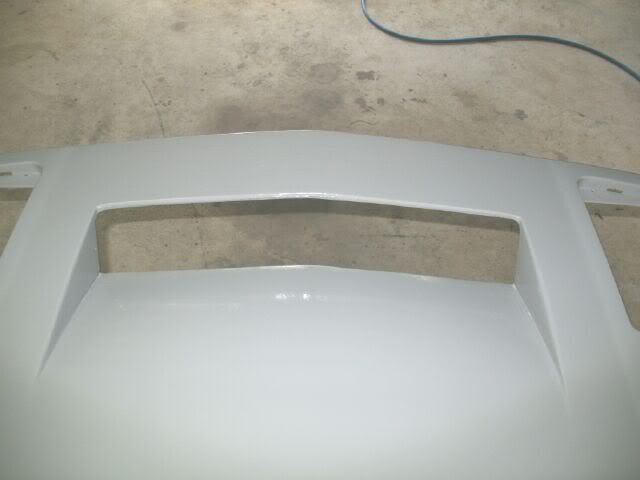
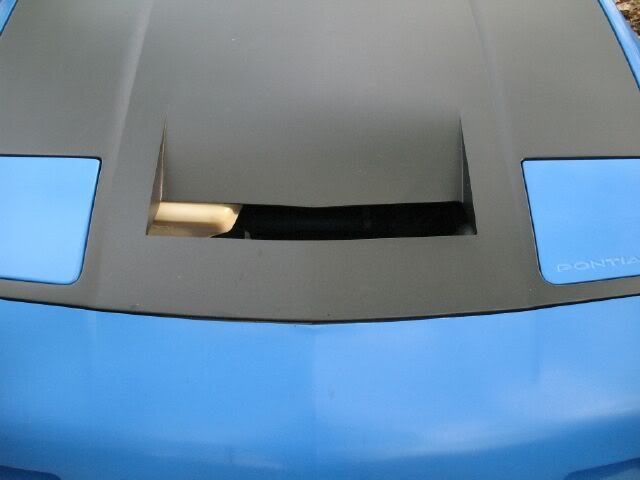
The hood vent will be the "cut and push down" variety". Here it is with the cuts made: I wanted the cuts to follow the fiero lines on the hood, so the side cuts are parrallel to (2 3/4" from) the contour line to the sides. The front cut is 5 1/2" back from the front edge and follows the front contour of the hood. The cuts along the side are about 10 1/2" long. Also the front 2" of the vent was cut off as well.
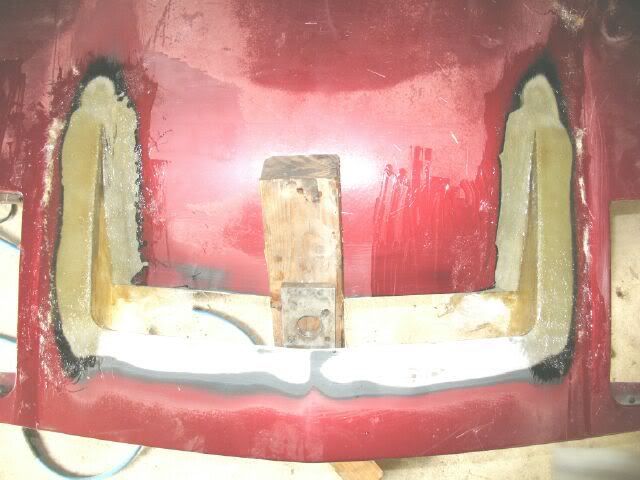
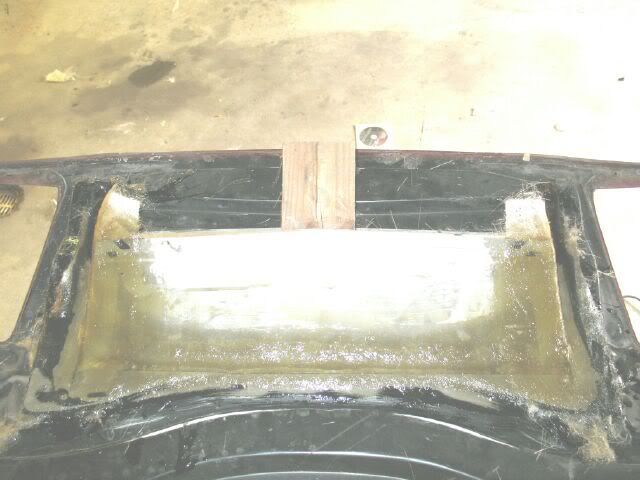
The width of the vent keeps the majority of the lower structure in place. The seal surface of the hood will remain in its current location, but was trimmed to allow the vent panel to come down to it. This picture you can also see the two pieces bonded to the front edge to help stiffen it (these were cut from the 2" section removed).
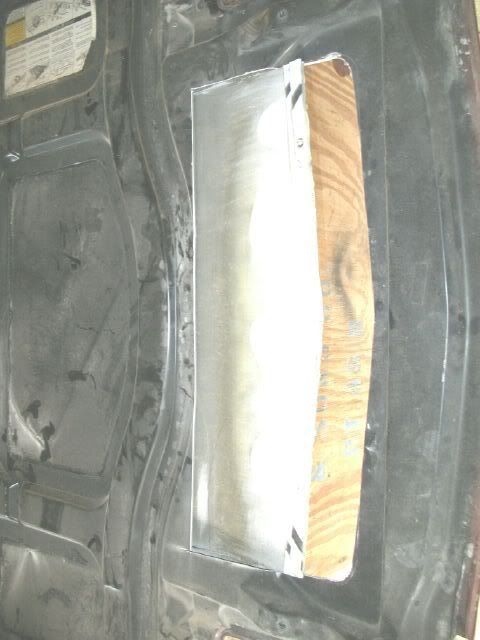
The vent panel is pushed down 3 1/2" using 4x4's
Now the messy part....
[This message has been edited by fieroguru (edited 07-03-2007).]
IP: Logged
12:50 PM
PFF
System Bot
fieroguru Member
Posts: 12128 From: Champaign, IL Registered: Aug 2003
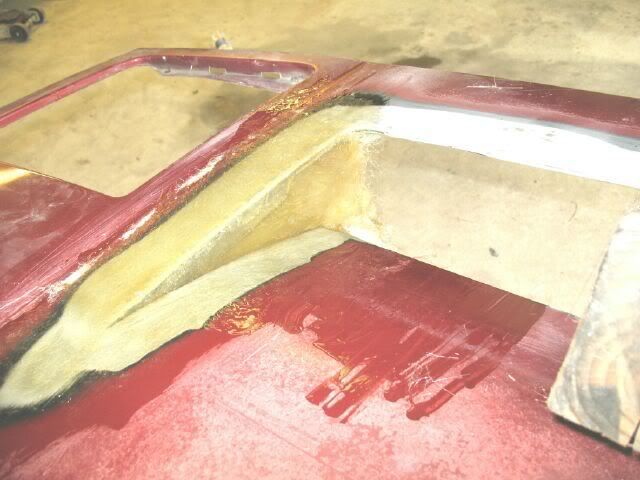
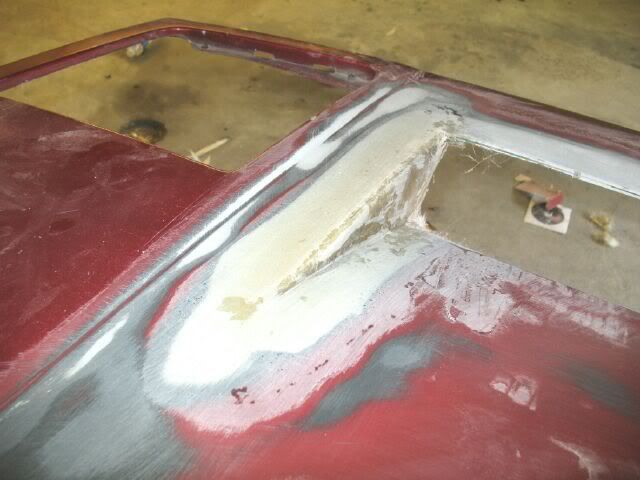
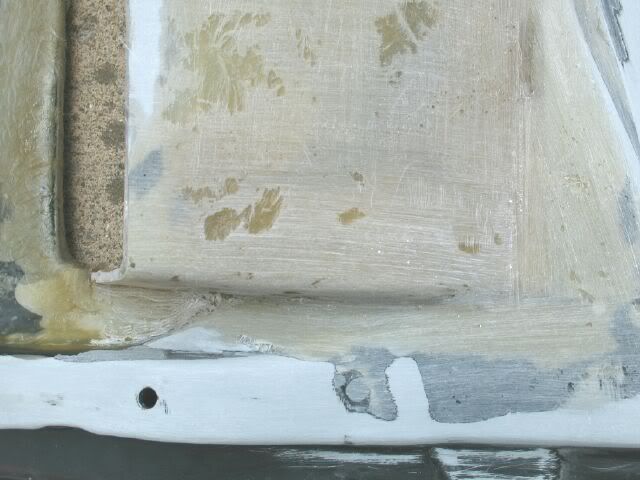
After grinding/sanding/tapering about 2" around all the places that would get fiberglassed, the glassing began. This was my first experience with fiberglass and it was not bad at all. I made sure to use SMC compatible resin. I started with a single sheet of mat from the top side of the hood to the bottom side to build the base. Then once dry, added another layer to the top side and two more layers to the bottom side around all the edges.
Not bad for about 5 hrs of work, but quite a bit of that was waiting to dry...
So how many layers of fiberglass matte do I need for the sides? I have 4 layers now.
[This message has been edited by fieroguru (edited 07-03-2007).]
I think the 4x4 blocks are a nice touch. They should work like splitters at high speeds.
Seriously though...nice start there.
A few questions... What will become of the hood with the WRX scoop? Will it be offered up for sale? And lastly...do you have a pic of the hood with the WRX scoop?lol.
------------------ --David
IP: Logged
01:05 PM
fieroguru Member
Posts: 12128 From: Champaign, IL Registered: Aug 2003
I added some pics of the old hood above. It is really not worth selling and would need alot of rework to make it nice, but if someone was close I would easily trade it for a stock hood!
Thanks. Since you are well on your way to a better alternative...I'll say it. Sorry...but the WRX scoop looks like a pimple on the Fieros nose.lol. I bet that scoop would look good on the rear deck though.
The new hood is looking great so far. I'm working on getting a new hood for my 86. I may attempt a scoop similar to yours on the old one...just for practice.
IP: Logged
01:46 PM
Lilchief Member
Posts: 1733 From: Vevay,Indiana Registered: Feb 2004
4 layers are plenty - I usually do three when making a part (in a mold). I see a couple problems, though: 1) Air bubble at the top edge - you'll have to grind that out & refill it with 'glass resin & mat. 2) All the fiberglass on top of the hood, if you don't want a hump, you'll have to grind all of that back off. Good start, though. Very similiar to but bigger than the one I made. //www.fiero.nl/forum/Forum2/HTML/079950.html (installation of one of my vents). I also added a lip around the top to accent mine. ~ Paul aka "Tha Driver"
You go into the bathroom American & come out American - what are you while you're in there? ..... ..... > Yur-a-pee'in
IP: Logged
12:30 AM
fieroguru Member
Posts: 12128 From: Champaign, IL Registered: Aug 2003
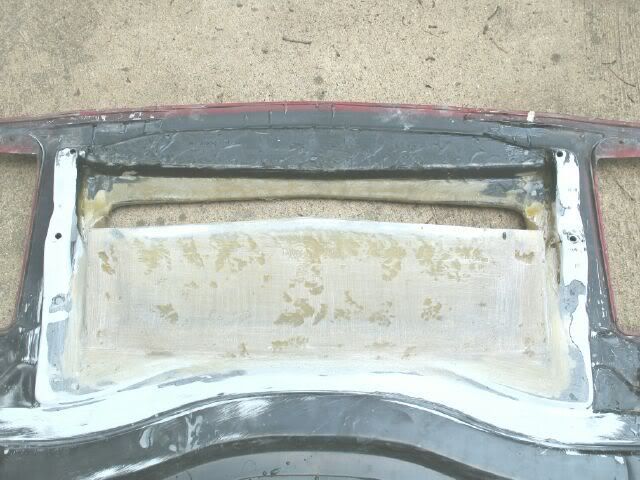
I did not touch the hood today, but late yesterday I started on the rough sanding on the top of the dirvers side... still lots and lots of sanding to go!
At least the vent keeps itself open now!
IP: Logged
04:31 PM
fieroguru Member
Posts: 12128 From: Champaign, IL Registered: Aug 2003
I'd rather not. With all the WRX's upgrading to the much taller STi version, you can buy an original WRX on ebay for about $35 (I think that is what I paid for mine). The OEM parts will have the flange and hardware to surface mount the scoop. The part is flexible, so getting it to conform to the rear deck lids should not be a major issue.
[This message has been edited by fieroguru (edited 07-04-2007).]
IP: Logged
04:34 PM
Jul 8th, 2007
fieroguru Member
Posts: 12128 From: Champaign, IL Registered: Aug 2003
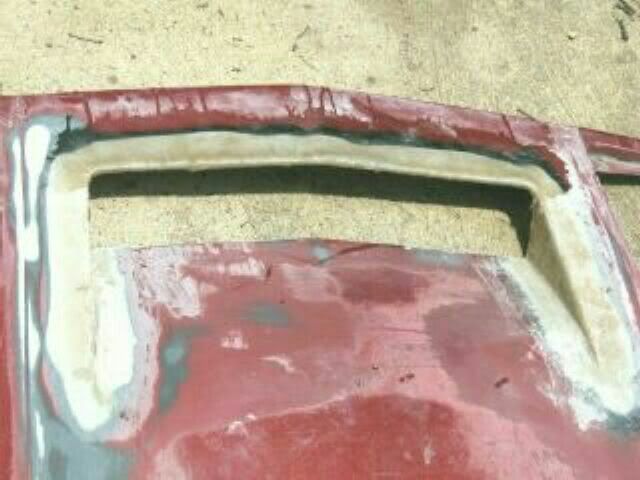
The only new fiberglass added today was 2 layers of fiberglass to the front edge of the cutout and 2 layers to the underside of the vent panel to build that section up, I still need to add another layer or two to get it flush with the front edge.
The rest of the time was sanding, sanding, and more sanding mostly on the underside getting rid of excess fiberglass and roughing everything into shape. It is getting closer, but still alot more sanding and filling to go. I am tired of sanding for today!
[This message has been edited by fieroguru (edited 07-08-2007).]
IP: Logged
02:41 PM
kennn Member
Posts: 272 From: Green Valley, AZ USA Registered: Apr 2006
I'm curious. It appears that you have chosen to locate your vent so that the front trunk compartment is not compromised and that it will continue to seal with the stock trunk seal. Is that correct? If so, what is the relationship of the vent to the radiator?
Ken
------------------ '88 Formula V6 '88 GT TPI V8
IP: Logged
03:15 PM
PFF
System Bot
fieroguru Member
Posts: 12128 From: Champaign, IL Registered: Aug 2003
Yes, I am keeping the stock front compartment seal intact and in the stock location.
The front edge of the vent is 8" back from the front of the hood. My car has a custom installed 26x19 radiator with the top of the radiator mounted further forward (~5 1/2" from the front of the hood).
Once I put the hood on my car, I may decide to cut the vent flap further back and enlarge the opening. The opening will be filled with hexaganol mesh - similar to defrost vent. Most likely I will have to go with an aftermarket overflow tank for the radiator
That's not a stock nose either (can tell by the top mounts). Fiberglass aftermarket? Does it look like the original aero nose? Funny I *had* noticed that your vent was "too close" to the front of the hood. Doubt it would clear a stock radiator... ~ Paul aka "Tha Driver"
To resist the influence of others, knowledge of one's self is most important.
IP: Logged
06:45 PM
fieroguru Member
Posts: 12128 From: Champaign, IL Registered: Aug 2003
It is a stock GT nose... might be that the steel mount bracket is painted blue as well. I wrapped the front with plastic then installed the nose and painted it. I also filled the emblem holes.
[This message has been edited by fieroguru (edited 07-08-2007).]
IP: Logged
07:32 PM
Aug 5th, 2007
fieroguru Member
Posts: 12128 From: Champaign, IL Registered: Aug 2003
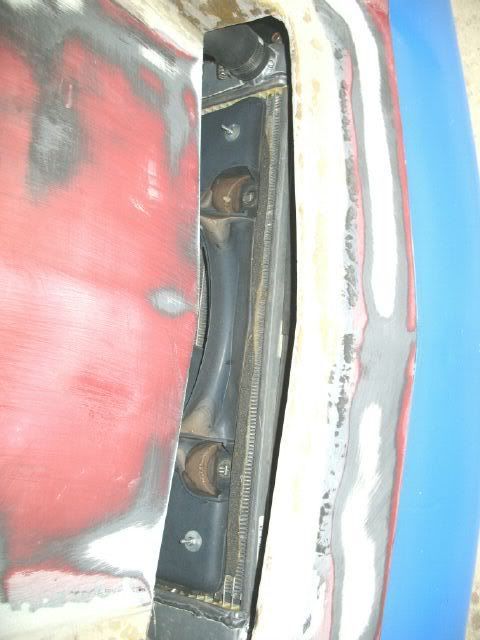
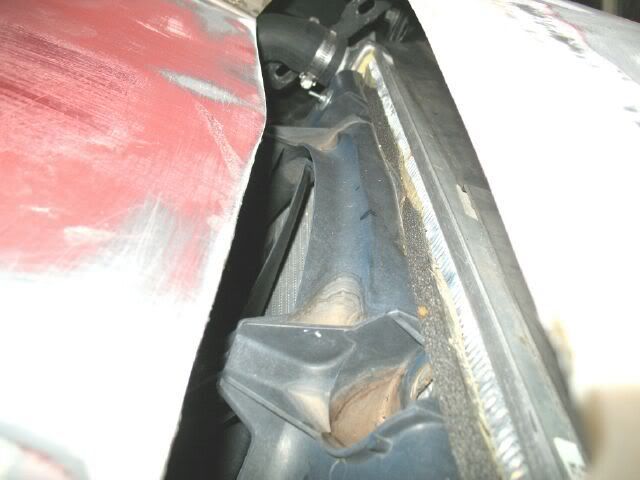
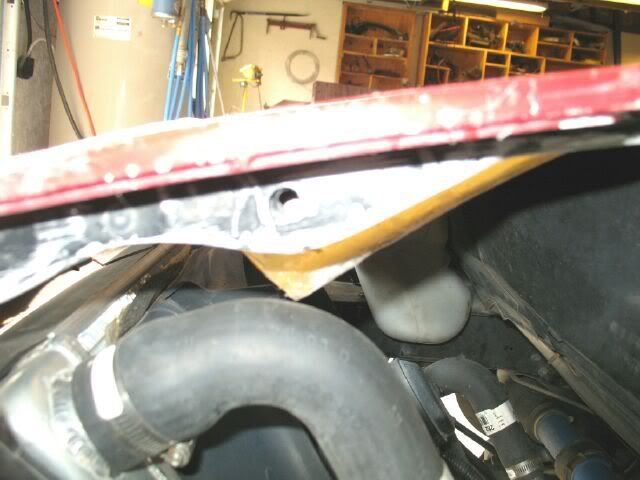
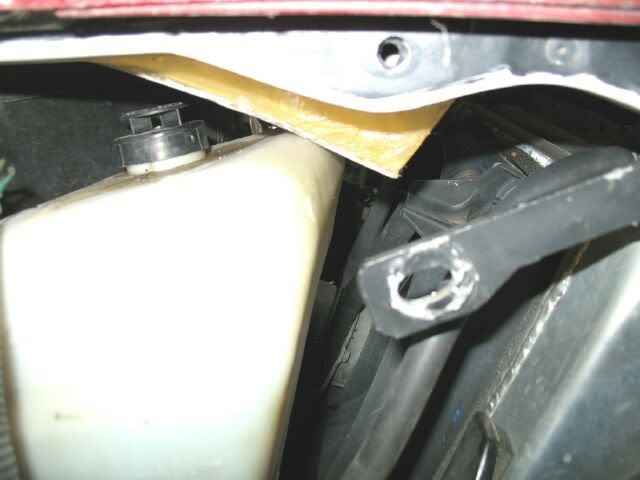
I have been slacking on the hood vent project... I hate sanding... Decided to mock it up on the SBC car to see how it looks and check for clearance. Clearance with the overflow tank is tight/rubbing so I will probably have to lower it about 1/8". Everything else looks good clearance wise (1/8" clearance to the upper radiator hose).
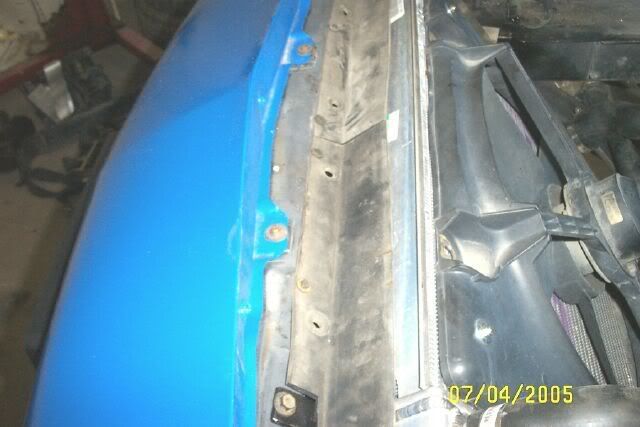
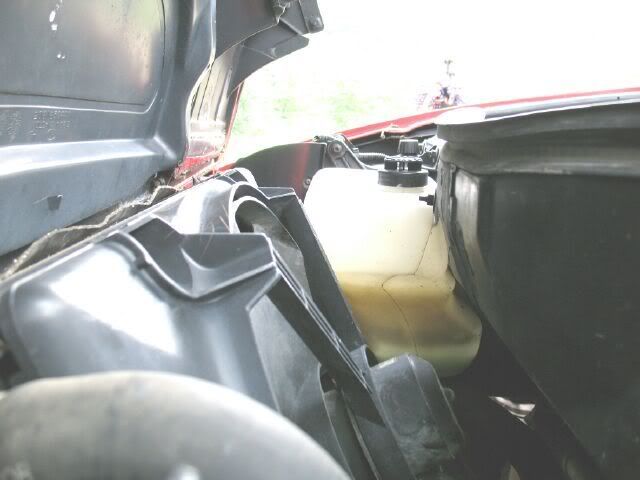
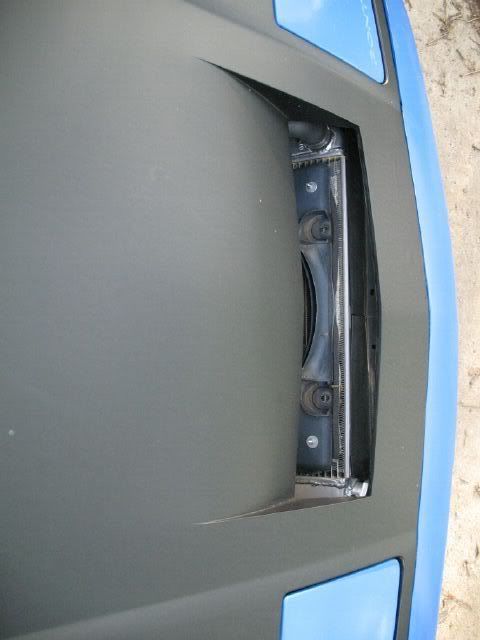
Here is a pic of a stock fiero radiator setup. The lower lip of the vent will not clear the radiator fan unless it is cut back about 2".
[This message has been edited by fieroguru (edited 08-05-2007).]
IP: Logged
11:47 AM
Daredevil05 Member
Posts: 2345 From: South Jersey 08077 Registered: Oct 2006
According to my experience, about 20% of fiberglass work is the actual layup. The other 80% is filling and sanding. It looks like you're making good progress, though.
BTW, 4 layers of random mat is more than enough for that project. It'll probably be stronger than the rest of the hood!
IP: Logged
11:01 PM
Aug 25th, 2007
fieroguru Member
Posts: 12128 From: Champaign, IL Registered: Aug 2003
Originally posted by FierociousGT: WHY?! Are you embarrass that the Fiero is Pontiac?
Nope, not at all. I just have never been a fan of the whole recessed letters (or the front emblem - its gone too). Besides most people see my car from the rear where they can see PONTIAC luminated in the tail lights!!!
IP: Logged
10:43 PM
fieroguru Member
Posts: 12128 From: Champaign, IL Registered: Aug 2003
Unfortunately, this hood will not make the trip to Fierorama this year... ended up having to sand all the primer off the top side and started the filler/primering process over... very aggrevating...
IP: Logged
10:50 PM
Mar 25th, 2008
fieroguru Member
Posts: 12128 From: Champaign, IL Registered: Aug 2003
The vent shape was created by slicing the hood and pushing the center down. I left the cross braces in place (trimmed slightly) and the the section that is puched down is a single thickness. I used 4x4's to keep it in pushed down while I glassed in the sides. Then the center part thickness was built up to keep it from bowing back up in the center.
IP: Logged
08:28 AM
maddoggie Member
Posts: 19 From: Salem, KY USA Registered: Dec 2007
Great write up. I've been thinking of a similar mod. I would like to have a screen mesh over the opening though, probably stainless steel. Anybody got any ideas where to look or find this screen.
IP: Logged
02:59 PM
nismokidd12 Member
Posts: 302 From: pensacola,florida Registered: Nov 2007
Great write up. I've been thinking of a similar mod. I would like to have a screen mesh over the opening though, probably stainless steel. Anybody got any ideas where to look or find this screen.
i get all of my mesh eitehr from home depot or lowes.
IP: Logged
03:04 PM
fieroguru Member
Posts: 12128 From: Champaign, IL Registered: Aug 2003
Great write up. I've been thinking of a similar mod. I would like to have a screen mesh over the opening though, probably stainless steel. Anybody got any ideas where to look or find this screen.
Thanks for the compliment. I will be adding mesh once it is done as well. I prefer to use the hexagonal mesh similar to the defrost vent material. I purchased mine from here: http://www.mnpctech.com/moddersmesh.html
IP: Logged
03:26 PM
Mar 27th, 2008
maddoggie Member
Posts: 19 From: Salem, KY USA Registered: Dec 2007
I've been searching for various metals for the scoop. This seemed to be one of the best choices. http://www.mechanicalmetals.ca/perfmetal.html I kept looking at screen and mesh, but this is considered to be perforated.
IP: Logged
11:33 AM
Apr 30th, 2008
fieroguru Member
Posts: 12128 From: Champaign, IL Registered: Aug 2003
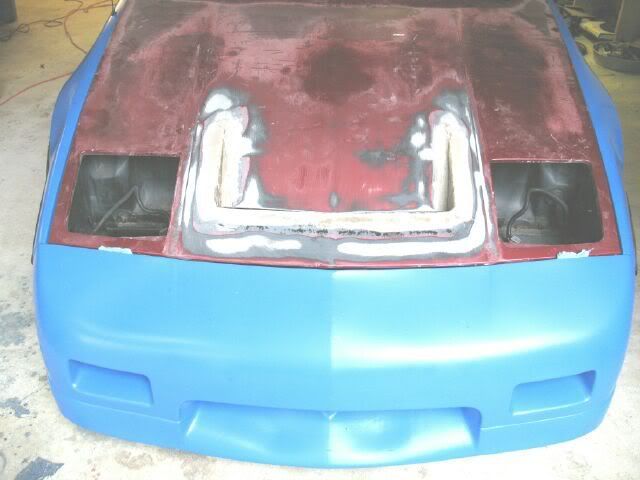
The WRX scoop started to crack and separate real bad a month ago, so I did quite a bit of work to the hood to get it functional and semi-presentable while the wife was out of town for 10 days. I still have some filling/smoothing work to do, but this is how I drove it to the Fiero Factory swap meet. I decided to cut the bottom section back further.... the opening is quite HUGE now. I will definately need to add a screen to restrict the view to the radiator.
IP: Logged
08:26 PM
PFF
System Bot
MordacP Member
Posts: 1300 From: Clovis, California, US Registered: Sep 2007
As i understand it, this should relieve the high pressure in the radiator compartment to possibly improve high speed stability. Well, it looks awesome, functional or not. Even though I was severely disappointed at the removal of the PONTIAC on the headlight cover, it looks great and if you squint real hard you cant tell it's gone.
IP: Logged
10:04 PM
May 1st, 2008
88White3.4GT Member
Posts: 1604 From: Hayward, CA Registered: Dec 2003
For all the people saying that its not functional. I have two little vents on the front of my wifes Fiero, if you start it up in the winter with ice on the windshield, and flip the switch to turn on the radiator fan and the ice on the windshield will start melting from the air hitting it. It takes some time, but you can really tell the vents are there.
Brad
IP: Logged
08:15 AM
fieroguru Member
Posts: 12128 From: Champaign, IL Registered: Aug 2003
The seal for the trunk as well as the hood reinforcement that it seals against is stock and unmodified, so the spare tire area is sealed up as tight as it was before. As for the radiator overfill, I will probably get an aftermarket one to make it less visible, but it works just fine for now.
All you need to do to verify function is drive the car and then get out and feel the top side of the hood over the spare tire area. Since it is sealed, the only way for the hood to heat up is for the hot air to be coming from the vent. After a drive, the top side of my hood over the spare tire area is quite hot, so I know it does what it is supposed to.
[This message has been edited by fieroguru (edited 05-01-2008).]
IP: Logged
08:20 AM
Pyrthian Member
Posts: 29569 From: Detroit, MI Registered: Jul 2002
any problems with sealing the compartment underneath? it also looks pretty close to the water reservoir
this looks much like the one I did on mine. to seal the spare tire tub, I did end up cutting into the metal wall, and lowering the part which interfered with the hoodvent, and just moved the weather seal down. and - for the reservoir - yes - mine hit the fill cap. I cut a square out of the top of the reservoir and flipped the cap to the other side.