Pennock's Fiero Forum
  Technical Discussion & Questions - Archive
  4.9 liter rebuild (Page 3)

T H I S   I S   A N   A R C H I V E D   T O P I C
  

Email This Page to Someone! | Printable Version

This topic is 3 pages long:  1   2   3 
Previous Page | Next Page
4.9 liter rebuild by Fieroseverywhere
Started on: 05-06-2007 07:55 PM
Replies: 88
Last post by: Fieroseverywhere on 09-06-2007 08:25 PM
Fieroseverywhere
Member
Posts: 4242
From: Gresham, Oregon USA
Registered: Mar 2006


Feedback score:    (14)
Leave feedback


Total ratings: 89
Rate this member

Report this Post08-23-2007 09:47 AM Click Here to See the Profile for FieroseverywhereSend a Private Message to FieroseverywhereDirect Link to This Post
Its no problem at all. No charge! I I tried to pay the guy for them but he wouldn't let me. I'll send it out tomorrow. I will send it in a padded envelope. BTW I have the address written down so you might want to edit you post and remove it. Maybe its just me but I don't like the idea of my address on an open forum. Too many wierdos out there. lol

Aaron told me there is about a 1 week turn around for the chip so you should have no problem getting it as long as he checks his e-mail.

Hopefully you can still find the other three wheels. I'm interested in seeing them. Since I am building this car to be light weight and nimble I have decided to go with the smallest and lightest wheels I can find for a decent price. I think I've narrowed it down to the 16" Motegi Trak Lites. They weigh 12.5 lbs each and I can find them for 1000 for the set. The light weight will offset the added weight of the 12" brakes and probably take some unsprung weight off. They are a one piece forged design which makes them stronger as well.

I figured out how to do a shaker intake. Total cost is 175 and you can buy all of the parts online. I will be puting the oil cooler behind the stock side intake and the battery will go up front. There will be nothing on either side of the engine. Along with the shaker intake, it should clean up the look very nicely. I will post a full write up about it later tonight. I'm debating on whether to make a new thread for it or just add it here. I'm also debating whether to build it using an electric supercharger also just for fun. I think the little bit of positive pressure will really wake up the top end and, in theory, make a car that will pull hard all the way to redline. Before anyone even bothers, they DO work. We have used them in the sprint cars with great success.

Later

[This message has been edited by Fieroseverywhere (edited 08-23-2007).]

IP: Logged
Darren's 87 coupe
Member
Posts: 673
From: Yukon , OK
Registered: Sep 2001


Feedback score:    (6)
Leave feedback

Rate this member

Report this Post08-23-2007 09:42 PM Click Here to See the Profile for Darren's 87 coupeSend a Private Message to Darren's 87 coupeDirect Link to This Post
I'm really looking forward to see what you come up with on the shaker hood. I think that's a good look when it's done right. I'm not doing an oil cooler right now, but I might change my mind on that, especially if I could install it in the side by the intake. That sounds like the best place.

Here's some pics of the black and blue engine. It's just laying together right now. The heads are on, but the intake and valve covers are just sitting on there, but at least you get the idea.


As far as my rims go, the other 3 are always available from almost anywhere. They're easy to find, I just need to save the money up. The tires are Firestone Firehawks p235/50/17's I really like the look of them. They are just sitting in the wheel well in the pic since I don't have any axles in the car right now, but you get the idea.


On a serious note....When I installed my lifters, I tried to push the plunger in, and some of them pushed in, but most of them didn't move. Will this fix itself when the engine starts up, or should I work on these to get the plungers to work before I go any further? I can test fit everything and get the engine test fitted this weekend and start on the wiring harness, and then the engine has to be pulled again, so I have some time to do this right, but I also don't want to mess with it if I don't have to. I knwo that hydrolic lifters last forever almost, and this engine only had 80,0000 miles on it, so they should be alright. What are you're thoughts on this? I have never gotten this far with an engine before, and I want to do it right.

Thanks for any advice from any of you guys,

Darren
IP: Logged
aaronrus
Member
Posts: 870
From: bradenton, FL USA
Registered: Nov 2003


Feedback score: N/A
Leave feedback


Total ratings: 56
User Banned

Report this Post08-24-2007 07:55 PM Click Here to See the Profile for aaronrusSend a Private Message to aaronrusDirect Link to This Post
 
quote
Originally posted by Darren's 87 coupe:

I'll pass on the connector for now. I have a ton of cars out at the pull a part now that you gave more cars to look into. Shouldn't have a problem finding what I need, and save you the hassle of shipping.

I did stick with the stock cam after some info from Micky Moose, saying that he didn't think it was really worth it. Just a chance for me to save some money. I'm sure it will be plenty fast enough for me as it is.

I will try to get some more pics of what I have going on as soon as I can. It's getting painted black and blue, and it's coming out looking good. Just taking my time. I am ready to get the computer chip sent off and get it reprogrammed by Arron. Did you get that chip done, or are you going another route? Do you know how to get a hold of Arron? I think I have the info at home, I will check tonight.

Talk at you later,
Darren


even simply getting the .480 in lift drop-in cam regrind from delta cams is SSSOOOOOOOO worth it, it really wakes up the 4.9L, not only does it improv the total HP, but it broadens the power band significant.. worth every penny
IP: Logged
Fieroseverywhere
Member
Posts: 4242
From: Gresham, Oregon USA
Registered: Mar 2006


Feedback score:    (14)
Leave feedback


Total ratings: 89
Rate this member

Report this Post08-25-2007 12:20 PM Click Here to See the Profile for FieroseverywhereSend a Private Message to FieroseverywhereDirect Link to This Post
Alright the shaker style intake is very simple. The key piece that I was having trouble finding was the scoop itself. I took some measurments of the decklid area on my 85SE and came up with a usable area of approx. 23"x19". This limits the options a bit especially since you are going to have to use the scoop to completely center the shaker in the decklid. Most hood scoops are longer then they are wide. This makes them hard to use for this purpose or in a fiero at all. Not to mention the fact that I need a bolt on scoop. I will explain why later. After much searching and a few good options I came accross this one...

http://www.fiberglass-hoods.com/hood-scoops.shtml
Fits the bill perfectly. 21.5x18.5x2 and it bolts on. Price is decent also at 110 shipped.

There are others that will work for this situation but not many. If you want an replica Trans Am shaker scoop (~125 shipped) there is one that will work at JCWhtiney.com.

This one will make it very easy to install the needed seal around the outside of it. The seal can be picked up at many sources around the net including E-bay. But its not bolt on which means you will need to make a way to attach it. It will have to be removable so keep this in mind.

There is also a hood scoop for a jeep that will work great. This one is quite a bit more expensive at ~275 shipped. I believe this is the one that Rockcrawl used in his install. Again its not bolt on. You will have to make a seal for it. This is easy and I will go into it later. I think it probably looks the best out of the three but I'm not willing to spend that much on just the scoop that doesn't bolt on.


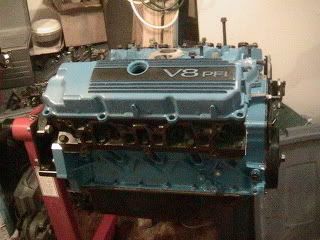
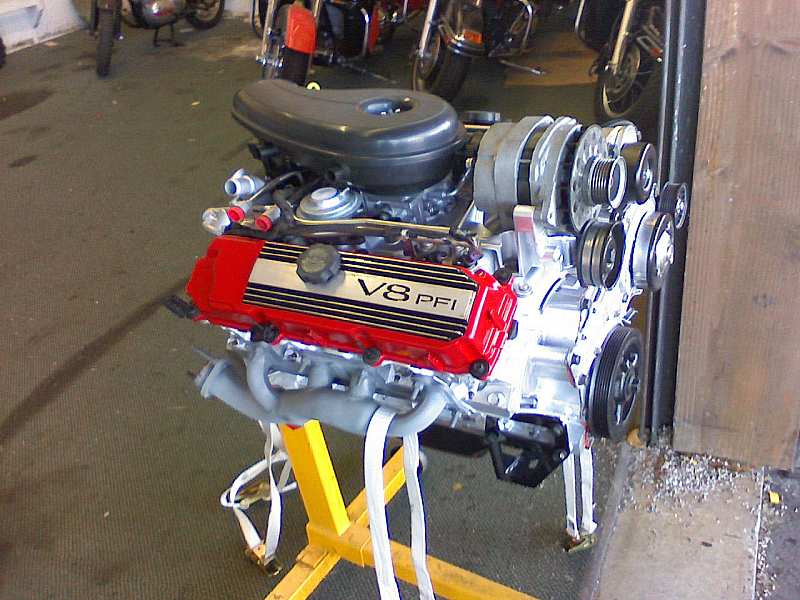
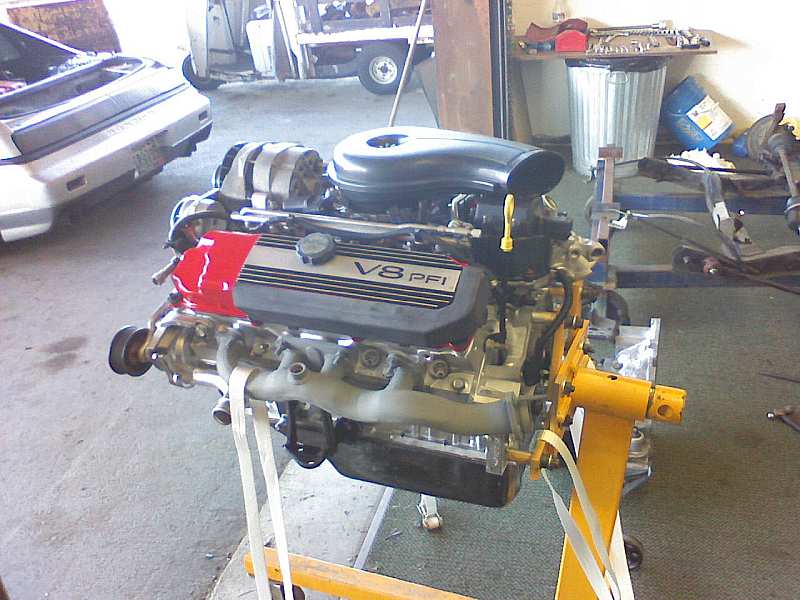
Now for the aircleaner assembly itself. This took me a little bit to find exactly what I needed. I'll save you all the trouble of having to look yourself and just tell you what I found. But first a little background. I took some measurments of the 4.9 throttle body and found that it is 5 1/8 inches around. This is a standard size which means that any aftermarket aircleaner assembly will fit. I dont literally mean that any one will work because there are other things to take into consideration.

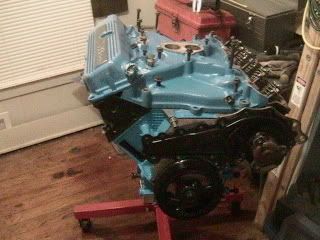
First off the 4.9 is not centered when installed into a fiero. This means we need a way to offset the aircleaner to give it a more centered look in the car.

Second, the alternator sits very close to the throttle body on one side. Same thing, we need an offset aircleaner to correct for this.

Lucky for us there is a cheap bolt on solution for this problem. Come to find out that Moroso and several other companies make offset aftermarket aircleaners for cars with HEI ignitions. The offset aircleaners are only available in a 14" diameter. Not only that but they are cheap as can be. The lower hole is offset 1.5" to clear the larger size distributor. Be aware though, there are two different versions out there. One will lower the airfilter to below the tb. Avoid this one. It will not work as well for this install. The one we want will raise the filter height to 1.5 above the tb. The bottom we want looks like this...

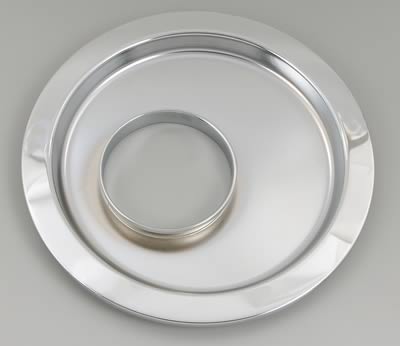
You can buy the bottom, filter, and top seperately if you want to create your own unique assembly. You can also buy them as a complete set if you want to save some money. So far, the best price I've found is on e-bay. Its just a generic offset/raised aircleaner and shouldn't cost more then 30 shipped. I've seen them for as little as 20. The moroso version is a little more at about 75 shipped. Deffinately better quality but its just an aircleaner. It holds the filter and thats it. The cheap one will work just as well for this purpose.

I you prefer to go the pieced out route you can find the parts at Summitracing.com and many other places. They only have one bottom that will work so make sure you pick up the raised, offset version. For the filter you have tons of options but keep in mind you are limited by height of your scoop. The scoop I chose will require that I find a 2" tall round filter. The bolt on scoop can be spaced to make room for a bigger filter if you want/need one. Try to figure out the needed airflow to avoid high RPM problems.

Tb risers may be needed depending on your install. These are cheap (~15 shipped) unless you go with a billet one (~40 shipped) and can be found in sizes ranging from .5"-2.5" heights.

Now for the actual install part. I will explain the bolt on one but you will have to figue out the others.

First off the Moore bolt on scoop will need 4 holes drilled into the decklid to attach it. I would suggest that you remove the decklid for this work. Center and allign it to the decklid and drill the needed holes. With the scoop bolted in place trace the outside of the scoop onto the decklid. Now remove the scoop and cut carefully along the line you just traced. Be very carefully not to damage either piece of the decklid you will need both. Once cut out, smooth and sand all the edges til they are to your liking. The piece you cut out will end up being the bottom of the shaker assembly. You will need to cut one more hole approx 5 1/8 into it for the aircleaner to go down to the tb. Placement of this hole will depend on your setup.

Thats it for the shaker asembly itself. Now all that you have to worry about is the seal. This can be anything but keep in mind that it will be seen when the decklid is open so you may want to make it look good.

My plan is to use some sheet metal and make a spacer to go in between the scoop and decklid piece it bolts to. I figure .25 should be fine. The metal will need to be wider then the scoop to give you a lip to put the seal on. The metal only needs to go from the inside of the scoop to about 1" outside the scoop. Measure for the space you have and adjust as necissary. I would say 4 pieces to go around the outside. I can't give you measurments since it will probably be unique to each car or install for the most part. You man even figure out a different method for this. I think I will use a Fiero sunroof whether strip and the tracks that they sit in. I may rivet the track to the pieces of sheet metal and install the seal that way.

Now you can bolt it all together. I am going to put a couple screws through the aircleaner bottom to attach it to the decklid piece. The whole assembly will get attached to the tb with either the provided center stud, caddy center stud, or a custom piece depending on your install. You will probably need to make some kind of support bracket for the back and/or side of it. You also moay want to figur out a drain of some kind for the little water that will run down the scoop. I would just drill a hole in the back and add a drain tube and route it to a safe place to drain. Once mounted you can paint/decal and re-attach the scoop. Now you have a shaker style intake for you 4.9 or for that matter any carbed engine also. Make sure that you dril a hole for the PCV tube to go to. This can be put anywhere along the tube to the tb. Its really that simple.

Just so you know. If you don't care about it being centered in the decklid you can use a smaller aircleaner and scoop and put something tegether for around 50 bucks. Even being offcenter it will not look bad. You can get cheap scoops on e-bay for around 20 bucks shipped and cheap aircleaners for about the same.

I know this is not a flapper style shaker but it will allow me to get rid of the stock aircleaner assembly and use the stock side intake as a place to mount my oil cooler. It should also allow more air into the engine while keeping the cost low. Since I am moving the battery up to the front I will have nothing on either side of the engine. This means that the factory engine vents will do their job more effeciantly also and there is no need for an added decklid vent.

If you have any questions or comments please let me know. I would love to get some feedback on this. If you have other ideas or think of something I am missing I would love to hear about it. Enjoy

[This message has been edited by Fieroseverywhere (edited 08-25-2007).]

IP: Logged
Mickey_Moose
Member
Posts: 7497
From: Edmonton, AB, Canada
Registered: May 2001


Feedback score: (3)
Leave feedback


Total ratings: 143
Rate this member

Report this Post08-25-2007 01:22 PM Click Here to See the Profile for Mickey_MooseClick Here to visit Mickey_Moose's HomePageSend a Private Message to Mickey_MooseDirect Link to This Post
Do I understand you correctly that you are bolting the scoop to the hood? The ideal on the shaker is that it is attached to the motor and not the hood so the scoop moves with the motor.

Also a side note, Rockcrawl did not use any type of scoop on his, it was all hand crafted. I have a couple of his build pictures if you want to see them I can post them. They do not show a whole lot, but show a couple of things.
IP: Logged
Fieroseverywhere
Member
Posts: 4242
From: Gresham, Oregon USA
Registered: Mar 2006


Feedback score:    (14)
Leave feedback


Total ratings: 89
Rate this member

Report this Post08-25-2007 01:42 PM Click Here to See the Profile for FieroseverywhereSend a Private Message to FieroseverywhereDirect Link to This Post
 
quote
Originally posted by Mickey_Moose:

Do I understand you correctly that you are bolting the scoop to the hood? The ideal on the shaker is that it is attached to the motor and not the hood so the scoop moves with the motor.

Also a side note, Rockcrawl did not use any type of scoop on his, it was all hand crafted. I have a couple of his build pictures if you want to see them I can post them. They do not show a whole lot, but show a couple of things.


Yes I am bolting it to the decklid. But then I am cutting the decklid out around it. I should also add that I am using a fastback decklid.

The notchback decklid will cause some issues because of the raised hump in the center. I have not figured this out yet. You might be able to flip the cutout piece and make it work. You will have to insulate it from the heat though. You also might be able to use an 84 decklid with the center grate.

The cut out piece of fastback decklid will become the bottom of the shaker assembly which will attach to the motor. When the decklid is opened it will stay with the motor. This makes perfect sence to me because the decklid is already insulated from the heat. I tried to describe it as well as possible but figured there would still be some confusion. I wanted a bolt on scoop so I could remove it later to change/clean out the filter. Also for race day I will remove the scoop entirely and replace the aircleaner top with a K&N crossflow filter top to allow the engine to fully breath. I have also worked out an electric supercharger setup that will work with this shaker setup. I plan on using it with a tpsI am not worring about the silonoid or flapper with this setup. Basically it is a cold air intake that is setup to come through the decklid. What makes it a shaker is that it stays with the motor.

I would love to see some pics of Rockcrawls setup. I have not spoken to him about it or seen any kind of build so I had to plan this all out myself.

[This message has been edited by Fieroseverywhere (edited 08-25-2007).]

IP: Logged
Fieroseverywhere
Member
Posts: 4242
From: Gresham, Oregon USA
Registered: Mar 2006


Feedback score:    (14)
Leave feedback


Total ratings: 89
Rate this member

Report this Post09-04-2007 10:05 PM Click Here to See the Profile for FieroseverywhereSend a Private Message to FieroseverywhereDirect Link to This Post
One final update for this thread. I have started a new build thread (link below).

I got the final pieces that I am going to do while the engine is out of the car done.

Fuel rail - Only five 13mm bolts hold this guy on
throttle cable bracket - two 13mm bolts
three wire temp sensor - screws into the t-stat housing, list posted above.
MAT sensor - screws into the intake manifold next to the alternator.
IAC - two or three 13mm bolts, goes kinda between the alternator and throttle body.
Oil pressure sending unit - screws into the oil filter housing, use fiero one 2.5 or 2.8.

I had to rerturn the belt becaue it was too short. Their advertised size was too small. I have ordered a new one. I believe it is for a dodge avenger and is .5" longer. Should work great.

Thats it for now. I'll leave you with some pics of the completed motor.


Join me in the the new build thread. I have lots more going on there. Hope you got that connector Darren.
https://www.fiero.nl/forum/Forum1/HTML/067149.html

EDIT: This is my 1000th post. It just goes to show you I spend way too much time on this forum.

[This message has been edited by Fieroseverywhere (edited 09-04-2007).]

IP: Logged
Darren's 87 coupe
Member
Posts: 673
From: Yukon , OK
Registered: Sep 2001


Feedback score:    (6)
Leave feedback

Rate this member

Report this Post09-06-2007 06:08 PM Click Here to See the Profile for Darren's 87 coupeSend a Private Message to Darren's 87 coupeDirect Link to This Post
Yes I did get the connector. Thanks a ton for doing that for me. I got the engine under the car for the first time this weekend. The stuff on top of the intake is just loosely fitted for now. I will probably have the engine out a few more times before I am really done. At least I can get a look at what it looks like under the hood now. Now I have to pull off of it and work on siding my house for the next month. I might get a few things wired during the weekdays, but the weekends are for the house. It sucks.

Your's looks really good. Can't wait to hear that you have turned it over.

Thanks again,
Darren
IP: Logged
Fieroseverywhere
Member
Posts: 4242
From: Gresham, Oregon USA
Registered: Mar 2006


Feedback score:    (14)
Leave feedback


Total ratings: 89
Rate this member

Report this Post09-06-2007 08:25 PM Click Here to See the Profile for FieroseverywhereSend a Private Message to FieroseverywhereDirect Link to This Post
Glad to hear you got it. Dont mention it.

Your just a little bit ahead of me know. Mine is going in in two days. I havent tightened much of the top stuff either. Just enough to plug all the holes for the trip. I cant wait to see what it looks like in there.

Got a pic of yours in the car?
IP: Logged
Previous Page | Next Page

This topic is 3 pages long:  1   2   3 


All times are ET (US)

T H I S   I S   A N   A R C H I V E D   T O P I C
  

Contact Us | Back To Main Page

Advertizing on PFF | Fiero Parts Vendors
PFF Merchandise | Fiero Gallery | Ogre's Cave
Real-Time Chat | Fiero Related Auctions on eBay


Copyright (c) 1999, C. Pennock