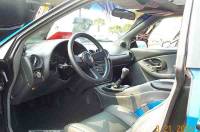
Well, I am in the middle of prepping my car for paint and I just can't bear to put fresh paint on sagging doors. Rodney to the rescue. I ordered some roller rebuild kits and hing pins and the stuff is great. Here's a walk-through:
First, It isn't quick to do. Door skins have to come off and removing them and putting them back properly takes some time. It's going to be down while I paint it so what better time? I'm only showing the bottom door hing, with the roller, because the upper hinge is just a pin and pretty straightforward. There are some tight spaces to work in getting the hinges off. Gotta be patient.
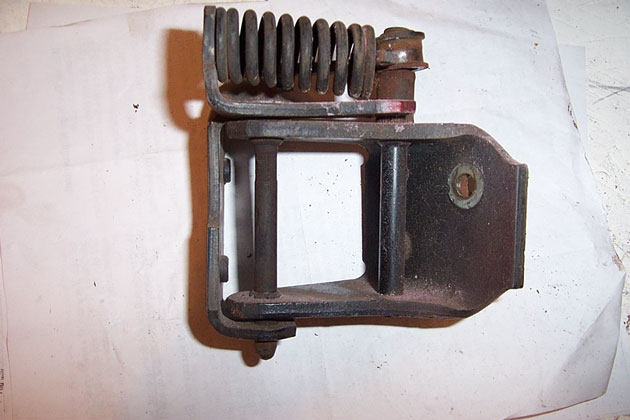
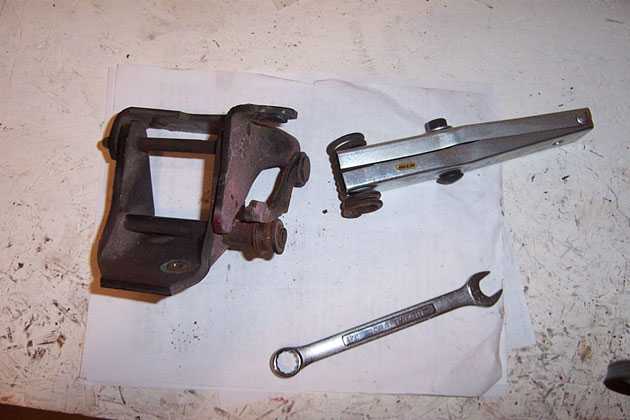
Here is the lower passenger hinge removed:
Notice how skewed the roller is on the pin. I'd say it was a little worn.
Get a GM Door hinge spring compressor. Rodney no longer carries them so I got the local NAPA to order one for me. It arrived at 7:00 AM the next morning. Spring removed:
Handy tool.
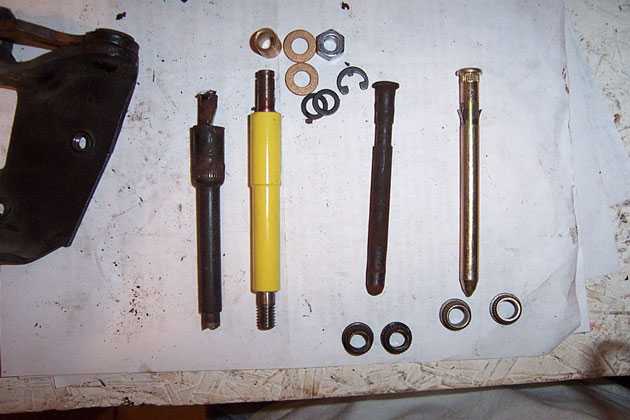
You have to grind the ends off the roller pin, remove the roller(which is to be reused), and then punch it out. I used the old hinge pin as a punch to remove the roller pin and hinge pin bushings. New parts and old:
Notice how notched the pin is where the roller was. That plastic bushing sucked. Press the new metal bushing into the roller with washers on each side and secure it with the c-clip. Press in the new hinge pin bushings and tap the pin in. I put a little grease on everything for good measure. You should paint the roller pin as it is mild steel and will rust. The only decent paint I had was yellow. Oh well, car's gonna be yellow anyway. The completed door hinge:
Installation is pretty much the opposite of removal. Use a jack, jackstands or something to support the doors. Makes like a lot eaiser and safer. I completeley removed and reinstalled ONE HINGE AT A TIME. This helped with door re-alignment and door support during installation.
I highly recomment this kit from Rodney Dickman. My doors are so smoooooth.
Thanks! I'll be doing brakes and suspension soon, and I'll try to do something similar with those.
The door hinge replacement also kind of turns out to be a good time to clean and lubricate the moving parts in the window and locking mechanisms. My doors are so much better now. It took a little time but, man, it was worth it.
IP: Logged
11:29 PM
May 22nd, 2003
jstricker Member
Posts: 12956 From: Russell, KS USA Registered: Apr 2002
Nice pics and write up! Thanks. Rebuilding the hinge looks like the easy part. I'm guessing removing and re-installing the hinge is the hardest part. Could you go into more detail on the hinge R&R procedure?
Yeah the rebuilding of the hinge was the easy part......once I got the spring tool. You can try it without the tool but you will probably get frustrated end up buying one since they only cost $23.00. WELL worth the money.
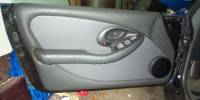
A lot of the door panel/skin removal is covered in Haynes but I'll tell you what I ran into. First things first. Remove the interior door panel. Start by removing the armrest and door handle covers. Refer to Chiltons or Haynes for the details. Pop off the inner door panel. Now the fun part. Remove the outer door skin. Those dreaded plastic-headed torx screws! I destroyed every one of them! I pushed a medium flat-head screwdriver in there and managed to unscrew them with that. You also have to remove the door moulding to remove 2 7mm screws underneath. Unclip the lock and door handle from their rods and don't forget to pop the rivets out of the bottom of the diir skin. I just used a chisel to shear off the heads. Gently guide the door panel off.
The bottom hinges have 4 bolts, 3-13mm and 1-15mm. The 15mm one has the head behind the carpet on the kickpanel close to the door opening. That means you have to remove the bottom inner trim moulding. Not too bad but the e-brake gets in the way on the driver side. Be careful when removing this. You have to punch through some soft gooey weatherproofing stuff to get at that 15mm bolt. I remove that bolt first then slide a jackstand under my door. Then I went in from the outside of the door(skinless) and removed those 2 bolts. The bottom one wants to hit on the window guides so jack up on the door as you back out the bolt to create some room. Last, I remove the remaining bolt whose head is inside the hinge. A small headed wratchet works best here as there is very limited room. I did a lot of wiggling and moving of the door at this poit to make room for my wrench to move. It was a tight fit. After that bolt os removed, you just pull the hige out and take it to the bench!
I did neglect to mention that I am buying new fasteners for the door skin. I like to replace all plastic fasteners when possible.
I hope that helps. I suppose if you read all that, you REALLY want to rebuild your hinges. Good Luck.
IP: Logged
11:10 AM
mrfixit58 Member
Posts: 3330 From: Seffner, Fl, USA Registered: Jul 99
The only thing I would add is a neopriem(SP?)washer above the new bronze busings. It helps the door slid easier and takes any extra play out of the hinge. I think the Ogre (see Ogre's Cave at the bottom) did a write-up about it.
The only thing I would add is a neopriem(SP?)washer above the new bronze busings. It helps the door slid easier and takes any extra play out of the hinge.
Do you mean on the regular hinge-pin? That would be a good idea. I didn't get any side to side play but it might eliminate any up and down play.
Thanks for the comments! I have taken so much from this forum that I guess it's only fair to give some back.
Edited for misunderstanding.
[This message has been edited by 87GTSleeper (edited 05-22-2003).]
IP: Logged
03:39 PM
PFF
System Bot
foxgapfiero Member
Posts: 2445 From: Bangor PA USA Registered: Sep 2001
One thing about the roller kit. Don't get crazy tightening the nut on the bottom of the roller kit. This is only mild steel and if you get too nuts with it the threads will break off along with the nut(like I did). The nice thing about it is if you do break it, just have the pin welded to the hinge. If you ever have to replace it again, and I don't think you ever will, just grind off the weld.
IP: Logged
06:21 PM
May 23rd, 2003
David DeVoe Member
Posts: 1358 From: Grand Blanc, MI US Registered: Jul 2001
Just for reference: My latest catalog from http://www.autobodytoolmart.com has the door spring tool in it for $14. Those guys are easy to deal with, and have great prices on their autobody stuff as well.
JazzMan
IP: Logged
09:36 PM
Aug 31st, 2003
SLagrec1 Member
Posts: 241 From: Troy, Michigan Registered: Aug 2003
The passenger side wasn't too bad but the driver door bushing was degraded to the point where the upper hinge pin was elongating the hole in the hinge itself.
It seems others have been able to complete this repair without removing the hinges from the doors. However, we got stuck. Couldn't pound the new hinge pins back in all the way on the passenger side. Just not enough room to swing the hammer in such a tight space.
Taking the hinge off the door made all the difference. In comparison, repairing the driver side took far less time.
I haven't had to do a roller. That may force you to remove the hinge.
The pins and bushings can be done without the hinge getting removed. It makes the job go much faster. In most cases the door won't need any adjustment.
If you do the extra thrust washer as shown in my cave, the bottom hinge may need a tiny tweek. It depends how thick of a washer you use. The Nylon oil plug washers I use will settle slightly and usually aren't a problem.
IP: Logged
12:38 PM
jelly2m8 Member
Posts: 6107 From: Nova Scotia, Canada Registered: Jul 2001


 You should paint the roller pin as it is mild steel and will rust. The only decent paint I had was yellow. Oh well, car's gonna be yellow anyway. The completed door hinge:
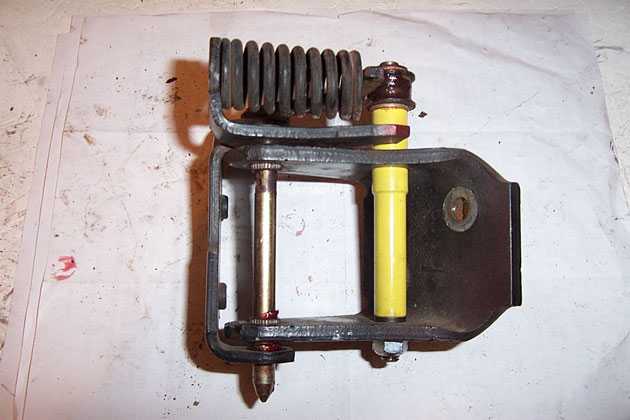


 I pushed a medium flat-head screwdriver in there and managed to unscrew them with that. You also have to remove the door moulding to remove 2 7mm screws underneath. Unclip the lock and door handle from their rods and don't forget to pop the rivets out of the bottom of the diir skin. I just used a chisel to shear off the heads. Gently guide the door panel off.