
 
     |
| LS4 / F40 swap - fieroguru (Page 150/197) |

|
ericjon262
|
JAN 15, 08:42 PM
|
|
I posted a link to your mount in that post (on the private sloppy page), he didn't take too kindly too it. personally, I like yours much better, but as he pointed out, it only works with some transmissions.------------------
"I am not what you so glibly call to be a civilized man. I have broken with society for reasons which I alone am able to appreciate. I am therefore not subject to it's stupid laws, and I ask you to never allude to them in my presence again."
"The day I tried to live, I stole a thousand beggars' change and gave it to the rich."
http://www.fiero.nl/forum/Forum2/HTML/119122.html
|
|
|
|
Will
|
JAN 16, 02:22 PM
|
|
https://www.lsxmag.com/news...a-unique-ls-oil-pan/
To be fair, there are uses for the pan beyond just transverse swaps. There are some swaps, like Datsun 240/260/280Zs that have difficulty with clearance for both headers and starter on the right side of the engine. This oil pan would make those installations easier.
The FWD bellhousing also fits better into some transmission tunnels, although there's no reason the Moroso pan couldn't be used with any other LS.
E30's have the clearance problem as well, but the crossmember location requires a front sump pan.
Having the weld beads intrude on the edges of the starter bolt holes is a pretty terrible design, but I didn't spec it. I'm surprised Moroso built that, though. I thought they knew better.
And WTF is up with that drain plug? That's a disaster poised and ready to pounce.[This message has been edited by Will (edited 01-17-2020).]
|
|
|
|
fieroguru
|
FEB 01, 08:33 PM
|
|
Slowly been working on the LS4...
Pistons & Rings - pulled everything apart, cleaned the pistons and rings, then checked the top ring gaps. All were just above 0.022", which should avoid them binding under boost. Then put them all back together so they can be reinstalled in the engine.
Block - did a light hone to the cylinders to remove any glazing. The bare block is light enough to carry, so took it to the car wash for some deep cleaning. Once back, I oiled up the cylinders.
Crankshaft - decided to switch to 24X, so I have been working on a locating fixture to properly index the 24X reluctor. I hope to have this fixture made tomorrow and swap the reluctor wheels.
Heads - fully disassembled. The intake runners were a mess with carbon/oil build up. Lots of work and soaking to get them cleaned, but now they are clean. I am going to do some bowl work to them before I start putting them back together.
Intake - use my fine tooth file to start knocking down all the text that was case into the runners on the dorman intake. Firing order, map location, made in the usa... I don't need any of that and just want the intake runners to be smooth.
Harness - picked up another E40/T56 harness, 200 ecm pins, and lots of other harness/connector bits.
I would like to start assembling the short block tomorrow afternoon...
|
|
|
|
Trinten
|
FEB 01, 11:38 PM
|
|
Man... I am envious that you have the equipment, and skill, to machine, check, and assemble your own engine(s).
I still need to 'outsource' that stuff! lol
|
|
|
|
85-308
|
FEB 02, 08:29 AM
|
|
another great thread from the Guru. Thanks for sharing.
Just out of curiosity, what do you use for engine assembly lube? I've seen everything from thick paste to thin oil recommended over time and of course, all it takes is rotating the crank twice to wipe the cylinder walls clean and very likely squeeze most lube off of rotating bearing oil clearances, etc.
Did you or do you need to degree-in the cam (unless I missed it) etc?Check piston crown-to-deck height or similar?
It's just one of the things that 'bugs' me when doing an engine reassembly, and not having a dry sump pump or accumulator that I can pre-oil with (never used either).
Yes, the engines seem to survive but I almost wonder if the whole 'engine ass'y lube' marketing strategy is made up....
Thoughts?
Again, thx for sharing!
|
|
|
|
fieroguru
|
FEB 02, 02:47 PM
|
|
| quote | Originally posted by Trinten:
Man... I am envious that you have the equipment, and skill, to machine, check, and assemble your own engine(s).
I still need to 'outsource' that stuff! lol
|
|
Engine building is more about cleaning, checking and keeping clean than anything. Especially when the parts are still in good shape. If I needed to have the crankshaft turned, I would have farmed that out. I love my shop equipment, but they can'g hold the precision for internal engine machine work. The hone was done with a dingle ball hole and a hand held drill, which is pretty common practice for hobbiest.
| quote | Originally posted by 85-308:
another great thread from the Guru. Thanks for sharing.
Just out of curiosity, what do you use for engine assembly lube? I've seen everything from thick paste to thin oil recommended over time and of course, all it takes is rotating the crank twice to wipe the cylinder walls clean and very likely squeeze most lube off of rotating bearing oil clearances, etc.
Did you or do you need to degree-in the cam (unless I missed it) etc?Check piston crown-to-deck height or similar?
It's just one of the things that 'bugs' me when doing an engine reassembly, and not having a dry sump pump or accumulator that I can pre-oil with (never used either).
Yes, the engines seem to survive but I almost wonder if the whole 'engine ass'y lube' marketing strategy is made up....
Thoughts?
Again, thx for sharing! |
|
All internal engine components that have moving parts (Pistons/rings/wrist pins, rockers, lifters, timing chain, etc) are soaked in 5W30 engine oil to make sure they are fully saturated with oil and won't have any dry surfaces. Cam and crank bearings I use 90 wt synthetic on them. Once I get close to starting the engine, I will prime it with 5w30 dino oil... I still need to build the pressure bleeder for that!
I will be degreeing in the camshaft just to verify it was made properly. The camshaft I removed was off ALOT when I degreed it in. Ended up moving the dowel pin location on the timing gear to get it where is needed to be.
|
|
|
|
fieroguru
|
FEB 02, 03:14 PM
|
|
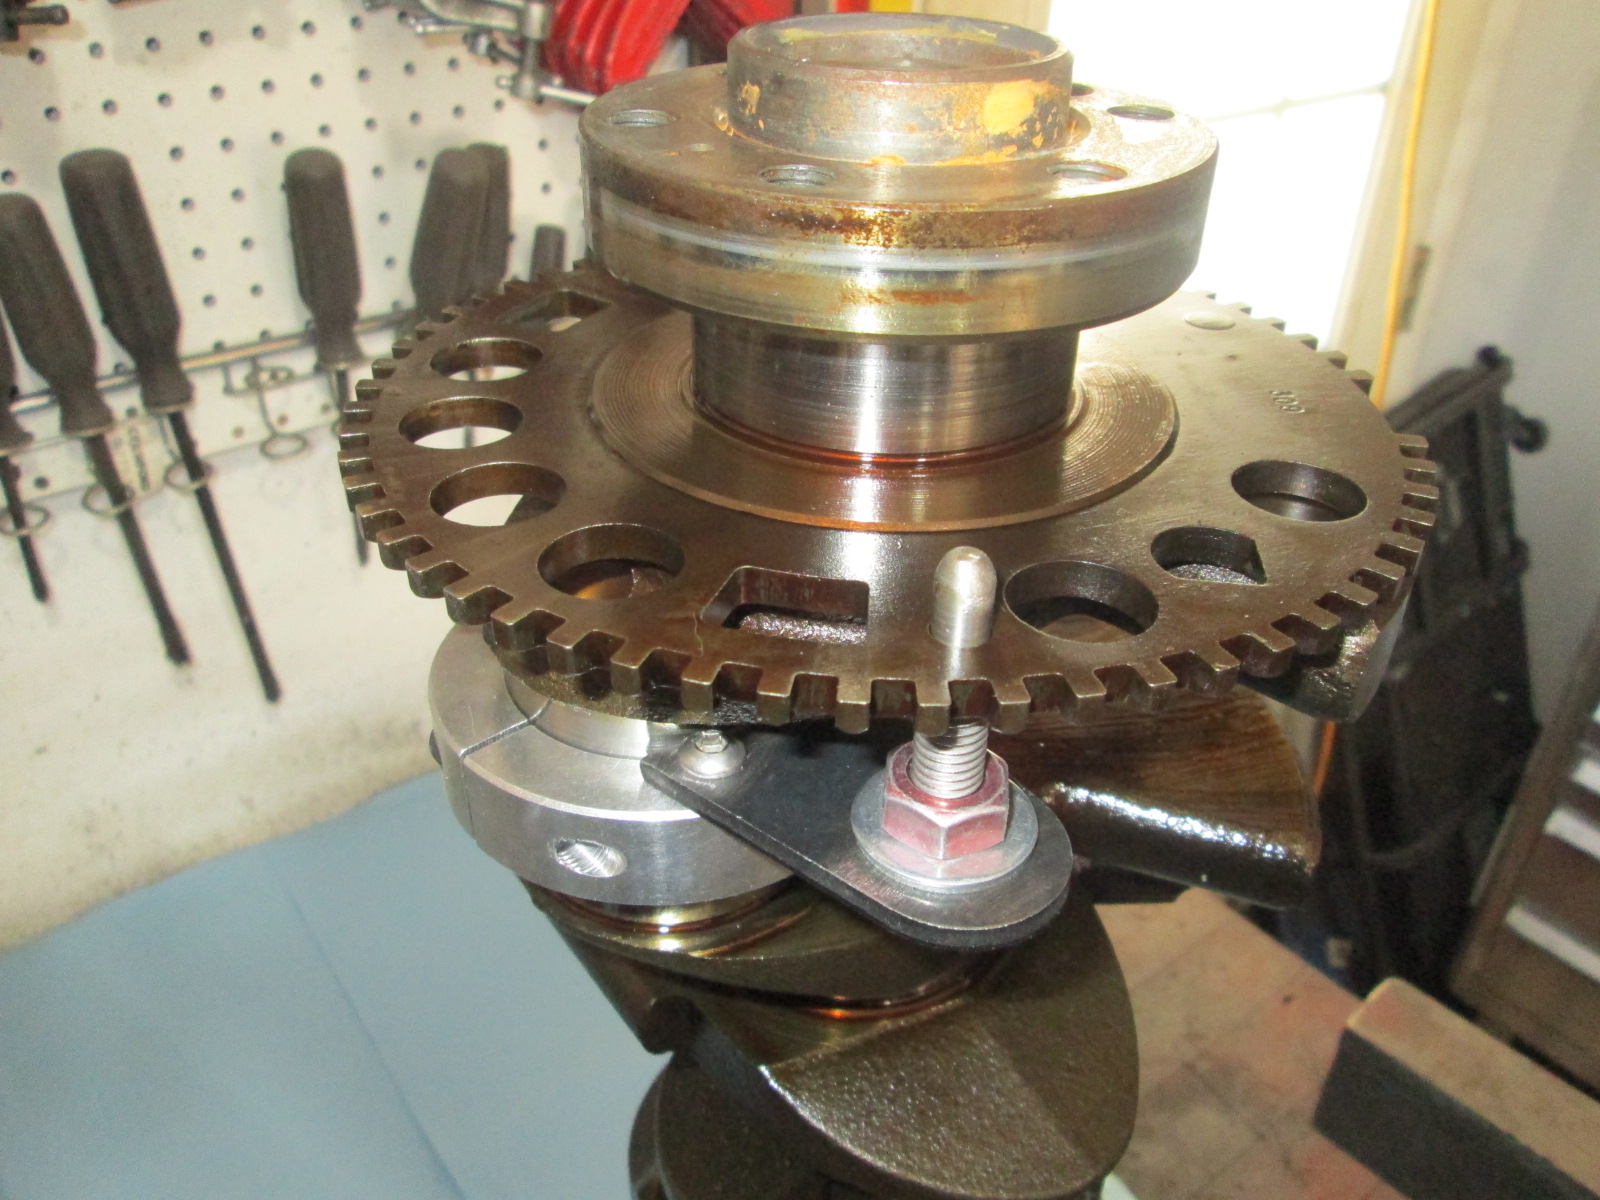
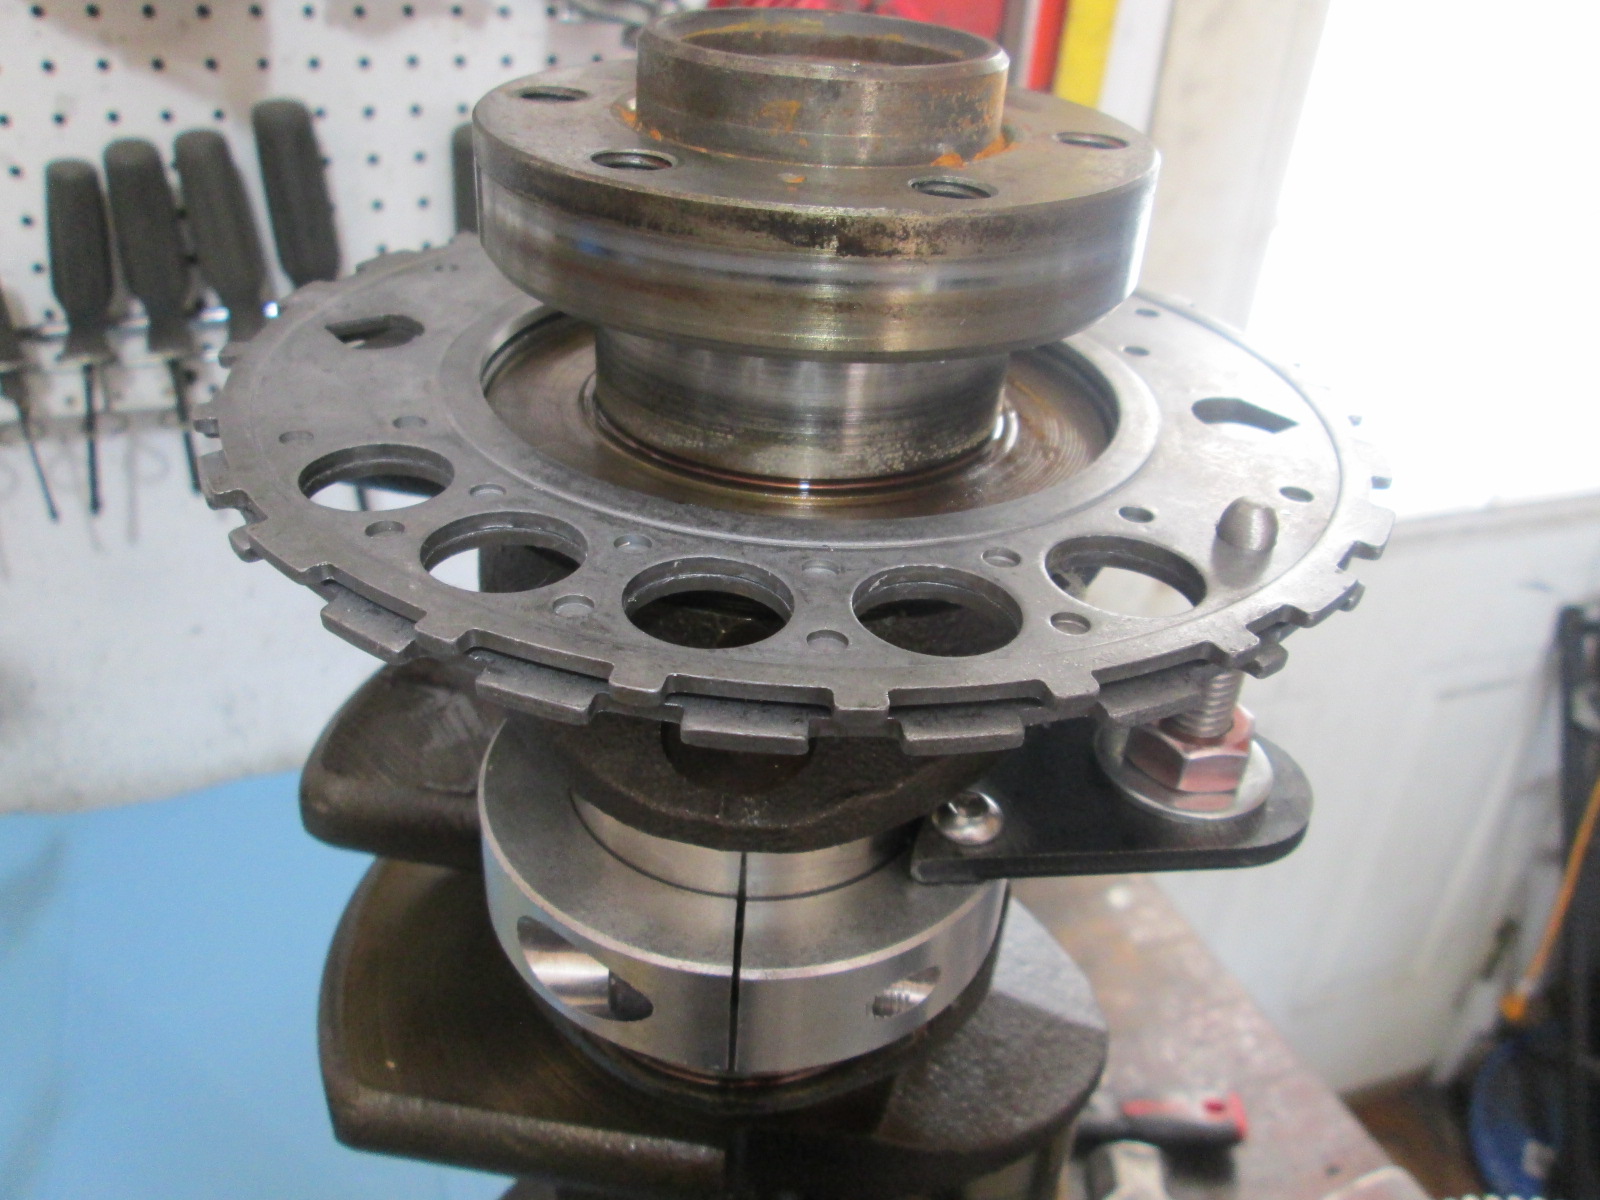
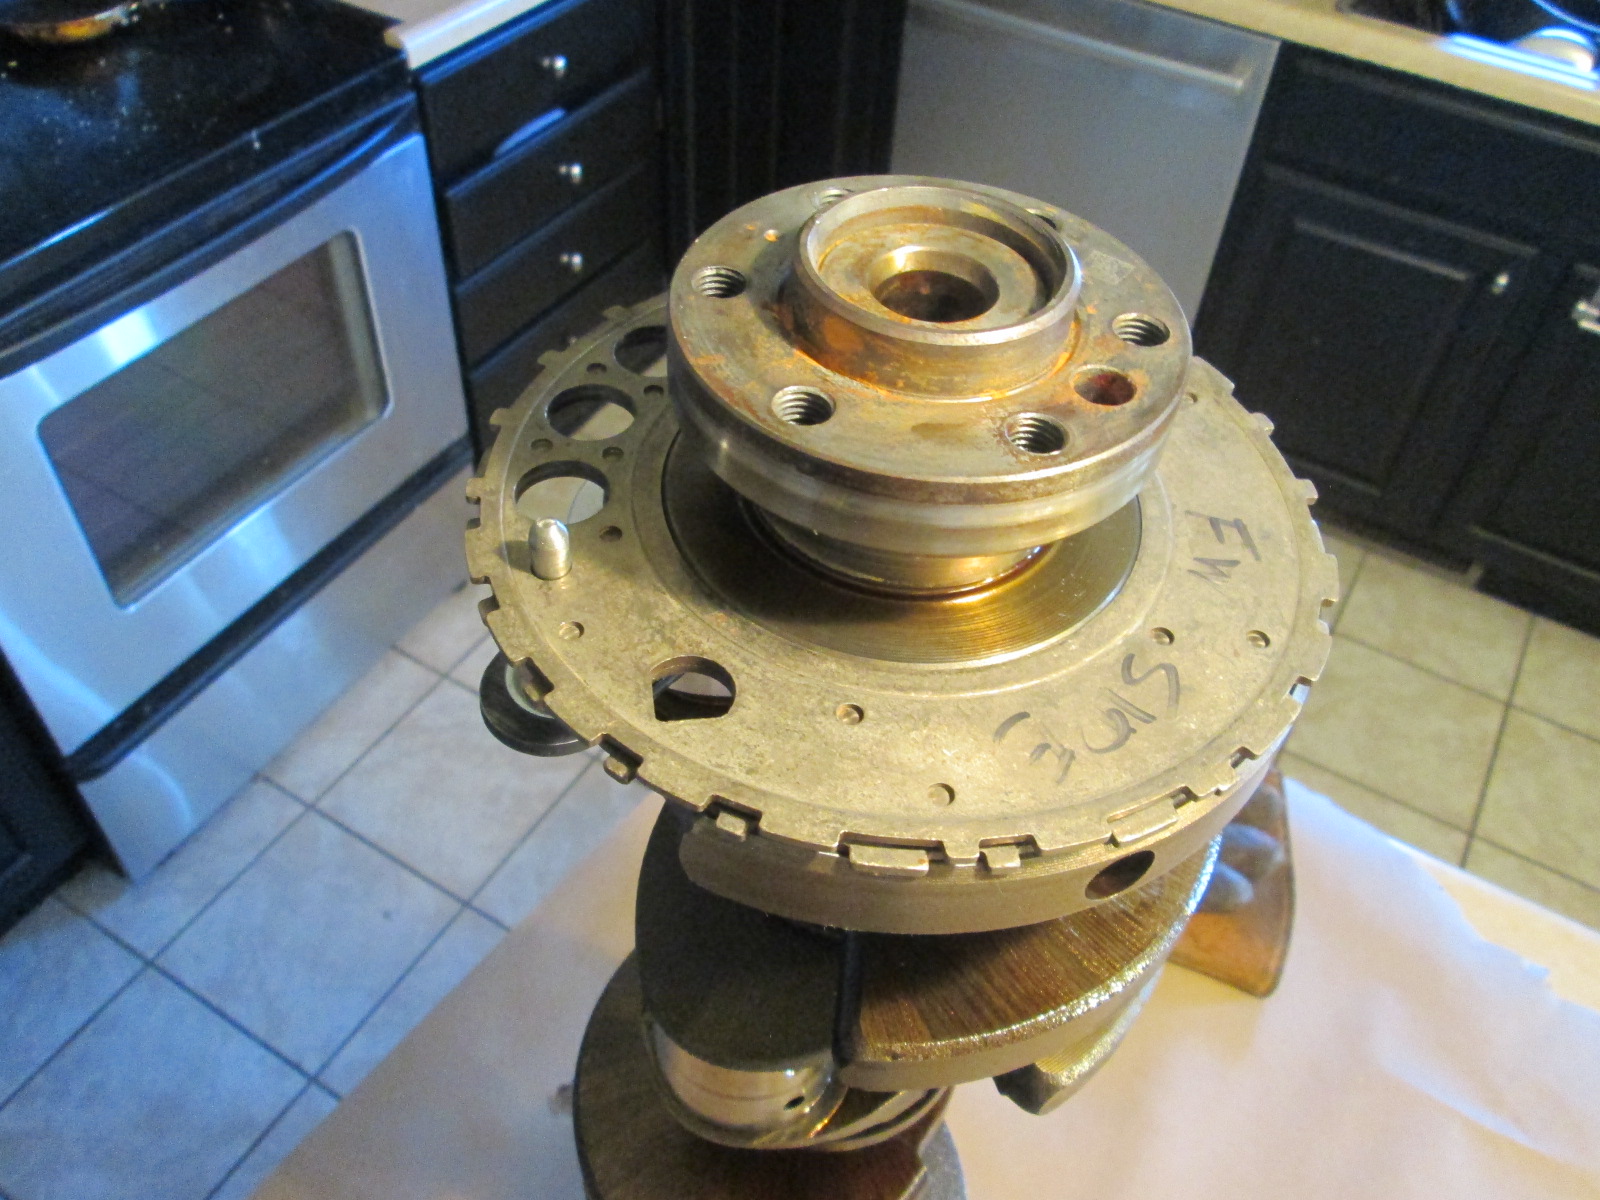
Reluctor wheel swap...
The reluctor wheels are press fitted to the end of the crankshaft, so a little heating and tapping will remove the old one. Installing the new one means heating it up in the oven and setting it in place. The challenging part is that its orientation to the crankshaft is critical. The tool below is the only known tool to facilitate the reinstallation. Besides it being over $200, I really don't like how it does everything from the end of the crank and uses the dowel pin location for alignment. Think about how I would need this to work... pull the reluctor out of the oven, set it into place, before it cools enough to keep it from spinning, I have to position this tool to the dowel location in the crank as well as the hole in the reluctor...

So I made my own tool using an aluminum shaft collar, bracket tab, and a bolt. I turned the ID of the shaft collar to just over 2.10", drilled & tapped a couple of holes. Shaped and drilled a roll cage tab bracket, and turned down a bolt so it has minimal clearace to the hole in the reluctor wheel... I have about $35 and an hour of my time into this tool. The placement of the dowel pin was determined using the 58X wheel that was still on my crankshaft from an 85K mile engine.
Install the tool to lock down the dowel location using the existing 58x reluctor:
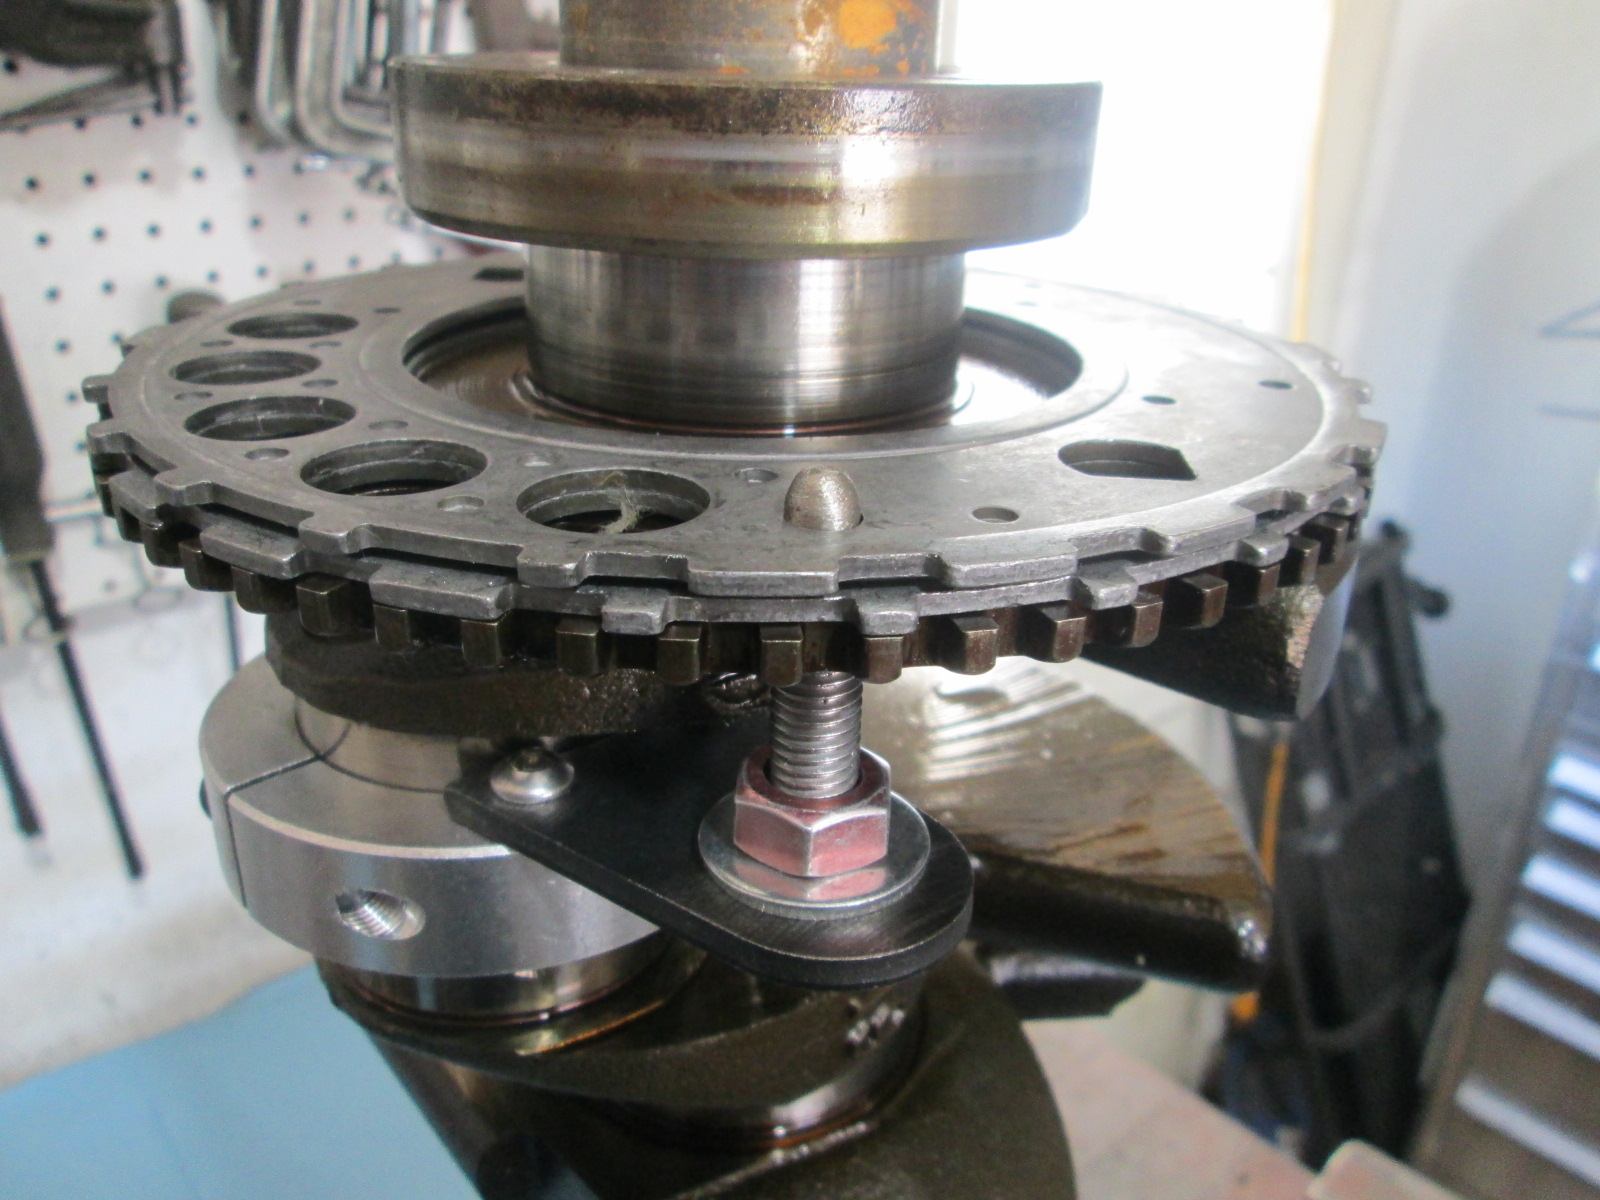
Set new 24X one in place to make sure the dowels and arrows line up, then mark the flywheel side of the wheel (so you don't put it on backwards!):
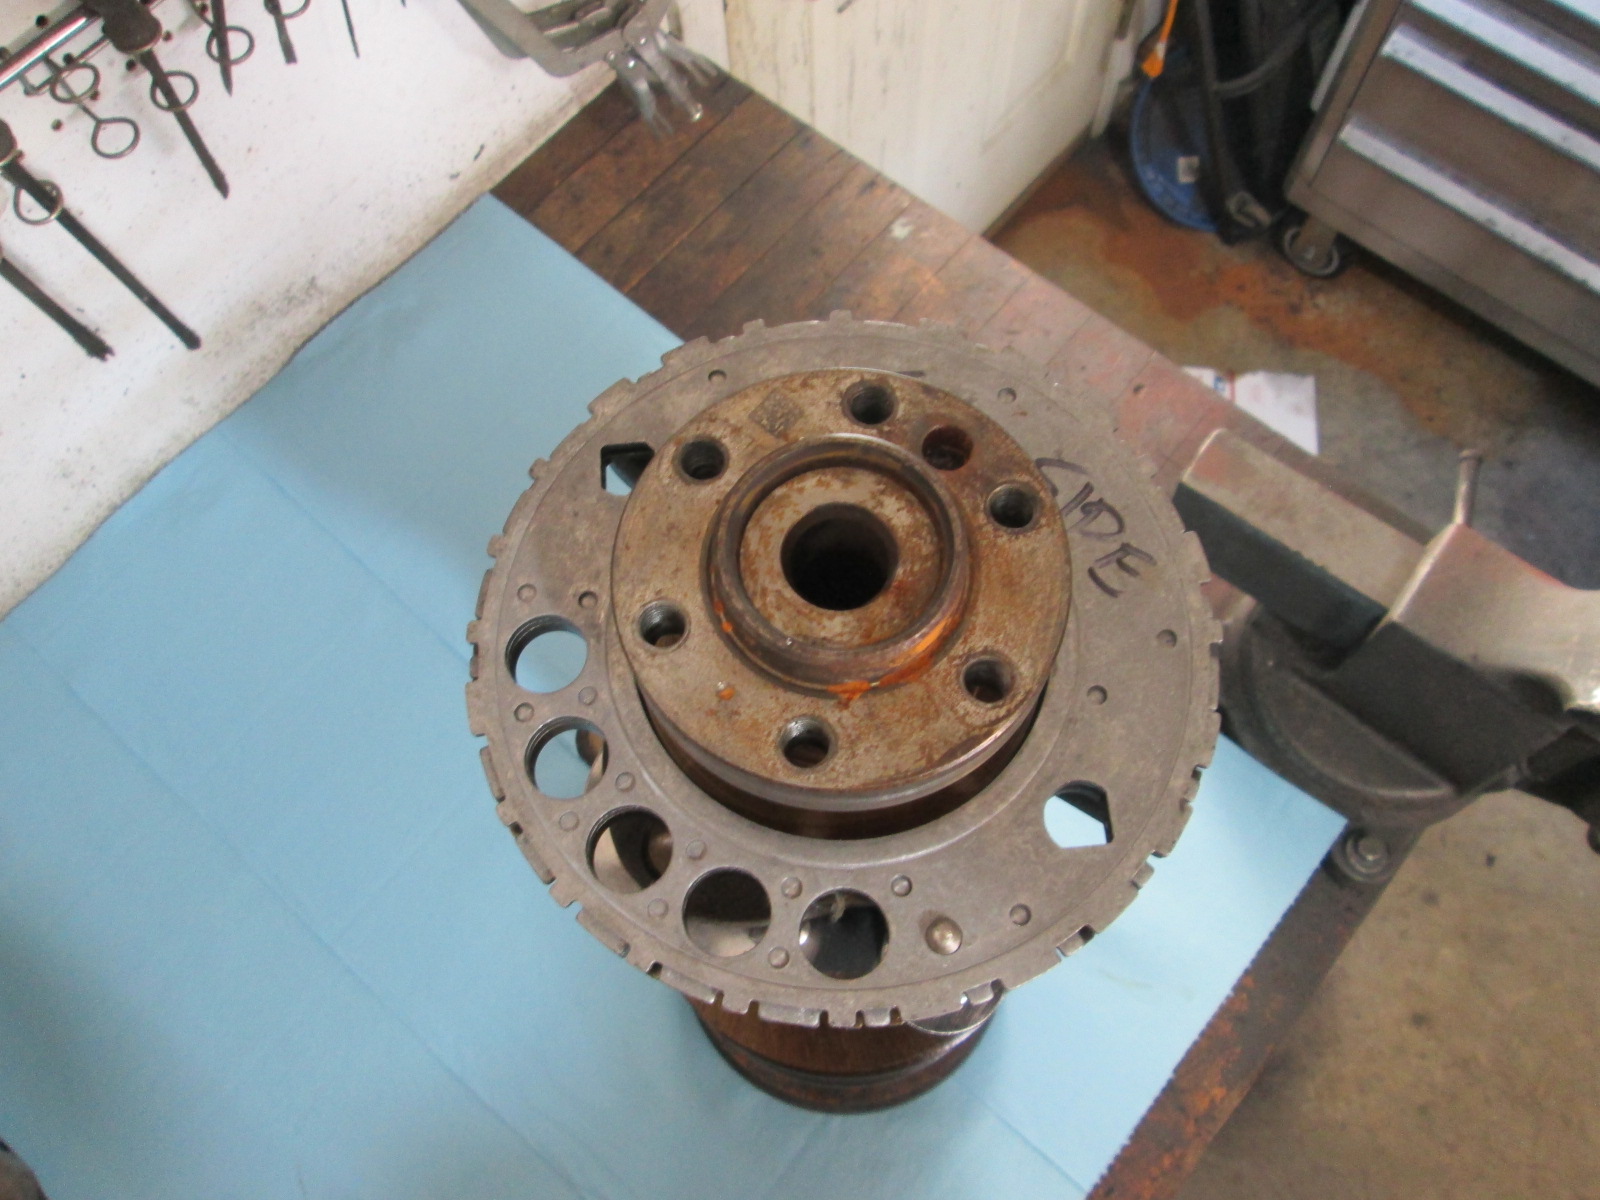
Heat the old reluctor with some map gas and gently tap it off the end:
Here you can see the new reluctor will not fit the crankshaft due to the press fit:
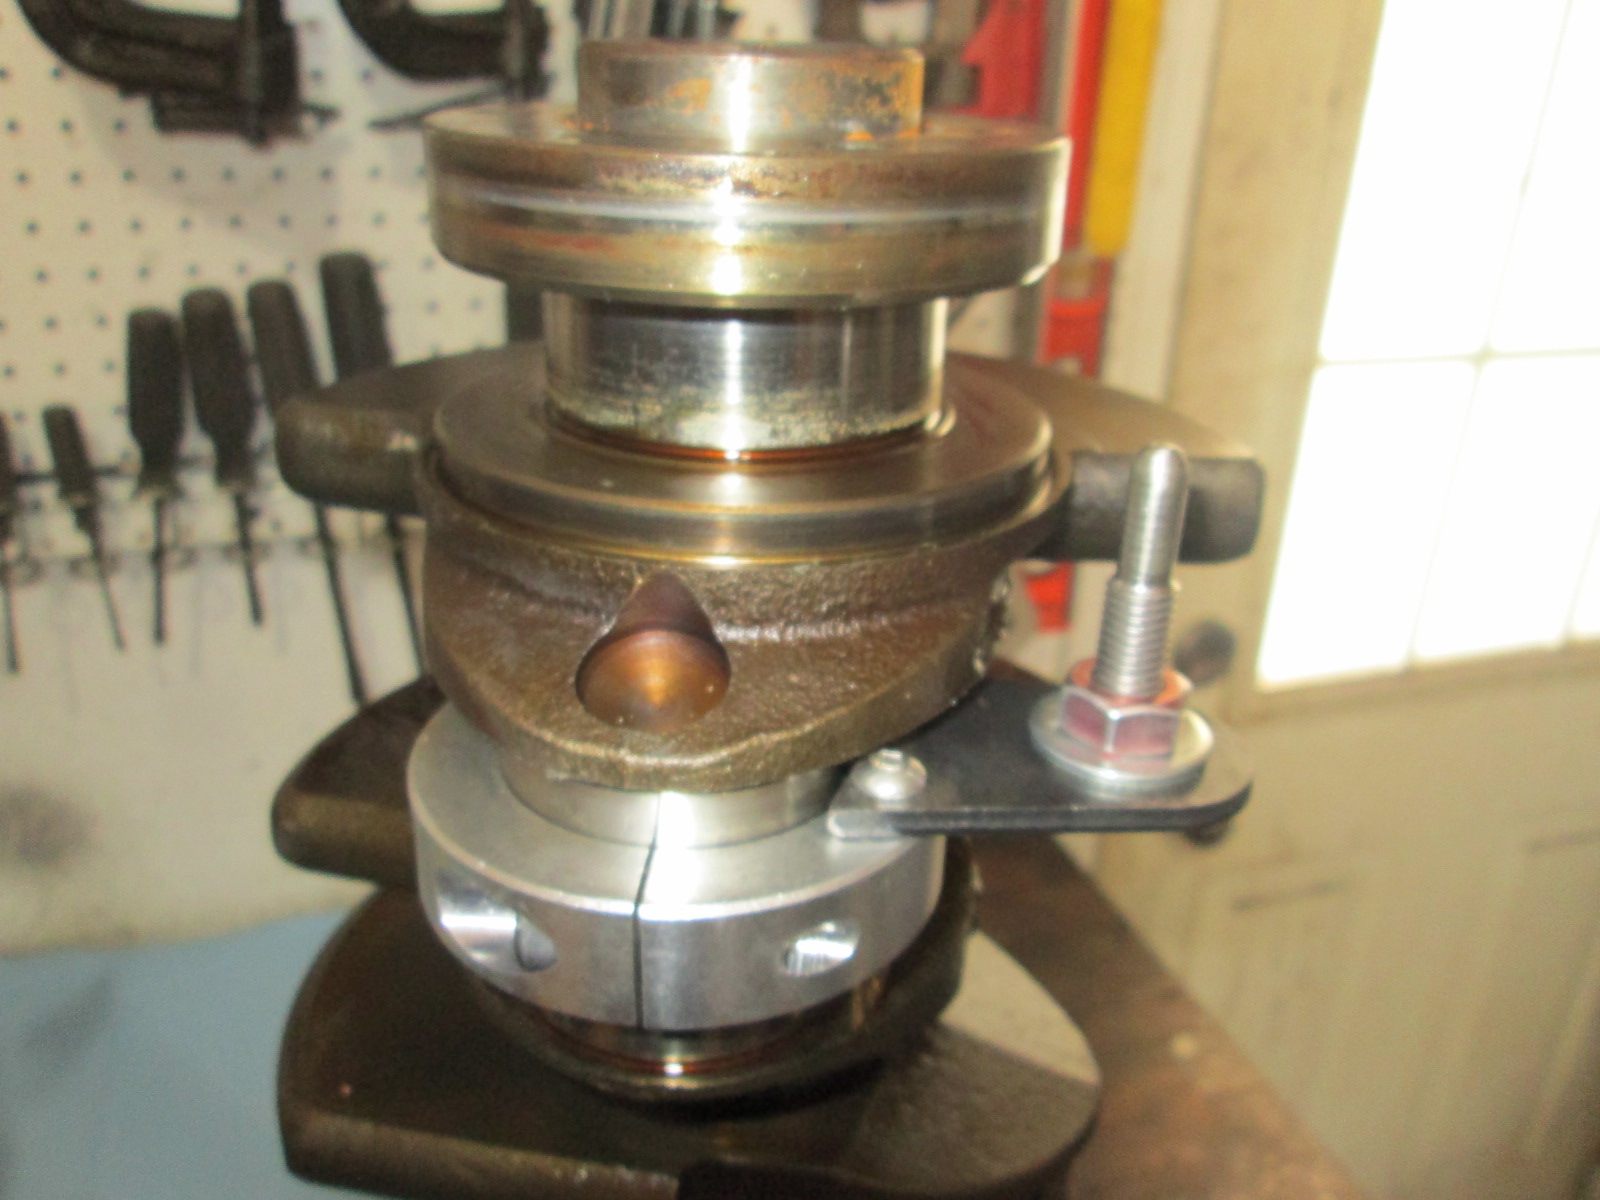
Set the new 24X reluctor with the flywheel side face up in the oven (so you don't need to flip it while hot), set the over to 500 degree broil and wait 20+ minutes. It was lunch time, so I cooked some pizza at 450, then swapped the pizza and reluctor wheel. Left the oven @ 450 while eating pizza, then turned it up to 500 broil while bring the crankshaft to the kitched and setting everything up for the hot placement.
Ready for the hot reluctor install:
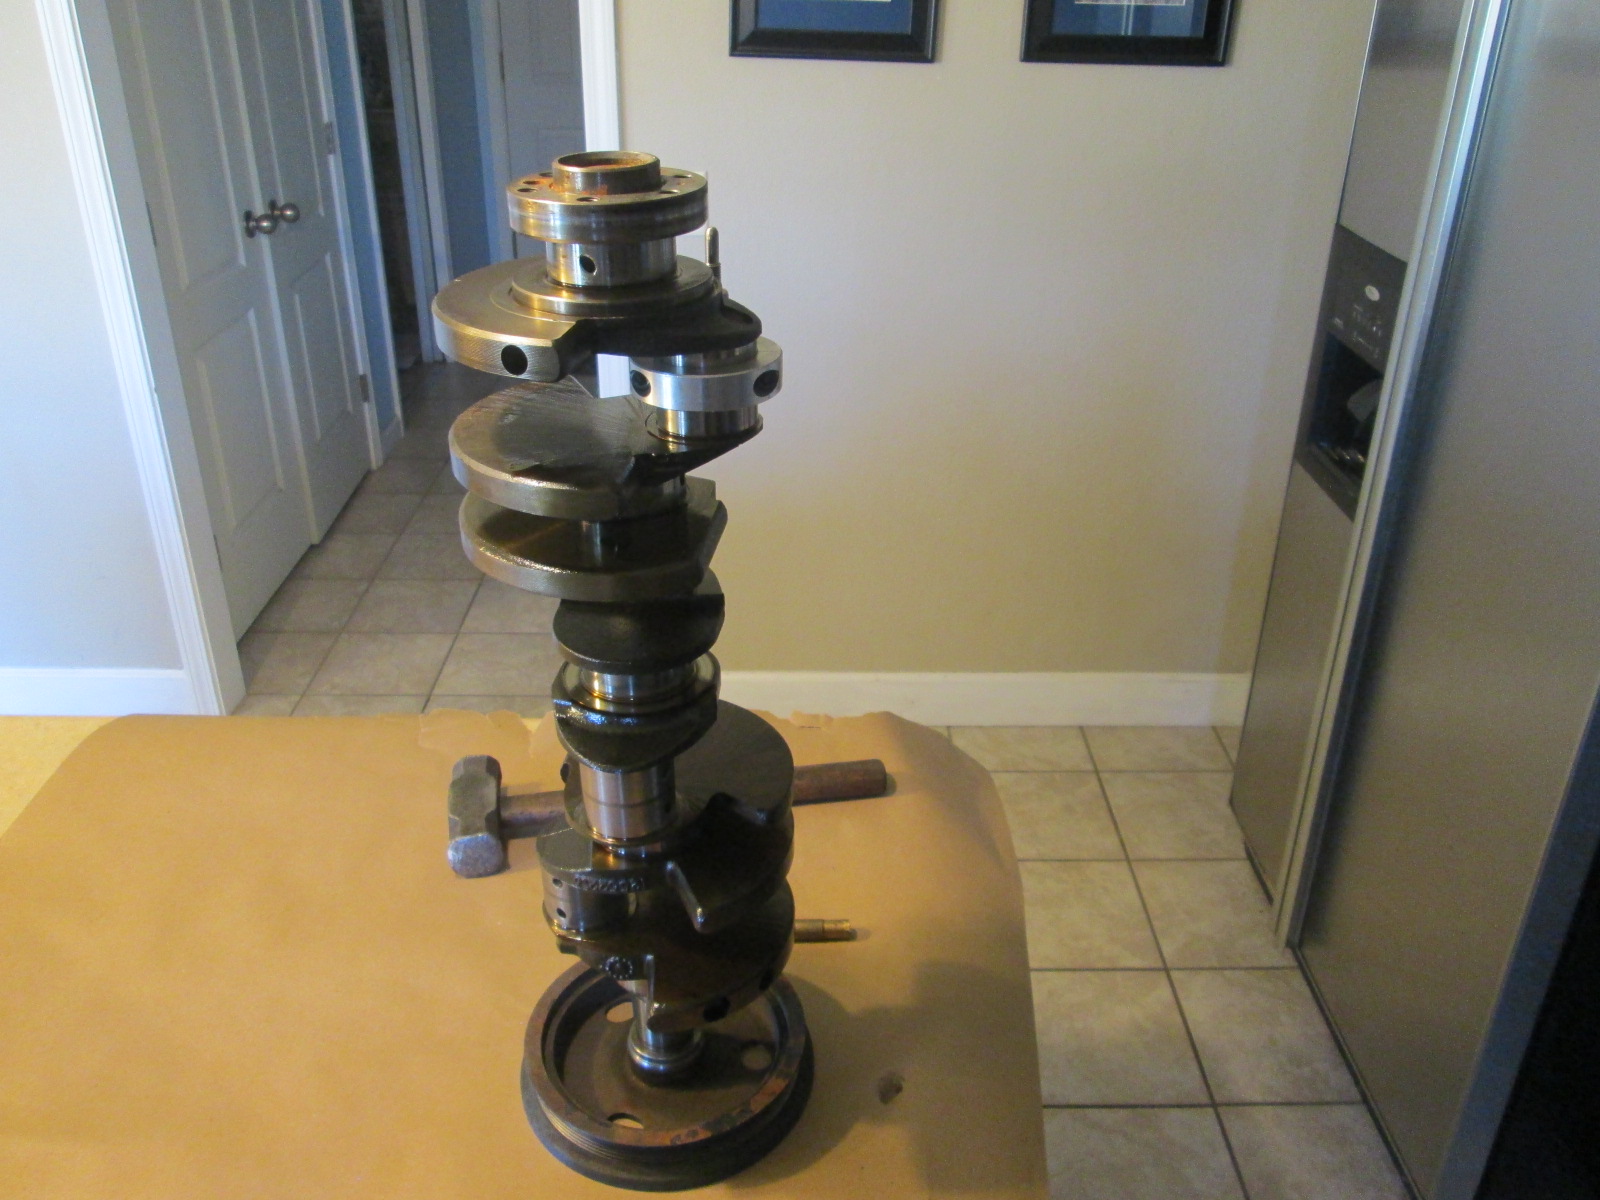
I checked the temp of the wheel with a hand held IR temp tool and it was fluctuating between 510 and 525 degrees F. Using my welding gloves, pulled the wheel, lined up the reluctor hole with the pin from the tool and set the wheel down on the crank. It was plenty hot enough to set down on the crank fully w/o using any tools (literally just dropped into place). Took some pictures while letting it cool.
|
|
|
|
ericjon262
|
FEB 02, 03:19 PM
|
|
|
I wish I was there to take pictures of that with my FLIR, I bet they would turn out pretty cool.
|
|
|
|
Will
|
FEB 04, 09:40 AM
|
|
| quote | Originally posted by fieroguru:
Set the new 24X reluctor with the flywheel side face up in the oven (so you don't need to flip it while hot), set the over to 500 degree broil and wait 20+ minutes. It was lunch time, so I cooked some pizza at 450, then swapped the pizza and reluctor wheel. Left the oven @ 450 while eating pizza, then turned it up to 500 broil while bring the crankshaft to the kitched and setting everything up for the hot placement.
Ready for the hot reluctor install:
|
|
The most important step is wife prep, which must be undertaken prior to moving any engine parts into the kitchen.
|
|
|
|
Trinten
|
FEB 04, 02:47 PM
|
|
Will, great suggestion for those that have already gotten that modification in place. I've opted to stick with my factory-original SOH (single-overhead-household). 
|
|
|
|